Introduction
LEGO picture frame is a fun way to display your photos creatively. They combine the versatility of LEGO bricks with a personalized touch for your home decor. Building one can be an enjoyable project for all ages.
Why Choose LEGO for Your Picture Frame?
LEGO is perfect for crafting photo frames due to its flexibility. With LEGO, you can design frames in various shapes, sizes, and colors. The interlocking bricks make the structure sturdy and customizable. If you want a frame that feels vibrant and unique, LEGO is an excellent choice.
Additionally, LEGO encourages creativity and innovation. You can experiment with different designs and themes. This makes each frame one-of-a-kind and reflects your personality. LEGO frames are also easy to assemble, modify, and even transport.
Popular Uses for LEGO Picture Frames
LEGO picture frames have multiple uses beyond just displaying photos. You can use them for:
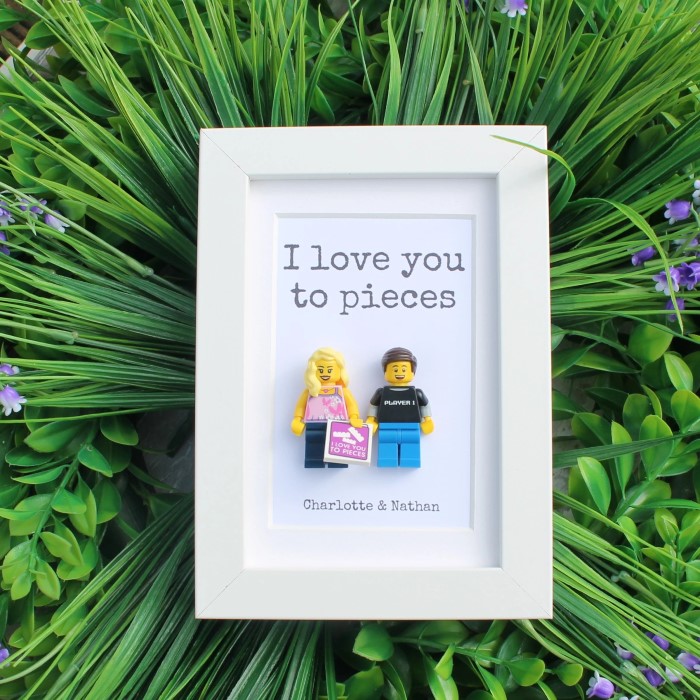
- Gift Ideas: Create customized picture frames for friends and family.
- Event Decorations: Their vibrant designs are perfect for parties, weddings, or themed celebrations.
- Workspace Decorations: Display motivational quotes or fun photos on your desk.
LEGO frames also add a playful touch to children’s rooms. Kids can even help build their own personalized frame. They work great in classrooms or creative spaces. The possibilities are endless with LEGO picture frames.
Materials Needed for Building a LEGO Picture Frame
Creating a LEGO picture frame starts with gathering the right materials. The right pieces make the process smooth and enjoyable. Below, we’ll cover the essential LEGO pieces and additional components to consider for enhancing your design.
Essential LEGO Pieces
To build your LEGO picture frame, you’ll need these basic pieces:
- Bricks: Get a variety of standard LEGO bricks. They form the base and sides of your frame. Use different colors to match your theme.
- Plates: Flat plates will serve as backing or support for your frame.
- Tiles: Smooth tiles improve the appearance of the frame and give it a clean finish.
- Technic Pieces: For more creative designs, include Technic bricks or connectors.
Ensure you have enough pieces for the size and complexity of your frame. Planning your design helps determine the quantity required.
Additional Components to Enhance Your Design
To make your LEGO picture frame unique, consider adding these components:
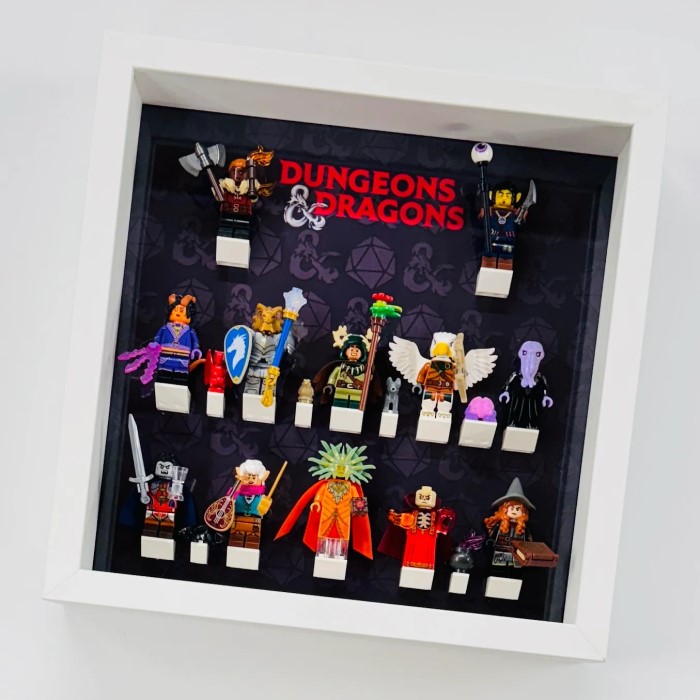
- Mini-figures: Add personality with LEGO mini-figures that suit your theme.
- Slopes and Arches: Use these to create curves or decorative elements.
- Letter Tiles and Numbers: Personalize the frame with names, dates, or messages.
- Light Bricks: Brighten your frame with LEGO light-up bricks for a stunning effect.
- Stand or Hangers: Add a sturdy base or wall-mounting elements to display your frame securely.
With these materials, you have everything needed to bring your LEGO picture frame to life. Prepare your pieces and start creating your one-of-a-kind design.
Step-by-Step Guide
Building a LEGO picture frame is an exciting and creative endeavor. Follow these steps to create your own frame, from preparing your workspace to customizing and decorating your masterpiece.
Preparing Your Workspace
- Choose a Clean, Flat Surface: Select a workspace that is tidy and spacious.
- Organize Your LEGO Pieces: Sort LEGO bricks, plates, and tiles by color and size.
- Gather Additional Tools: Keep scissors, tweezers, or other craft tools handy if needed.
- Sketch Your Design: Draw or plan your frame’s layout. Decide colors, size, and decorative details.
- Ensure Ample Lighting: Work in a well-lit area for better visibility.
Preparation is key for a smooth building process. A well-organized workspace saves time and enhances creativity.
Assembling the Frame Structure
- Build the Base: Start with a sturdy layer of LEGO bricks or plates.
- Construct the Sides: Use bricks to create the outer frame. Ensure each side connects seamlessly.
- Add Backing Support: Attach plates to the back for structure and stability.
- Leave an Opening: Make room to insert your photo or artwork.
- Test for Strength: Press on the joints to check that the frame holds firmly together.
Focus on secure connections to ensure the frame is durable and stands upright.
Customizing and Decorating
- Add Decorative Pieces: Use slopes, arcs, mini-figures, or themed LEGO designs.
- Personalize with Letter Tiles: Include names, dates, or messages for a special touch.
- Brighten with Light Bricks: Add light-up pieces for a lively effect.
- Include Functional Features: Attach a hinge for opening or a stand for display.
- Experiment with Colors: Combine vibrant and neutral tones to suit your theme.
Customization turns your LEGO picture frame into a unique and expressive creation, showcasing your personality and style.
Creative Design Ideas
Your creativity can shine with unique design ideas for LEGO picture frames. Let’s explore some innovative themes you can incorporate into your projects.
Themed LEGO Frames for Special Occasions
Custom themes make your LEGO picture frames stand out for special events. Here are some ideas:
- Birthday Frames: Use vibrant bricks in the birthday person’s favorite colors. Add LEGO balloon pieces for fun.
- Wedding or Anniversary Frames: Incorporate white bricks, mini-figures in wedding attire, and heart-shaped accents.
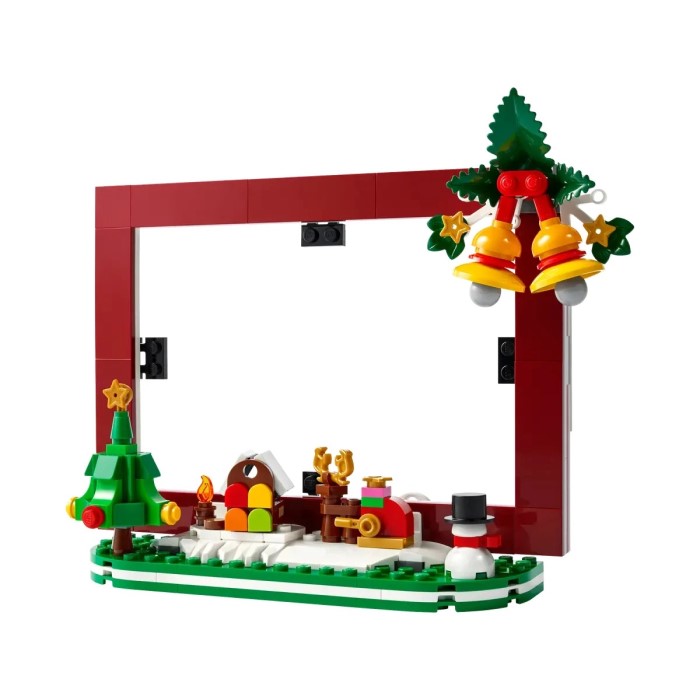
- Holiday-Themed Frames: Use reds and greens for Christmas, or pumpkins and spooky elements for Halloween.
- Graduation Frames: Add a mini-figure with a graduation cap and letter tiles for the graduation year.
- Seasonal Themes: Use flowers for spring, sun symbols for summer, autumn leaves, or snowflakes for winter.
Celebrate any occasion with a personalized LEGO frame that captures the spirit of the moment.
Incorporating Pop Culture Designs
Enhance your LEGO picture frames with pop culture-inspired designs. Here are some creative tips:
- Movie Themes: Recreate famous scenes or use mini-figures resembling movie characters.
- Superheroes: Add superhero figures like Batman, Superman, or Spider-Man for an action-packed look.
- Cartoon Characters: Include LEGO versions of beloved cartoon characters for a playful frame.
- Video Games: Use bricks to create designs inspired by games like Minecraft or Super Mario.
- Music Icons: Add a mini-figure with instruments or elements from your favorite music artist.
Pop culture designs make your frame appealing and relatable for fans of all kinds.
With these creative ideas, your LEGO picture frame will not only display memories beautifully but also reflect your unique interests and the significance of each event.
Tips and Tricks for Building
Crafting LEGO picture frames is a fun and rewarding experience, but it helps to use practical tips during the process. These tricks will enhance your frame design while ensuring both strength and flexibility.
Stability Hacks to Ensure Durability
Ensuring your LEGO picture frame is durable is key to its longevity. Use these stability hacks:
- Reinforce Corners: Strengthen corners with overlapping bricks to prevent easy disassembly.
- Double Up Layers: Use multiple brick layers for added structure and strength.
- Secure Connections: Press bricks firmly to avoid gaps and improve the frame’s integrity.
- Include Support Plates: Add large LEGO plates for a solid, leveled base.
- Use Technic Bricks: Insert Technic pins or axles for extra structural stability.
Stability hacks are essential to keep your frame long-lasting and prevent it from toppling over.
Maximizing the Versatility of LEGO Bricks
LEGO bricks offer endless possibilities for customization. Utilize their versatility with these tips:
- Combine Colors: Mix and match bricks for a vibrant, eye-catching design.
- Create Modular Frames: Design frames that can be expanded or adjusted easily.
- Experiment with Shapes: Build round, oval, or uniquely shaped frames for creative appeal.
- Incorporate Themes: Use themed bricks like flowers or mini-figures to add personality.
- Add Functional Features: Include hinges, stands, or wall-mount elements for multiple display options.
By maximizing LEGO’s flexibility, you can create a unique, memorable frame for any photo.
Showcase Your LEGO Picture Frames
After creating your unique LEGO picture frame, it’s time to showcase it proudly. Displaying it effectively can highlight your creativity and enhance your decor.
Ideas for Display Placement
- Living Room Mantel: Place your LEGO frame on the mantel for a standout centerpiece.
- Bookshelves: Add it to shelves to bring charm and personality.
- Desk Decoration: Use it to liven up your workspace or study area.
- Children’s Rooms: Add a playful touch to a kid’s room with their own creation.
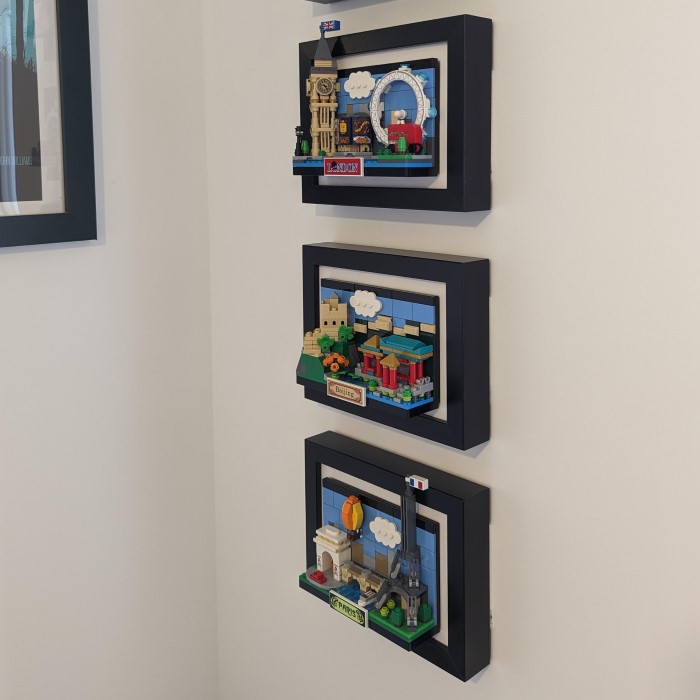
- Wall Art: Use a sturdy hook or Velcro strips to hang it on the wall.
- Entryway Table: Welcome guests with a vibrant LEGO frame showcasing family photos.
- Nightstands: Enhance your bedside table with a cheerful and personal touch.
Try to pair your LEGO picture frame with complementary decor for the best effect. Group frames of similar themes for a cohesive look.
Sharing Your Creations Online
Social Media:
Capture and post photos of your LEGO frames on platforms like Instagram or Pinterest. Engage with fellow LEGO fans by using popular hashtags such as #LEGOArt and #LEGOFrames to increase your visibility and connect with others.
LEGO Communities:
Actively join online forums or groups dedicated to LEGO enthusiasts. Share your unique designs, participate in discussions, and seek constructive feedback from other members to improve your skills.
Blogs or DIY Sites:
Write informative tutorials or engaging stories about your creative process of building LEGO frames. Publish these pieces on personal blogs or DIY websites to inspire others and showcase your craftsmanship.
Photo Sharing Platforms:
Utilize photo-sharing sites like Flickr to display your creations. Upload high-quality images of your LEGO frames to attract viewers and highlight the intricate details of your work.
Video Tutorials:
Create captivating time-lapse videos that document your frame-building process. Upload these videos to YouTube, providing insights and tips along the way, which can help others learn while showcasing your talent.
Online Contests or Exhibitions:
Seek out and participate in LEGO-themed contests or exhibitions. By showcasing your work in these venues, you can gain recognition and connect with other passionate LEGO builders.
Sharing your LEGO picture frames inspires others and connects you with fellow enthusiasts. It’s also a wonderful way to celebrate your creativity.
Frequently Asked Questions
How to Choose the Right LEGO Pieces
Choosing the right LEGO pieces is essential for building a great picture frame. Start by identifying your design and size requirements. Select bricks for the frame and plates for support. Use tiles if you want a polished, smooth finish for the edges. Add colorful pieces to match your theme or photo. Technic pieces are useful for creating unique designs and adding extra stability. Don’t forget decorative elements, such as mini-figures, slopes, or letter tiles for personalization. Always ensure you have enough pieces to complete the design before starting.
Caring for and Maintaining Your LEGO Frame
Proper care helps your LEGO picture frame last longer and look its best. Here are a few tips:
Clean Regularly
- Dust Removal: Use a soft, damp cloth to wipe the LEGO frame regularly. This action helps remove dust and prevents buildup, which can affect the visual appeal of your frame.
- Gentle Cleaning Technique: When cleaning, gently rub the cloth over the frame’s surfaces. Avoid using harsh chemicals or abrasive materials that could scratch or damage the LEGO pieces.
Avoid Moisture
- Keep Away from Water: Position your LEGO frame in a dry area. This practice prevents the frame from coming into contact with water, which can weaken or warp the bricks.
- Control Humidity Levels: Avoid placing the frame in environments with high humidity, such as bathrooms or basements. Maintaining a stable and dry environment will prolong the frame’s lifespan.
Check for Loose Pieces
- Regular Inspections: Occasionally inspect the frame for any loose pieces or connections. This proactive approach allows you to identify and address any issues before they worsen.
- Tighten Connections: If you find any loose connections, carefully tighten them. You can do this by pressing the pieces together firmly to ensure they fit securely.
Store Properly
- Choose a Safe Location: When not displayed, store the frame in a safe and stable area. Avoid placing it in high-traffic zones or areas prone to accidental bumps.
- Use Protective Cases: Consider using a display case or box when storing the frame. This additional layer of protection guards against dust, moisture, and physical damage.
Replace Damaged Pieces
- Identify Worn Components: Regularly assess the LEGO pieces for signs of wear or damage. Look for any cracked or broken parts that might compromise the frame’s integrity.
- Swap Out Parts: When you notice any damaged pieces, promptly replace them with new LEGO parts. Doing so helps maintain the durability and overall appearance of your frame.
By following these care tips, your LEGO picture frame will stay in excellent condition over time.
Conclusion: Start Creating Your Own LEGO Picture Frame Today!
In conclusion, creating your own lego picture frame is an exciting and fulfilling project that lends itself to creativity and personalization. With the versatility of LEGO, the resulting frames are not only functional but also serve as cherished keepsakes. Whether you design a frame for yourself or as a thoughtful gift, the process allows you to showcase your imagination and memories in a unique way.
As you embark on this fun project in 2025, remember to explore different designs, themes, and collaborative efforts while building your custom LEGO picture frame. Start gathering your materials, unleash your creativity, and enjoy this delightful crafting journey!