Introduction
When it comes to showcasing your cherished memories and artwork, knowing how to attach wire to picture frame is essential. Whether you’re an art enthusiast or someone who loves to decorate your home with family photos, mastering this skill not only ensures your frames are securely mounted but also enhances your overall display aesthetic. In this article, we’ll explore various methods and tips for attaching wire to picture frames, providing you with a comprehensive guide for creating beautiful and effective displays.
Understanding Picture Frame Components
Before diving into the process, it’s important to familiarize yourself with the essential components of a picture frame. Typically, a frame consists of the outer frame, a backing board, and glass or acrylic to protect the artwork. The way you attach wire to the frame will often depend on the frame’s construction. Many frames feature built-in D-rings or hardware that simplifies the wire-attachment process. However, if your frame does not, don’t worry—it’s easy to add the necessary attachments. Understanding your frame will ultimately help in deciding the best method for securely hanging it.
Tools and Materials Needed
Before you begin, gather all necessary tools and materials. This ensures a smooth and efficient process.
Essential Tools for the Process
- Screwdriver: Required to install D-rings or eye screws into the frame.
- Wire Cutters: Used for cutting the picture hanging wire to the desired length.
- Measuring Tape: Helps to mark precise attachment points on the frame.
- Pencil: Use it to make markings on the frame for attachment spots.
- Pliers: Helpful for securely tightening the wire around hardware.
Types of Picture Hanging Wire
Selecting the right type of picture hanging wire is essential for stability. Here are common options:
- Braided Wire: Versatile and ideal for medium-weight frames.
- Coated Wire: Plastic-coated for a smooth finish and prevents damage to hands.
- Stainless Steel Wire: Durable and strong, suitable for heavier frames.
Choose a wire suited to your frame’s weight for optimal security.
Choosing the Right Hardware
To ensure your frame hangs properly, select appropriate hardware:
D-Rings
- Purpose: D-rings are specialized hardware used to hang picture frames securely. They offer a reliable method for attaching frames to walls.
- Weight Suitability: They are ideal for smaller picture frames and those that are light to moderate in weight. Their design ensures that lighter frames can hang without sagging or shifting.
- Installation: D-rings can be easily attached to the back of a frame, typically on the outer edges. This allows for a balanced distribution of weight when the frame is hung.
- Versatility: These rings can be used on various wall types and can accommodate different mounting techniques, making them a versatile choice for home decor.
Eye Screws
- Strength and Support: Eye screws are designed to provide strong support for heavier frames. Their robust construction makes them an excellent choice for larger or more substantial pieces of art.
- Weight Capacity: When properly anchored, eye screws can hold significant weight, making them ideal for frames that may exceed the load limits of standard hanging hardware.
- Installation Location: These screws are typically installed in the middle or near the top of the frame, allowing for a secure attachment point that can effectively deal with the frame’s weight.
- Usage: Eye screws are particularly useful in settings where framed artwork or mirrors need to be secured more permanently, ensuring they remain firmly in place over time.
Hooks and Anchors
- Function: Hooks and anchors are crucial components for safely securing frames to the wall. They provide the necessary support to hold frames in place and prevent them from falling.
- Types of Hooks: Various types of hooks can be used, including picture hooks, wall hooks, and heavy-duty hooks. Each type serves different needs based on the weight and style of the frame.
- Anchors: Wall anchors are essential for creating a secure attachment point in drywall or plaster. They allow hooks to hold up heavier frames by distributing the load across a larger area.
- Installation Process: Proper installation of hooks and anchors is vital for ensuring frame stability. This involves selecting the right type of anchor for the wall material and securely fastening the hooks to support the frame effectively.
Make sure your hardware is sized for the weight of your picture frame and wall type.

Preparing Your Picture Frame
Proper preparation of your picture frame is essential before attaching the wire. This ensures your artwork or photo is securely hung and well-supported. Follow these steps carefully for a seamless process.
Inspecting the Frame for Compatibility
Start by checking the frame’s structure for compatibility. Make sure it is sturdy and intact. Confirm the frame material can handle the weight of the picture hanging wire. Lightweight frames work well with D-rings, but heavier frames may need eye screws. Review the back of the frame for attachment options, focusing on the strongest points. Avoid weak areas to ensure durability during hanging.
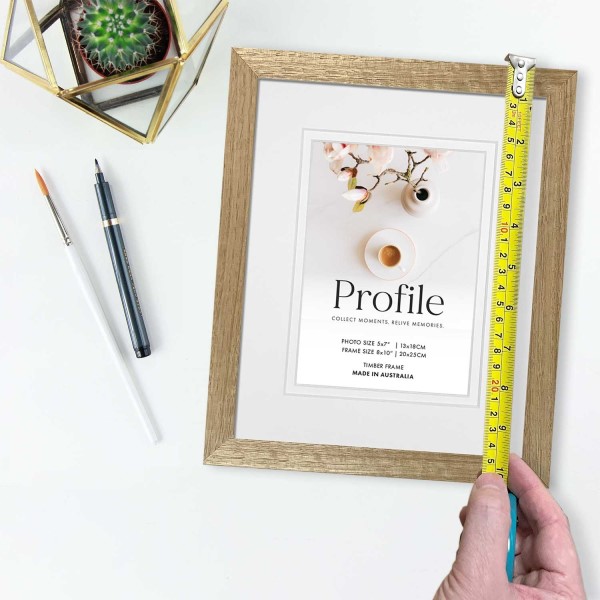
Marking the Attachment Points
Accurate marking of attachment points is crucial. Use a measuring tape for precise measurements on both sides of the frame. Determine the height for placement by measuring one-third from the top of the frame. Mark these locations using a pencil, ensuring symmetry and balance for hanging. Double-check the markings for alignment to avoid uneven attachments. This prevents imbalance once the frame is hung.
Attaching the Wire to the Frame
To securely hang your picture frame, follow these steps to attach the wire properly.
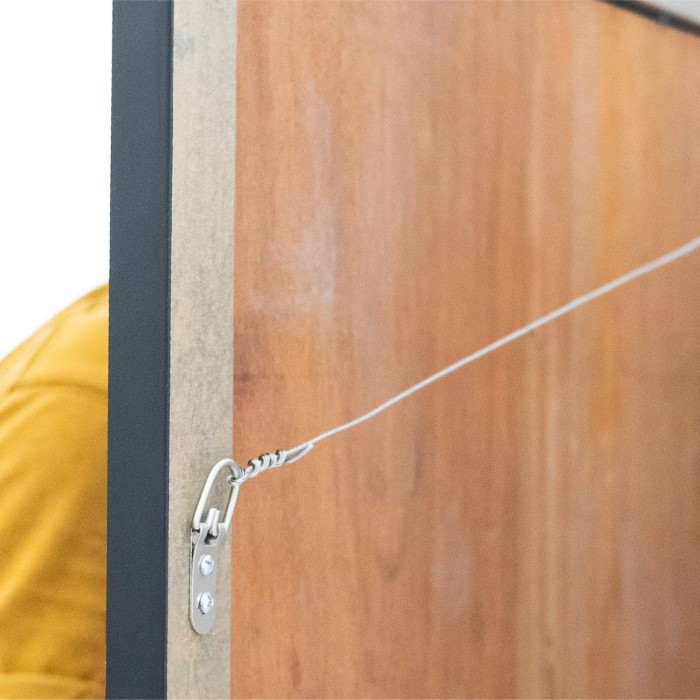
Installing D-rings or Eye Screws
Start by installing D-rings or eye screws as the attachment points for the wire. Choose D-rings for light to medium-weight frames or eye screws for heavier frames. Use a screwdriver to secure the chosen hardware firmly to the frame’s back. Place the hardware about one-third from the top of the frame to balance weight evenly. Confirm that the screws are tightly fixed into sturdy areas of the frame to avoid loosening over time.
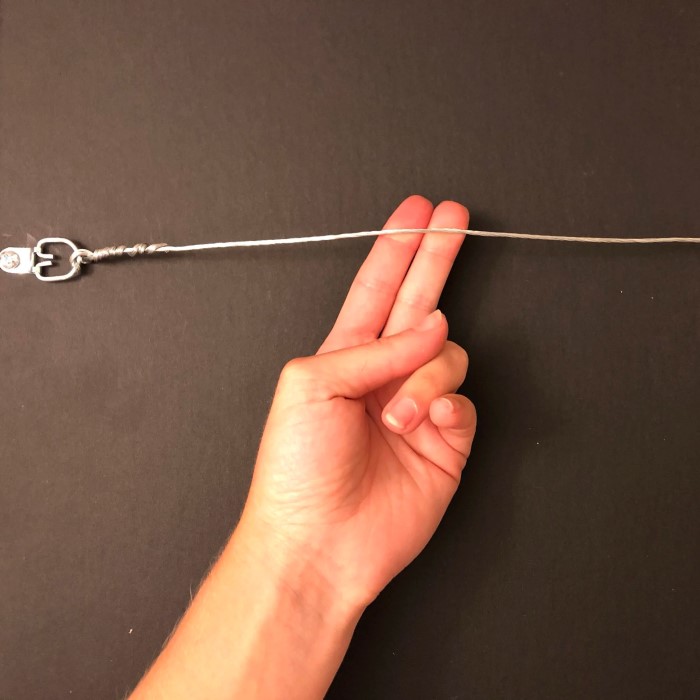
Measuring and Cutting the Wire
Measure the length of wire needed for your frame. Use a measuring tape to determine the correct length by accounting for slack required to hang the frame comfortably. Cut the picture hanging wire using wire cutters, ensuring a clean cut. Leave enough extra wire on both ends to loop it around the hardware securely.
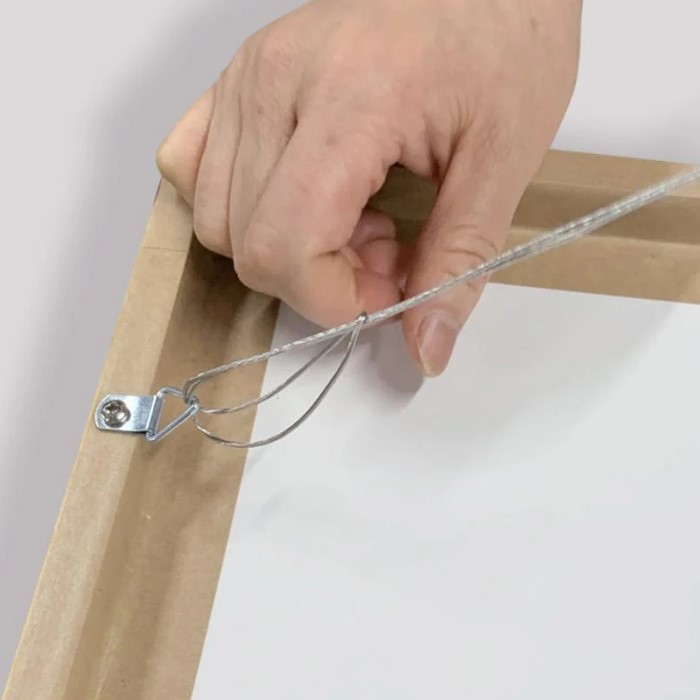
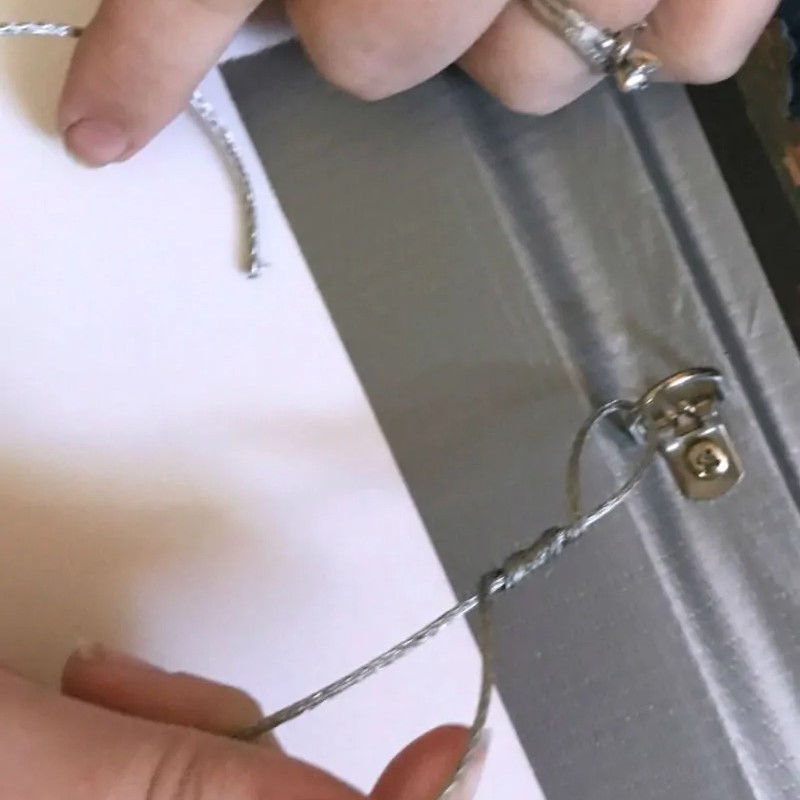
Securely Attaching the Wire to the Hardware
Attach the wire to the installed D-rings or eye screws. Begin by threading one end of the wire through the D-ring or eye screw, creating a tight loop. Use pliers to pinch and wrap the wire securely around itself to prevent slipping. Repeat the same process on the opposite side of the frame. Ensure the wire has slight slack for hanging but isn’t excessively loose to avoid instability. Check both connections for tightness to guarantee durability.
Following these steps ensures your picture frame is ready for safe and stable hanging.
Testing the Wire and Frame
Once the wire is attached to your picture frame, testing for security and balance is crucial. This ensures the frame hangs properly and stays stable over time. Follow these key steps:
Checking for Balance and Security
Begin by holding the frame upright and inspecting the wire’s attachment. Confirm that the wire loops are tight and secure around the D-rings or eye screws. Tug gently on the wire to check for any looseness.
Place the frame on a flat surface and balance it using both hands. Ensure the wire distributes the frame’s weight evenly. Check for any tilting or unsteadiness, which may indicate incorrect placement of hardware or wire tension.
Lift the frame gently by the wire as if you were hanging it on the wall. Observe the wire’s tension and verify that it doesn’t sag excessively. This helps maintain stability and prevents potential slipping.
Proper Positioning for Hanging
Positioning the wire for hanging is vital for proper alignment on the wall. Hold the frame at eye level and estimate its center point. Use a measuring tape to locate the wall hook or anchor spot accurately.
Ensure the wire has slight slack so the frame doesn’t press tightly against the wall. A taut wire can cause imbalance, whereas excessive slack might lead to unsteadiness. Find the right balance for a neat and secure placement.
Place the frame on the wall and test its stability after hanging. Check its alignment and make necessary adjustments for a straight and polished appearance. Confirm the wire sits snugly on the hook or anchor without wobbling.
These steps guarantee your picture frame hangs securely, remains level, and stays balanced.
Common Mistakes to Avoid
When learning how to attach wire to picture frame, be aware of common mistakes. Avoiding these errors will ensure your frame hangs securely and looks polished.
Improper Placement of Hardware
Placing hardware incorrectly can cause imbalance or damage to the frame. Always measure carefully before attaching D-rings or eye screws. Mark points accurately using a pencil, ensuring symmetry on both sides of the frame. Avoid attaching hardware too close to the edges, as this weakens stability. Selecting sturdy areas of the frame prevents screws from dislodging over time.
Selecting the Wrong Type of Wire
Choosing the wrong wire type jeopardizes the safety of your picture frame. Use braided wire for medium-weight frames due to its flexibility and strength. Opt for coated wires to protect hands and avoid scratches on walls. Stainless steel wires work best for heavy frames, offering robust support. Match your wire choice to the frame’s weight for optimal results.
Over-tightening or Under-tightening the Wire
Improper wire tension impacts durability and balance. Avoid over-tightening, as it risks weakening wire loops. Loose wires create instability and uneven hanging. Use pliers to secure tight loops around D-rings or eye screws. Ensure slight slack for comfortable hanging and proper weight distribution. Regularly check wire tension to prevent sagging or slipping.
Recognizing and resolving these mistakes enhances the safety and appearance of your hanging picture frames.
Tips for Hanging Picture Frames with Wire
Hanging a picture frame with wire requires careful attention to detail. Following these tips ensures stability and safety.
Ensuring Stability on the Wall
- Choose the Right Wall Surface: Know your wall type—drywall, concrete, or wood—to choose suitable hardware.
- Use a Level: A level ensures your frame doesn’t tilt, providing a professional look.
- Hang on a Stud: Use a stud finder to locate wall studs for secure hanging.
- Avoid Excessive Slack: Ensure the wire has slight slack but isn’t too loose to keep the frame stable.
- Check Wire Strength: Verify the wire can handle your frame’s weight to prevent accidents.
Paying attention to these details ensures your frame stays secure and aligned on the wall.
Using Hooks or Anchors for Better Support
- Select the Right Hook: Choose heavy-duty hooks for large or heavy frames.
- Install Anchors for Heavy Frames: Use wall anchors on drywall or plaster when studs are unavailable.
- Measure Carefully: Position hooks or anchors at the correct height for balanced hanging.
- Test the Setup: Hang the frame gently to ensure the hardware holds securely.
- Check Weight Limit Ratings: Ensure hooks and anchors can handle the frame’s weight.
Proper hooks and anchors improve the frame’s stability and protect your walls from damage.
Additional Maintenance and Care
Proper maintenance ensures your picture frames remain safe and secure on the wall. Regular care prevents accidents and keeps your frames in good condition.
Replacing Old or Damaged Wires
Over time, picture hanging wires can weaken or become rusty. Replacing them is vital for safety.
- Inspect Regularly: Check the wire for fraying, rust, or signs of wear.
- Remove Old Wire: Detach the wire from the hardware using pliers.
- Choose New Wire: Select wire matching your frame’s weight and type.
- Cut New Wire: Measure and cut the wire slightly longer than the previous one.
- Attach and Secure: Thread the new wire securely through the D-ring or eye screw.
- Test Strength: Tug gently to ensure the new wire is tightly secured and durable.
Replacing wires periodically ensures the safety and stability of your hanging frame.
Regular Safety Checks for Hanging Pictures
Routine safety checks prevent accidents and secure your picture frames for long-term use.
- Inspect Hardware: Check D-rings, screws, and hooks for wear or loosening.
- Test Wire Tension: Ensure the wire is not sagging or overly tight.
- Check Wall Anchors: Confirm the wall hardware is still firmly in place.
- Assess Frame Condition: Look for cracks or damage to the frame structure.
- Confirm Wall Alignment: Verify the frame is hanging straight and level.
Conducting regular checks ensures that both your frames and walls remain safe and intact.
Conclusion
Learning how to attach wire to picture frame is an invaluable skill for anyone looking to enhance their home decor. By following our detailed steps, you can create beautiful displays that showcase your favorite memories and artwork securely. Remember, the key to effective and aesthetically pleasing display is not just in the art itself but in how you present it. By ensuring each frame is hung properly and securely, you can enjoy your cherished visuals for years to come.
With this guide, you’re now equipped to transform your wall into a stunning showcase. Whether it’s a single cherished photo or an entire gallery wall, the process begins with knowing how to attach wire to picture frame and enjoying the beauty it brings to your living space.