Introduction to Wrapping Picture Frames
Wrapping gifts can sometimes feel like a chore. However, wrapping a picture frame is an opportunity to enhance its appeal and demonstrate a personal touch. Knowing how to wrap a picture frame effectively adds beauty and charm to your present. In this guide, we’ll explore various techniques, materials, and creative ideas to wrap picture frames beautifully while ensuring that your gifts stand out. Whether for birthdays, holidays, or special occasions, a well-wrapped frame can make the perfect gift.
Why Wrap a Picture Frame?
Wrapping a picture frame can serve several important purposes. First, it helps to protect the frame during transportation or storage. By wrapping it securely, you can prevent scratches, dust accumulation, and other damage.
Second, wrapping a picture frame can be a great way to personalize gifts. Using decorative wrapping materials adds a special touch, making the frame look more festive and thoughtful.
Another reason to wrap a picture frame is to refresh its appearance. If the frame has minor imperfections or doesn’t match your decor, wrapping materials can provide a cost-effective makeover.
Lastly, it’s an eco-friendly way to repurpose older frames. Instead of buying new frames, you can use wrapping material to give an old one a new life. This not only saves money but also reduces waste.
Whether for protection, gifting, or decoration, wrapping a picture frame offers both practical and creative benefits.
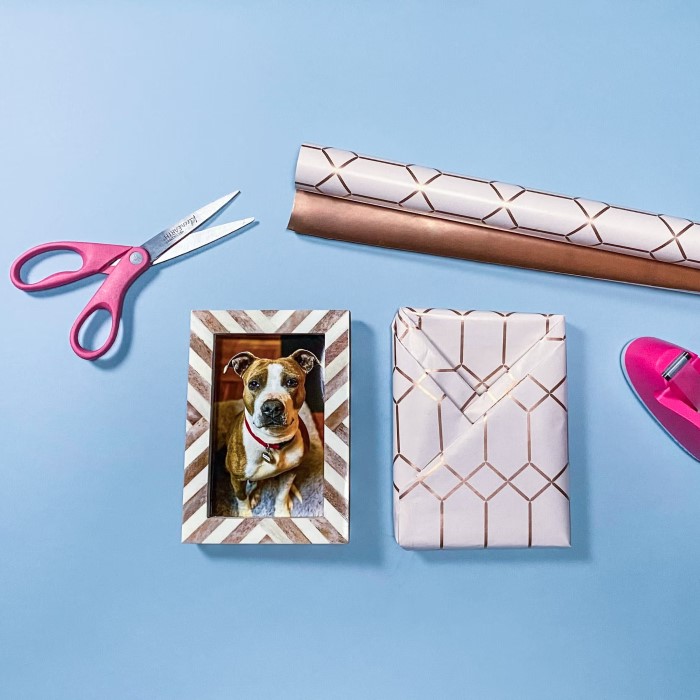
Essential Materials Needed for Wrapping a Picture Frame
Having the right materials is crucial for wrapping a picture frame effectively. Here’s what you’ll need:
- Wrapping Paper or Fabric: Choose materials that match your style or occasion.
- For gifting purposes, use decorative paper.
- For decorating, opt for fabric or textured materials.
- Clear Tape or Double-Sided Tape: Ensure the wrapping stays secure.
- Use tape that won’t damage the frame.
- Double-sided tape offers a cleaner look.
- Scissors or Craft Knife: These are essential for precise cutting.
- Sharp scissors prevent fraying.
- Use a craft knife for detailed cuts.
- Ruler or Measuring Tape: Accurate measurements prevent waste and ensure a neat wrap.
- Measure both frame and wrapping material carefully.
- Corner Protectors (Optional): Add extra protection for delicate frames.
- Use foam or felt corner protectors.
- Decorative Elements: Personalize the wrapping with embellishments.
- Ribbons, bows, or stickers can enhance the look.
- Glue or Adhesive Spray (Optional): For attaching fabric or heavier materials.
By using these materials, you can achieve a professional and polished look while wrapping your picture frame. Choose the best tools and supplies based on your specific goal, whether for protection, gifting, or decoration.
Preparing the Picture Frame for Wrapping
Proper preparation of the picture frame is key for a flawless wrapping job. Taking the time to prepare ensures the wrapping material adheres neatly and the frame remains protected. Here are the steps to get your picture frame ready:
- Clean the Frame:
- Use a soft cloth or duster to wipe off any dust or dirt.
- For stubborn spots, use a damp cloth but dry it thoroughly afterward.
- Remove Any Glass or Artwork:
- Carefully take out the glass or artwork from the frame.
- Store them in a safe place to prevent accidental damage.
- Inspect for Damage:
- Check the frame for cracks, chips, or loose joints.
- Repair any damage with wood filler or glue before wrapping.
- Smooth the Surface:
- If the frame is rough or uneven, sand it lightly using fine-grit sandpaper.
- Wipe away any debris with a clean cloth after sanding.
- Secure Loose Parts:
- If any parts of the frame feel loose, tighten or glue them securely.
- Let any glue dry completely before proceeding to wrap.
- Choose a Flat, Clean Workspace:
- Use a table or flat surface to work on the frame.
- Ensure the surface is clean to keep your wrapping material in perfect condition.
By taking these steps, you set the foundation for a beautiful and professional-looking wrapped picture frame. Proper preparation helps you achieve neat results and ensures durability during storage or display.
Step-by-Step Instructions to Wrap a Picture Frame
Follow these easy steps to wrap a picture frame beautifully and efficiently.
Measuring and Cutting the Wrapping Material
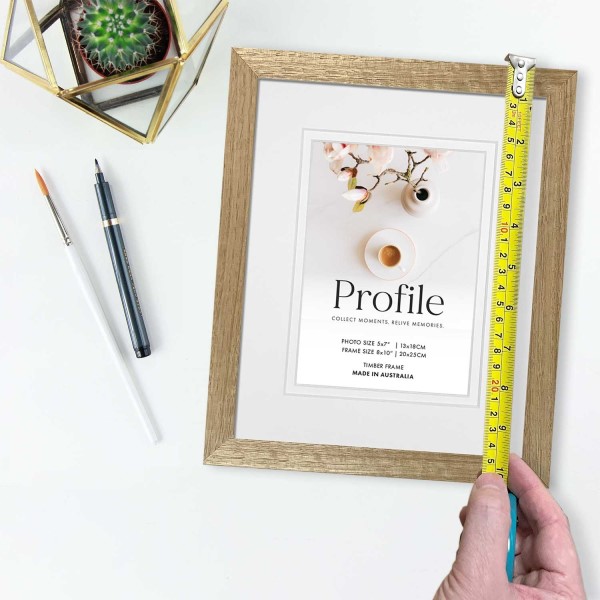
- Measure the Frame: Measure the height and width of the frame carefully. Include depth if it’s thick.
- Use a ruler or measuring tape for accuracy.
- Prepare the Wrapping Material: Choose paper or fabric that meets your needs, like decorative or textured material.
- Determine the Amount of Material: Add extra material for tucking and folding around edges.
- Cut the Material Precisely: Place the wrapping material on a flat surface and cut it accurately.
- Use sharp scissors or a craft knife.
Placing and Securing the Wrapping Material
- Position the Frame: Place the frame face down at the center of the wrapping material.
- Fold the Material Over the Frame: Start with the longer sides and fold them tightly over the edges.
- Ensure the material is smooth and wrinkle-free.
- Secure with Tape: Use clear or double-sided tape to hold the folded sides firmly.
- Keep tape lines neat to avoid uneven edges.
- Fold the Remaining Edges: Fold the shorter edges carefully to cover the frame completely.
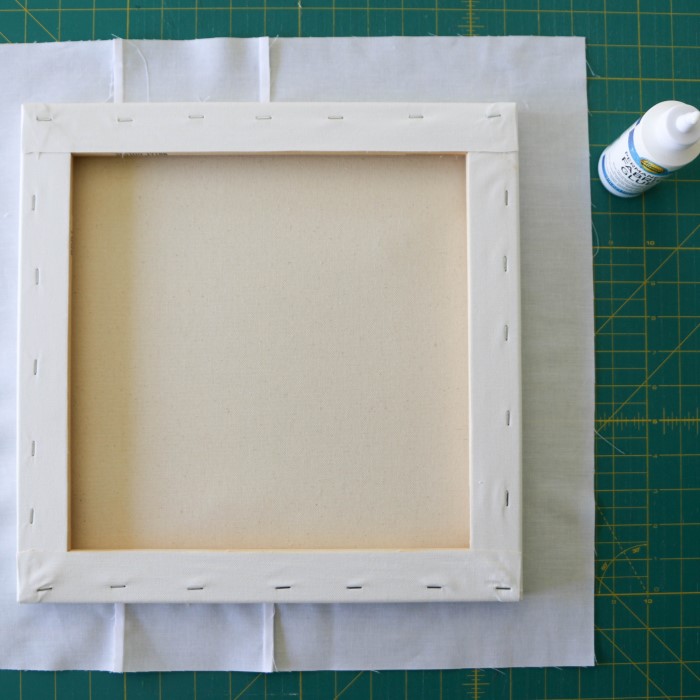
- Use Glue for Fabric: Apply glue or adhesive spray if using fabric for better adhesion.
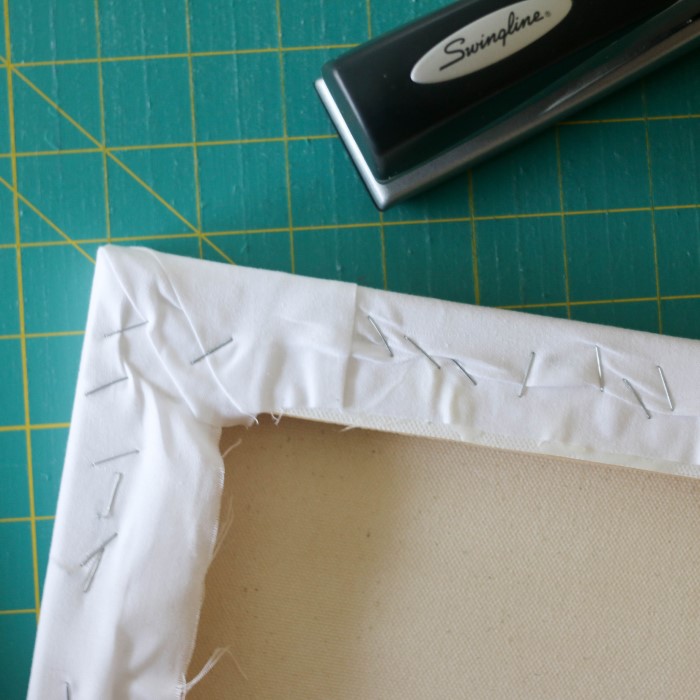
Ensuring a Neat Finish on the Corners
Fold Corners Precisely
When wrapping a picture frame, it’s essential to pay special attention to the corners. To achieve a polished look, begin by tucking the wrapping material neatly into each corner. This step should be done carefully to ensure that there are no bulges or uneven folds, which can distract from the overall presentation. A precise fold not only improves the aesthetics of the wrap but also contributes to a more secure finish. Use your fingers to smooth down the wrapping paper as you tuck, ensuring a snug fit around the edges.
Secure Corner Tucks
Once you have tucked in the corners, it’s important to secure them to maintain the neat appearance you’ve created. You can use tape or glue to hold the folded corners in place. Applying tape to the inside of the folds can help keep everything tidy and out of sight. For an even cleaner look, double-sided tape is an excellent option, as it provides a hidden adhesion that won’t detract from the wrap’s visuals. This technique ensures that the corners remain firmly in position while enhancing the professional quality of your wrapping.
Trim Excess Material
After you have secured the corners, it’s time to focus on any excess material that may be hanging over the edges of the picture frame. Using sharp scissors, carefully cut away any overhanging wrapping paper to achieve a tidy finish. This trimming step is crucial because it delivers a polished look and prevents any loose edges that could unravel during transportation or handling. Be cautious not to cut too closely to the frame, as you want to maintain enough wrapping material for full coverage.
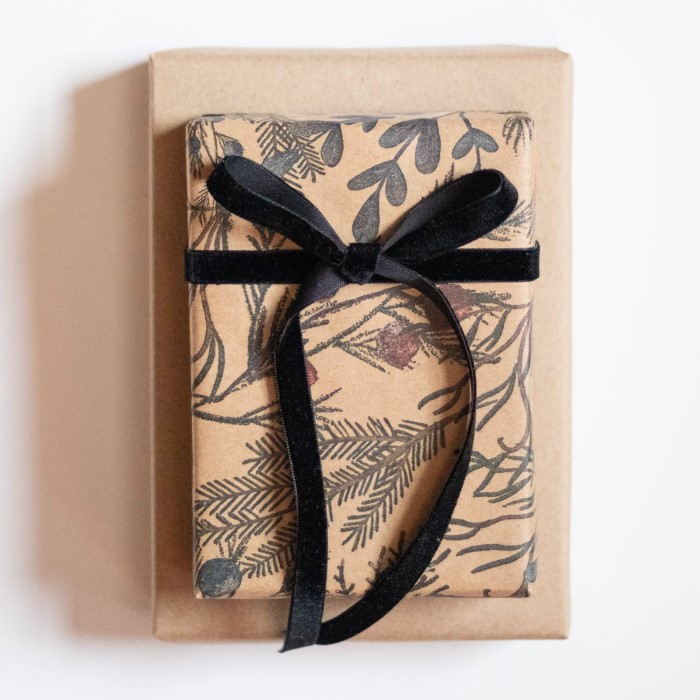
Add Decorative Touches
To elevate the overall appearance of your wrapped picture frame, consider adding decorative touches. Use ribbons, bows, or stickers to enhance the visual appeal of your gift. For instance, a beautiful ribbon can be tied around the center in a bow, adding a touch of elegance. Alternatively, consider using themed stickers or embellishments that relate to the occasion. Such touches not only make your gift more attractive but also personalize it, making the recipient feel special and appreciated.
By following these steps, you’ll learn how to wrap a picture frame efficiently. These techniques ensure your frame looks polished, whether for gifting or décor purposes.
Creative Wrapping Ideas for Picture Frames
Give your picture frames a unique and charming look with creative wrapping ideas. Whether you’re using a frame as decoration or gifting it, these tips can transform ordinary frames into extraordinary pieces. Here are some ideas to inspire you:
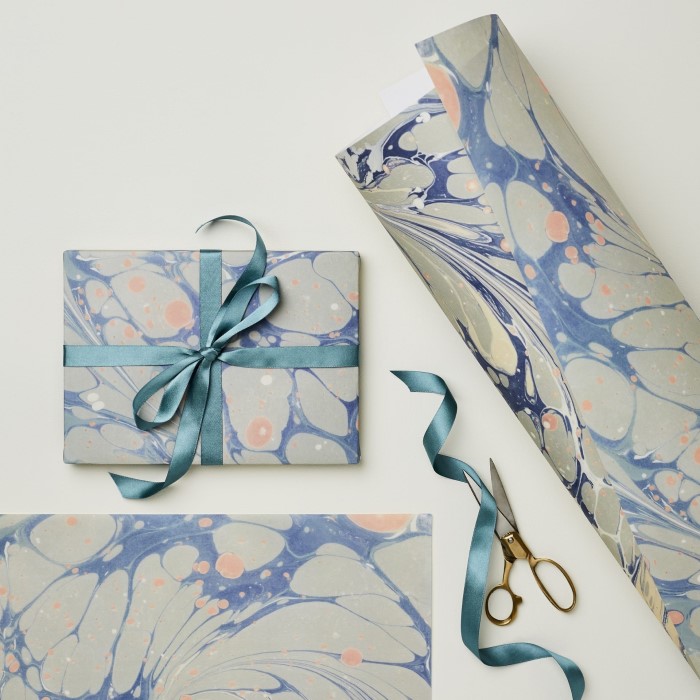
Use Decorative Paper with Patterns
Choose colorful, patterned gift wrap for a lively appearance. Match the paper design to the occasion.
- Floral patterns for spring themes.
- Metallic finishes for elegant moments.
Fabric Coverings for Warmth
Wrapping a frame with fabric adds texture and a cozy feel. Choose fabrics like:
- Velvet for a luxurious vibe.
- Burlap for rustic style.
- Cotton prints for playful décor.
Add Layers with Ribbons
Layering ribbons over wrapping adds depth and beauty. Tie bows or weave the ribbons:
- Use contrasting colors for a bold effect.
- Mix textures like satin and organza.
Embellish with Decorative Elements
Include elements like glitter, stickers, or cutouts to personalize your frames.
- Attach shaped card stock to the corners.
- Sprinkle glitter for a festive finish.
Use Nature-Inspired Accents
Incorporate natural items for a unique touch. For example:
- Tie small dried flowers or leaves.
- Decorate with pinecones for winter themes.
Experiment with Paint and Stencils
Paint wrapping paper or stencil designs on fabric for a custom look.
- Use metallic or matte colors.
- Add names or dates with stencils for personalization.
Theme-Based Wrapping Ideas
Wrap the frame based on specific themes:
- Movie-themed paper for cinema lovers.
- Maps for travel enthusiasts.
Creative wrapping ideas make picture frames special and unique. They elevate your project to the next level and stand out in any setting. Use these suggestions for gifts or customized décor that impresses and captivates.
Tips and Tricks for Professional-Looking Results
Achieving a professional look when wrapping a picture frame requires attention to detail. These simple tips can make a big difference in the final outcome:
Start with Clean and Smooth Materials
- Ensure the wrapping paper or fabric is free from wrinkles or creases.
- Iron fabric before use for a polished look.
Use High-Quality Materials
- Invest in sturdy wrapping paper or durable fabrics to avoid tearing or fraying.
- Consider using premium tape for stronger adhesion and a neat finish.
Be Precise with Measurements
- Measure the frame and wrapping material carefully before cutting.
- Extra accuracy ensures even coverage and reduces waste.
Work on a Flat Surface
- Set up on a clean, flat surface to prevent wrinkles and uneven folds.
Maintain Tension When Wrapping
- Pull the wrapping material tightly to avoid wrinkles or loose sections.
- Smooth out any air bubbles or creases as you work.
Handle Corners with Care
- Fold and tuck carefully around corners for clean edges.
- Use double-sided tape to secure discreetly.
Trim Excess Material
- Cut any extra material to avoid bulkiness or uneven edges.
- Always use sharp scissors or a craft knife for clean cuts.
Add Finishing Touches
- Use embellishments like ribbons, bows, or stickers for a personalized touch.
- Match decorative elements to the frame’s purpose or theme.
Test Adhesives on Scrap Material
- Ensure tape, glue, or adhesive sprays do not damage your wrapping material.
- Apply adhesives in small amounts to avoid excess.
Take Your Time
- Rushing leads to mistakes. Be patient for clean and professional results.
By following these tips and tricks, you can elevate your picture frame wrapping skills. Whether it’s for gifting or decor, these methods will help you achieve a flawless and impressive finish.
Common Mistakes to Avoid When Wrapping Picture Frames
Wrapping a picture frame might seem simple, but mistakes can ruin the final result. By knowing what to avoid, you can create a clean and professional look. Here are some common mistakes to watch out for:
Skipping Proper Preparation
- Forgetting to clean the frame can lead to dust or smudges showing through the wrap.
- Neglecting to remove glass or artwork may cause these parts to get damaged.
- Overlooking rough edges or loose parts may result in uneven wrapping. Always prepare your frame first.
Using Incorrect Materials
- Thin wrapping paper can tear easily during the process. Opt for stronger materials.
- Regular tape can damage the frame; use clear or double-sided tape instead.
- Incorrect measuring of wrapping material leads to too much or too little coverage.
Making Poor Cuts
- Uneven or jagged cuts make the wrap look unprofessional. Use sharp scissors or a craft knife.
- Cutting without a ruler can result in inaccurate measurements. Always measure carefully.
Neglecting Corners
- Bulky or messy corners can ruin the overall aesthetic of your wrap.
- Failing to tuck and secure corners properly leaves the frame looking unfinished.
Using Excess Adhesive
- Overusing glue or tape can create a messy appearance.
- Be mindful of adhesive placement to ensure a neat finish.
Ignoring Wrinkles and Air Bubbles
- Wrinkles or bubbles in the wrapping material look sloppy. Smooth the material as you work.
- Not maintaining tension when wrapping may lead to a loose and uneven surface.
Rushing the Job
- Hurrying through the process can lead to sloppy work and a lackluster finish.
- Take your time to align and secure materials properly.
By avoiding these common mistakes, you can wrap your picture frames efficiently and beautifully. Each step matters, so attention to detail ensures a polished and professional result. Remember, practice makes perfect. With time, your wrapping skills will shine.
Conclusion: Mastering How to Wrap a Picture Frame
Ultimately, how to wrap a picture frame is more than just a task; it’s a creative opportunity that allows you to express yourself and your affection for the recipient. Remember to gather your materials, follow the steps thoughtfully, and personalize your presentation. The effort you put into wrapping will enhance the gift experience, making it one to remember. By following this guide, you’ll have the skills to wrap picture frames beautifully, ensuring every gift is stunning and unforgettable. Happy wrapping!