Introduction: Why Accurate Measurements Matter
Measuring picture frame size correctly is crucial for ensuring that your artwork or photographs are displayed beautifully. An incorrectly sized frame can lead to a lopsided appearance or, worse, damage to the artwork. When you want your pictures to shine, precision in measurement is key. In this article, we will explore how to measure picture frame size in detail, focusing on essential tools that enhance accuracy. By the end, you’ll be equipped with the knowledge to confidently measure and frame your artwork.
Importance of Accurate Measurements
Accurate measurements are essential when choosing a picture frame. Every picture deserves a frame that fits perfectly. A proper fit enhances the artwork’s presentation and keeps it secure.
Incorrect measurements can lead to frames that are too small or big. A wrong-sized frame may damage your artwork or create visual imbalance. This is why knowing how to measure picture frame size is critical.
Precise dimensions ensure that the picture is held securely in place. It minimizes risks of slipping or bending inside the frame. Even millimeters matter, especially for custom or high-value artwork.
Accurate measurements also allow for easy installation. When your frame fits the display area perfectly, the process of mounting becomes effortless. This saves time and ensures the frame looks great.
In summary, by measuring correctly, you not only protect your artwork but elevate its aesthetic appeal.
Tools Needed for Measuring Picture Frames
Measuring a picture frame requires precision and the right tools. Having the correct equipment ensures accuracy and prevents errors during the process. Here are the essential tools you will need:
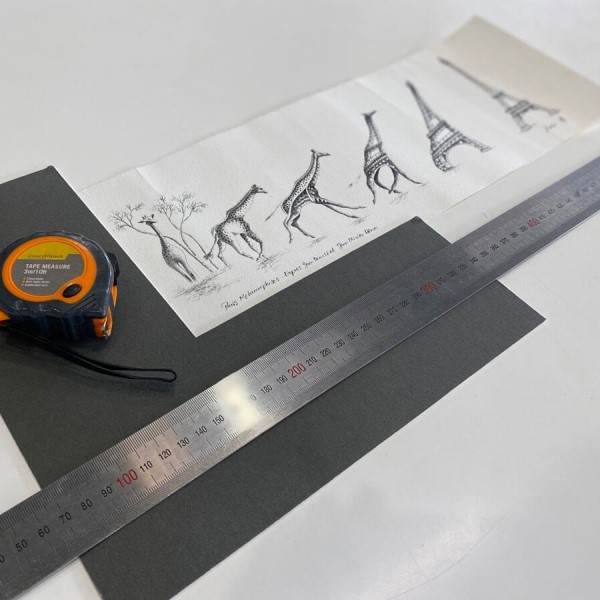
Measuring Tape or Ruler
A measuring tape or ruler is crucial for taking dimensions. Use a sturdy and reliable tool to measure both width and height. Make sure it has clear and accurate markings. Avoid using flexible or worn-out tools that may affect precision.
Pencil or Marker
A pencil or marker helps mark specific points on paper or the frame. Use it lightly to avoid permanent marks, especially if you’re measuring sensitive materials.
Calculator
A calculator can be handy to double-check measurements. It helps with calculations when determining ratios or proportions for mat boards and other components.
Level Tool
A level tool ensures straight measurements, especially for frames with angled or beveled edges. A simple handheld level will suffice.
Paper or Notebook
Keep a notebook to record your measurements. Organizing the dimensions properly helps maintain accuracy and avoids confusion when buying or fitting a frame.
Template or Sample Frame
Using a template or pre-made frame can guide your measurements. This ensures you have a visual reference for the intended size or style.
By gathering these tools before you start, you’ll save time and achieve better results. Tools like measuring tapes and rulers are essential for understanding how to measure picture frame size accurately.
Steps to Measure the Outer Dimensions of a Picture Frame
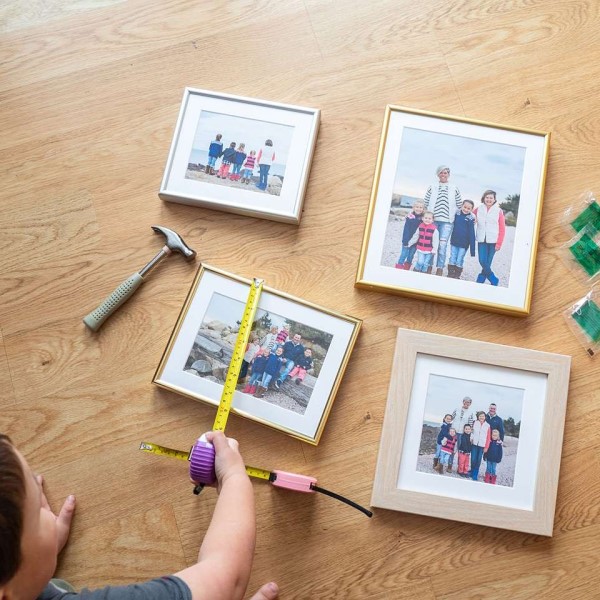
Measuring the outer dimensions of a picture frame is a straightforward process. Here’s a step-by-step guide to help you do it accurately:
Step 1: Gather Your Tools
Before you start, assemble all necessary tools. Use a measuring tape or a ruler for accurate results. Keep a pencil or marker on hand, along with paper or a notebook to record measurements.
Step 2: Place the Frame on a Flat Surface
Set the picture frame on a flat, stable surface. Ensure it isn’t tilted or uneven. A level surface helps in achieving precise measurements.
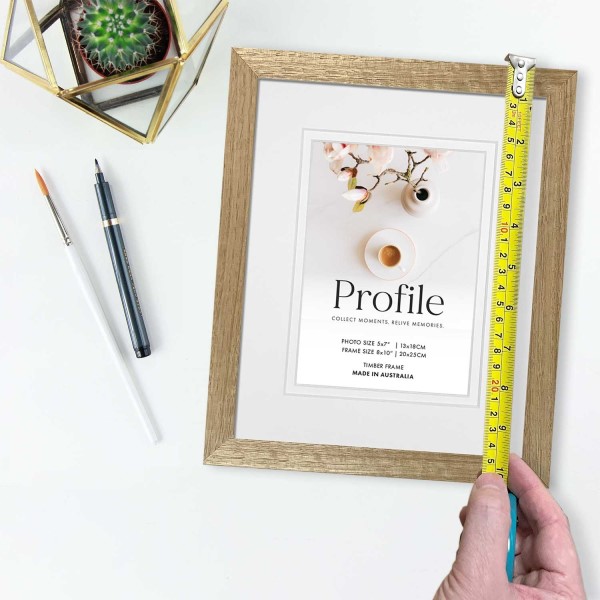
Step 3: Measure the Width
Use the measuring tape or ruler to measure across the widest part of the frame. Align the tool from the left to the right edge of the frame. Write down the measurement immediately to avoid forgetting.
Step 4: Measure the Height
Turn the measuring tape vertically along the length of the frame to measure the height. Make sure to include the outer edges completely. Record this measurement as well.
Step 5: Confirm Measurements
Double-check both measurements to ensure accuracy. It’s crucial to avoid errors.
Step 6: Take Diagonal Measurements (Optional)
For frames with unique shapes, measure diagonally from one corner to the opposite corner. Do this for both diagonal corners. Ensure both diagonals are equal for a rectangular frame.
Step 7: Note the Results
Write all measurements down clearly. Separate width, height, and diagonal dimensions for easy reference.
By following these precise steps, you’ll know how to measure picture frame size accurately. Proper measurements ensure the frame fits as intended and displays your artwork perfectly.

How to Measure the Inner Dimensions of a Picture Frame
Measuring the inner dimensions of a picture frame is essential for ensuring a perfect fit for your artwork or photograph. Here’s a simple guide to help you measure the inner dimensions accurately:
Step 1: Gather Your Tools
Prepare your measuring tape or ruler, pencil, paper, and any other essential tools. Ensure these tools are reliable and precise for accurate measurements.
Step 2: Remove the Backing
Take out the frame’s backing, glass, or mat board, if present. You need direct access to the inner edges to measure effectively.
Step 3: Measure the Width
Place the measuring tool on the inside edge of the frame. Measure the width from one inner side to the other. Ensure the tool is straight and positioned from edge to edge. Write down the measurement immediately.
Step 4: Measure the Height
Hold the measuring tape vertically on the inside edge of the frame. Measure the height from the bottom to the top inner edge. Record this number for accuracy.
Step 5: Measure the Depth (Optional)
If the depth of the frame is a concern, measure the distance from front to back inside the rabbet (the recessed area where the artwork sits). Write down this measurement as well.
Step 6: Double-Check Measurements
Double-check all your measurements. This ensures they are correct and prevents errors when fitting the artwork.
Accurate inner dimension measurements are crucial for maintaining the artwork securely in the frame. By following these steps, you will understand how to measure the inner dimensions of a picture frame confidently and effectively.
Measuring Mat Board Openings
Properly measuring mat board openings ensures your artwork fits accurately and looks professional. A mat board provides a decorative border and prevents your artwork from touching the glass directly, preserving it over time. Here’s how to measure the mat board openings:
Step 1: Gather Your Tools
Collect a measuring tape or ruler, pencil, eraser, and a notebook. Precision is important here, so make sure your tools are accurate.
Step 2: Remove the Mat Board
If the mat board is already framed, take it out carefully. This avoids damaging the artwork or board.
Step 3: Measure the Width of the Opening
Place the measuring tool horizontally along the opening of the mat board. Measure the width from one inner edge to the opposite inner edge of the window. Write down the exact measurement in inches or centimeters.
Step 4: Measure the Height of the Opening
Measure the height by holding your measuring tape vertically inside the mat board’s opening. Record this measurement immediately to ensure accuracy.
Step 5: Allow for Overlay
Typically, mat boards cover about 1/4 to 1/2 inch of the artwork’s edges. Deduct this amount from your artwork’s dimensions to calculate the visible area.
Step 6: Verify the Measurements
Double-check your recorded width and height dimensions. Ensuring accuracy avoids mistakes when cutting or selecting mats.
Tips for Accurate Mat Board Measurements
- Use a steady hand while measuring.
- Double-check the mat’s edges are even.
- Ensure the mat is lying flat for proper measurements.
- Always write down dimensions for quick reference.
By following these steps, you’ll master measuring mat board openings. This ensures your artwork fits seamlessly and is framed beautifully. Knowing how to measure picture frame size, including the mat board, is crucial for achieving a polished final look.
Determining Frame Depth and Rabbet Size
When framing artwork, understanding frame depth and rabbet size is essential. These dimensions influence the fit and security of your artwork. Knowing “how to measure picture frame size” accurately is key to achieving the best results.
What is Frame Depth?
Frame depth refers to the thickness of the frame from front to back. This dimension helps determine if the frame can accommodate your artwork, mat board, and glass. Deeper frames provide more space for layered components and are ideal for thicker pieces.
What is Rabbet Size?
The rabbet is the inner lip or recess of the frame. It holds the artwork and other components securely. Rabbet size includes depth and width, so it’s crucial for ensuring a snug fit.
Step-by-Step Guide to Measure Frame Depth and Rabbet Size
- Gather Your Tools: Collect a ruler, measuring tape, and a notebook to record measurements.
- Measure the Frame Depth: Place the measuring tool against the side of the frame. Record the distance from the front to the back edge.
- Locate the Rabbet: Inspect the recessed area inside the frame where the artwork fits.
- Measure Rabbet Depth: Measure the depth of the recess within the frame carefully. This ensures precise fitting.
- Measure Rabbet Width: Use the ruler to measure the width across the recessed lip. Record this dimension clearly.
- Verify Measurements: Double-check all recorded dimensions to avoid errors during installation.
Why Accurate Depth and Rabbet Measurements Matter
- It ensures your artwork fits securely within the frame.
- Prevents damage to artwork due to loose or tight fits.
- Helps determine compatibility with mat boards and glass.
- Enables proper framing for thicker items.
Taking the time to measure frame depth and rabbet size is crucial for successful framing. By following these steps, you’ll ensure your artwork or photo fits perfectly and looks stunning in its display.
Common Mistakes When Measuring Picture Frames
Measuring picture frames seems simple, but common errors can lead to improper fitting. Avoid these mistakes to ensure accurate results:
Not Using the Right Tools
- Using the wrong tools, like a flexible tape, reduces measurement accuracy.
- Always use a sturdy measuring tape or ruler for consistent measurements.
Ignoring Rabbet Depth
- Neglecting to measure the rabbet depth can lead to improper fitting of artwork.
- Always measure from the frame’s front to the recessed area inside.
Forgetting to Double-Check Measurements
- Skipping verification of dimensions is a common error.
- Double-check every measurement before proceeding with frame selection or cutting materials.
Measuring from the Wrong Points
- Incorrect starting points yield inaccurate results.
- For outer dimensions, measure edge-to-edge. For inner dimensions, measure inside edge-to-edge.
Excluding Mat Board Overlay
- Forgetting the mat board overlay can lead to misaligned artwork.
- Subtract ? to ? inch for the mat board’s overlap when sizing artwork.
Not Accounting for Frame Depth
- Skipping frame depth means the parts might not fit properly.
- Ensure the frame can accommodate glass, artwork, mats, or backing.
Avoid Mistakes with These Tips
- Use reliable tools for accurate frames.
- Note every measurement immediately.
- Verify by measuring twice.
By following these tips, you can avoid mistakes and ensure a perfect frame fit.
Tips for Choosing the Right Size Frame
Selecting the right size frame is crucial for proper presentation and protection of artwork. Here are key tips to help you make the best choice:
1. Measure Your Artwork Accurately
Start by measuring the dimensions of your artwork. Use a ruler or a measuring tape. Record the width, height, and, if needed, the depth of the piece. These measurements are the foundation for finding the right frame size.
2. Consider the Type of Artwork
Determine if your artwork or photograph requires a frame with a mat board. If it does, include space for the mat overlay in your calculations. Choose a frame size that accommodates both the mat and the artwork comfortably.
3. Decide on Frame Depth
Think about the components of your setup, like glass, artwork, and backing. Ensure the frame depth is adequate to hold everything securely. For thicker items, select a frame with a deeper rabbet.
4. Match the Frame to Your Style
Analyze the design and color of your artwork. Choose a frame style that complements it. Frames come in various materials, colors, and designs. Simplistic frames work well for detailed artwork, while ornate frames suit bold, simple designs.
5. Leave Room for Borders or Mats
Frames often look better with a small border around the artwork. Allow space for a mat if one is used. The mat adds depth and separation between the glass and the artwork.
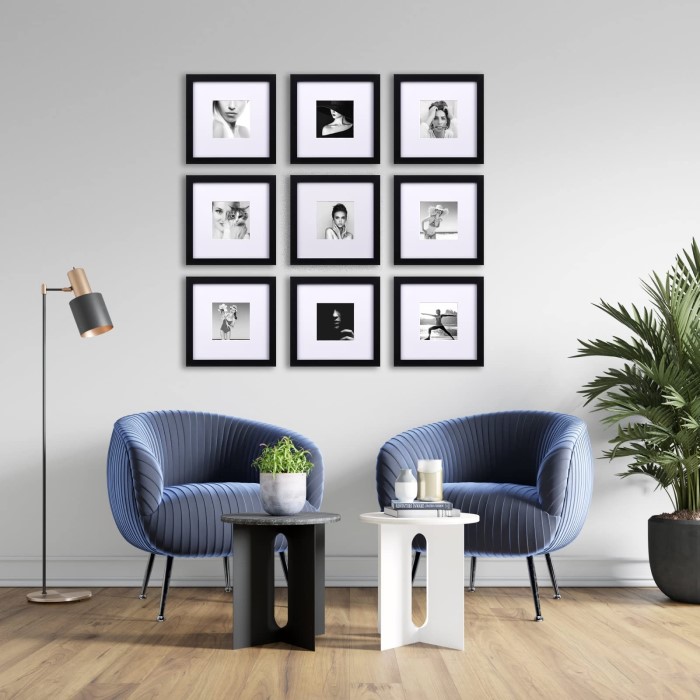
6. Account for Placement Location
Consider where the frame will be displayed. Larger spaces require bigger frames, while smaller spaces suit smaller ones. Make sure the frame size doesn’t overwhelm the display area.
7. Be Mindful of Standard Sizes
Using standard frame sizes often saves time and reduces costs. They are more accessible and don’t require custom framing. Check if your artwork fits within a standard frame size.
8. Seek Professional Advice
When in doubt, consult a professional framer. They can guide you to the perfect frame size and style. Professionals also help ensure your artwork is properly protected.
By using these tips, you can choose a frame that fits your artwork perfectly. Knowing “how to measure picture frame size” is key to a visually appealing and secure display.
Conclusion: Achieving Precision in Picture Frame Measurements
Understanding how to measure picture frame size accurately is essential for anyone wanting to display their artwork beautifully. Using the right tools and following structured steps can help you achieve the perfect fit. By acknowledging common mistakes and considering frame selection seriously, you can elevate the presentation of your art.
Whether you choose to explore ready-made frames or engage in custom framing, accuracy in measurement is indispensable. With the knowledge from this guide, you’ll be prepared to frame your pictures with confidence and precision. So, gather your tools, measure with care, and enjoy the satisfaction that comes from beautifully displayed artwork!