What is a DIY Storage Ottoman?
A DIY storage ottoman is a multifunctional furniture piece with built-in storage. It combines the practicality of extra storage space and the comfort of an upholstered seat. These ottomans are perfect for reducing clutter while enhancing room decor. Unlike store-bought options, DIY storage ottomans can be customized to fit your style and needs.
You can use them in living rooms, bedrooms, or entryways to organize items. They are ideal for storing books, blankets, toys, and more. With the DIY approach, you have control over the materials, size, and design of the furniture. This makes it a great project for both beginners and experienced DIY enthusiasts.
DIY storage ottomans are budget-friendly and can be made using basic tools and materials. Personalizing the design not only adds function but also gives your home a unique touch.
Benefits of Having a DIY Storage Ottoman
A DIY storage ottoman offers numerous benefits that enhance both functionality and aesthetics in your home. Here’s why you should consider making one:
1. Extra Storage Space
- A DIY storage ottoman helps reduce clutter by providing hidden storage.
- You can store blankets, books, toys, or seasonal items inside the compartment.
- It keeps your space organized and clean while utilizing unused areas efficiently.
2. Multifunctionality
- It works as a seat, footrest, or even a coffee table.
- A DIY option allows you to design an ottoman that matches your specific needs.
- Its dual-purpose nature saves space, especially in smaller rooms.
3. Custom Design
- You can personalize the ottoman to suit your room’s style and color scheme.
- Choose materials, fabrics, and finishes that complement your décor.
- A custom look adds a unique and personal touch to your furniture.
4. Cost-Effective Solution
- Building a DIY storage ottoman is often cheaper than buying one.
- You can source materials locally or repurpose items you already own.
- It’s an affordable way to create stylish and practical furniture.
5. Easy to Make
- Making a DIY storage ottoman doesn’t require advanced skills.
- Basic tools and simple instructions are all you need to complete the project.
- It’s a rewarding activity for beginners and seasoned DIYers alike.
Adding a DIY storage ottoman to your home is a practical and stylish choice. Beyond its functionality, it reflects your creativity and effort. Start building one to enjoy a clutter-free, beautifully designed space!
Materials and Tools You’ll Need
Before building a DIY storage ottoman, gather all necessary supplies and equipment. Having the right materials and tools will make the process smooth and enjoyable. Here’s a list to help you get started:
Materials
Plywood or MDF:
-
- These materials will serve as the primary components for the ottoman’s frame and base.
- Plywood is known for its strength and durability, while MDF (Medium Density Fiberboard) provides a smooth surface that is easy to paint or finish.
- Both materials can be cut to specific dimensions to create a sturdy structure that can support weight.
Foam or Padding:
-
- To ensure comfortable seating on the lid, use high-quality foam or cushioning materials.
- The thickness and density of the foam can significantly affect the comfort level, so consider selecting a medium to high-density foam for optimal support.
- Padding can also help to soften the edges and provide a more inviting look.
Fabric or Upholstery Material:
-
- Choose a fabric that complements your room’s decor for a cohesive design.
- Consider factors such as color, texture, and durability when selecting the upholstery.
- Popular options include cotton, linen, or synthetic blends that are easy to clean and maintain.
Hinges:
-
- Purchase durable hinges that can securely attach the lid to the frame of the ottoman.
- Look for hinges designed for heavy use, ensuring they allow for smooth opening and closing of the lid.
- Consider using inset or concealed hinges for a cleaner look.
Wood Screws and Nails:
-
- These fasteners will be essential for assembling the frame and creating the storage compartment within the ottoman.
- Opt for screws that are appropriately sized for the thickness of your materials and provide a secure hold.
- Nails can be used for additional support, particularly when attaching the base and sides together.
Wood Glue:
-
- Applying wood glue at the joints will reinforce the construction and add stability to the ottoman.
- Choose a high-quality wood glue that dries clear and is suitable for bonding different types of wood materials.
- Allow the glue to set properly before moving the assembled pieces to ensure a strong bond.
Paint or Stain:
-
- To achieve a polished look for the wood surfaces, consider applying either paint or stain as a finishing touch.
- Paint can provide a vibrant look while staining enhances the natural grain of the wood.
- Whichever option you choose, make sure to apply a protective sealer afterward to increase durability and enhance longevity.
Tools
- Saw – A circular or hand saw is essential for cutting the wood.
- Measuring Tape – To ensure accurate dimensions and cuts.
- Screwdriver or Drill – For attaching the screws and hinges.
- Staple Gun – To secure the fabric or upholstery.
- Sandpaper or Sander – To smooth the wood surfaces and edges.
- Pencil and Ruler – For marking measurements and cutting points.
- Clamps – To hold the pieces firmly while assembling.
Having these materials and tools ready ensures efficient workflow. Double-check before starting the DIY project to avoid interruptions. Using quality materials will improve durability and give your DIY storage ottoman a professional finish.
Step-by-Step Guide
Follow these steps to create your DIY storage ottoman. Each step ensures a smooth and efficient process.
Choosing the Right Design and Dimensions
- Measure the area where you’ll place the ottoman to determine its size.
- Decide on the ottoman’s function: seat, footrest, or table.
- Sketch a basic design that fits your room’s style and needs.
- Select materials based on your budget and desired durability.
Preparing and Cutting the Materials
- Use a measuring tape to mark dimensions on the plywood or MDF.
- Cut the wood pieces with a saw to match your sketch.
- Check that all pieces fit together before assembly.
- Sand the edges until smooth.
Assembling the Ottoman Frame
- Lay out the wooden pieces for the base and sides.
- Use wood glue to hold pieces together temporarily.
- Secure with screws or nails for a sturdy frame.
- Clamp the frame tightly while the glue dries.
Adding the Storage Compartment
- Attach interior braces to support the storage area.
- Securely fasten the bottom piece to the frame.
- Test the storage compartment’s strength by applying light pressure.
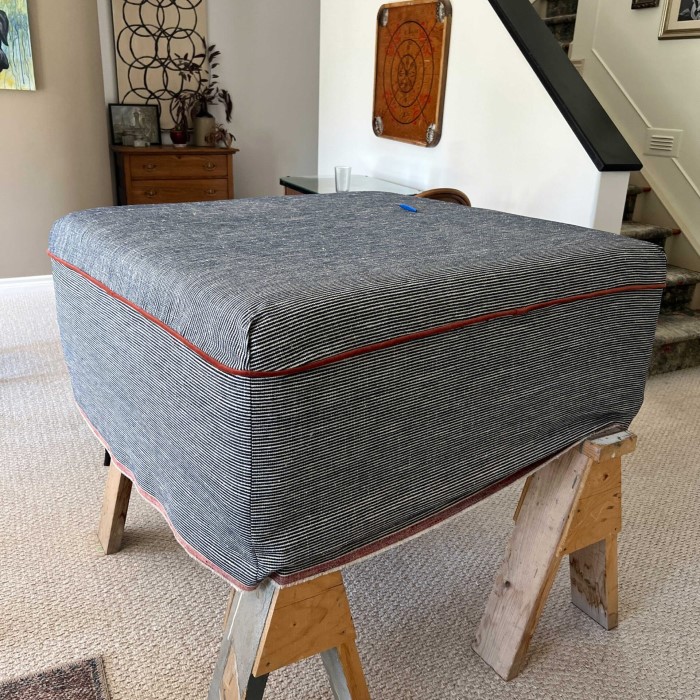
Creating and Attaching the Upholstered Lid
- Cut foam or padding to fit the lid dimensions.
- Wrap foam with your chosen fabric and staple it underneath the lid.
- Install hinges to the lid and frame for smooth opening.
- Test the lid by opening and closing it several times.
Following this guide ensures a functional and stylish DIY storage ottoman. Adjust steps based on your design choice.
Creative Design Ideas for DIY Storage Ottomans
Unleash your creativity when designing a DIY storage ottoman. The options are limitless. Here are some inspiring ideas to personalize your ottoman:
1. Vibrant Fabric Choices
- Use bold patterns or bright colors for your upholstery.
- Match the fabric with your room’s accent pieces.
- Add removable covers for easy cleaning and seasonal changes.
2. Unique Materials
- Repurpose old wooden crates or pallets for a rustic look.
- Choose sleek metal sheets for a modern aesthetic.
- Integrate glass panels or mirrors for chic, reflective surfaces.
3. Decorative Finishes
- Paint the ottoman base with trendy colors like navy blue or emerald green.
- Add wood stains for a warm and natural finish.
- Use metallic paint for a luxurious touch.
4. Functional Enhancements
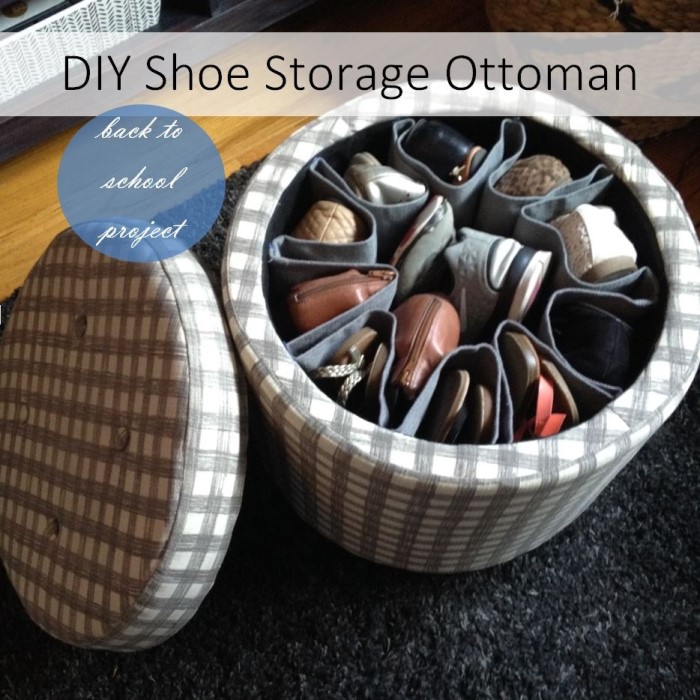
- Include dividers inside for better item organization.
- Design a pull-out drawer for easy access to stored items.
- Incorporate wheels for mobility within your home.
5. Shape Variations
- Experiment with square, rectangular, or even round ottoman designs.
- Add curved edges for a softer and more dynamic appearance.
- Create a multi-tiered structure for added storage space.
6. Personalized Decor
- Embroider initials or patterns onto the upholstery.
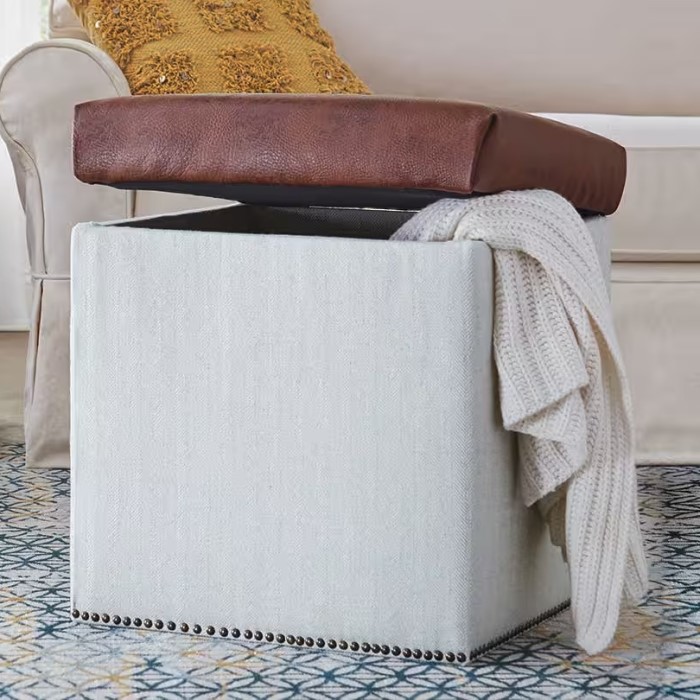
- Attach unique handles to the lid, like leather straps or wooden knobs.
- Adorn your ottoman with decorative studs, buttons, or tassels.
These ideas can give your DIY storage ottoman style and function. Tailor the design to your taste and needs. Let it be a standout piece in your space!
Tips and Tricks for a Professional Finish
Elevate your DIY storage ottoman by using these smart techniques. They ensure durability and a polished look.
1. Prioritize Precise Measurements
- Measure twice, cut once to ensure perfect dimensions.
- Double-check all markings before cutting any materials.
- Use a straight ruler for consistent, accurate lines.
2. Use High-Quality Materials
- Invest in sturdy plywood or MDF for strength.
- Choose durable fabric or upholstery for long-lasting appeal.
- Opt for rust-resistant hinges to avoid wear and tear.
3. Sand Thoroughly
- Smooth all wood surfaces before assembly.
- Focus on edges to avoid splinters and sharp corners.
- Sand between coats of paint for a refined finish.
4. Apply Paint or Stain Properly
- Use a primer for even paint application.
- Opt for multiple thin coats rather than one thick coat.
- Allow paint to dry completely between layers.
5. Secure Upholstery Tightly
- Stretch fabric firmly before stapling it to the lid.
- Space staples evenly for a neat appearance.
- Trim excess fabric for clean edges.
6. Test Hinges and Assembly
- Open and close the lid multiple times to ensure smooth motion.
- Check the sturdiness of each frame connection.
- Reinforce weak areas with extra screws or glue.
7. Add Protective Features
- Use felt pads under the ottoman to protect floors.
- Seal wooden surfaces with a clear finish to guard against moisture.
- Incorporate child safety locks if needed.
Achieving a professional finish requires attention to detail and care. These tips will make your DIY storage ottoman stylish and functional.
Common Mistakes to Avoid
Creating a DIY storage ottoman can be a fun and rewarding project. However, avoiding common mistakes is essential for a successful outcome. Here are some pitfalls to watch out for:
1. Incorrect Measurements
- Failing to measure properly can result in mismatched pieces and wasted materials.
- Always double-check measurements before marking or cutting.
- Ensure parts fit together perfectly to avoid uneven assembly.
2. Using Low-Quality Materials
- Cheap materials can compromise the ottoman’s durability.
- Invest in sturdy wood and long-lasting upholstery.
- Prioritize hinges and screws made of rust-resistant metal.
3. Neglecting Edges and Surfaces
- Rough edges can cause splinters or damage upholstery.
- Always sand surfaces and edges until smooth.
- Paint or stain evenly to maintain a polished look.
4. Poor Assembly Techniques
- Weak joints can cause the ottoman to collapse or break.
- Use clamps to hold pieces steady during assembly.
- Reinforce connections with glue in addition to screws.
5. Overlooking Lid Functionality
- A poorly attached lid may not open smoothly.
- Test hinges before final installation to ensure proper motion.
- Adjust and secure hinges tightly for long-term reliability.
6. Overstuffing the Storage Compartment
- Overloading can damage the frame or lid.
- Store only lightweight and appropriate-sized items.
- Avoid forcefully stuffing the compartment to maintain its structure.
7. Ignoring Aesthetic Balance
- Over-decorating can make the ottoman look cluttered.
- Match colors and design elements with your room’s theme.
- Keep embellishments simple and cohesive.
Avoiding these mistakes will ensure your DIY storage ottoman is both functional and stylish. Paying attention to details will make your project a success.
Conclusion: Your New Favorite Family Project
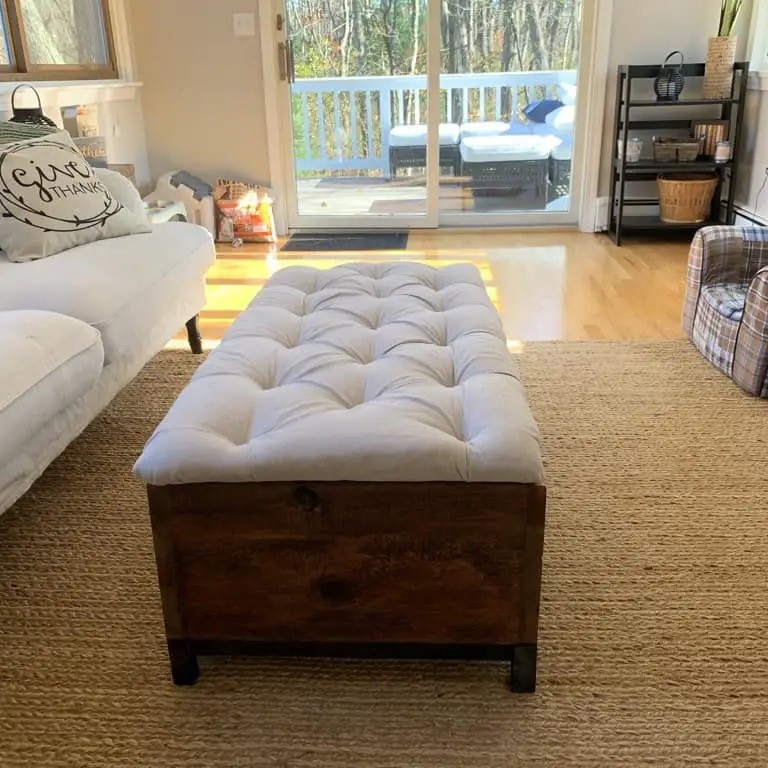
Creating a diy storage ottoman is a project that brings both functionality and aesthetic appeal to your home. Not only do you end up with a practical storage solution, but you also gain a piece of furniture made with love and creativity. This project allows family members of all ages to participate, making it a wonderful bonding activity that fosters collaboration and creativity.
Whether you need extra seating, a coffee table, or a place to store your blankets and books, a DIY storage ottoman is an excellent addition to any space. Remember, it’s not just about the end product—it’s about the memories created during the process! So gather your family, unleash your creativity, and start building your very own DIY storage ottoman today.