Introduction: Importance of a DIY Cat Scratching Post
Cats are natural scratchers; they use their claws to mark territory, stretch their muscles, and remove dead outer layers. This behavior is instinctual; providing a designated scratching post is essential for your furry friend’s well-being. A DIY cat scratching post not only helps satisfy these scratching urges but also protects your furniture from damage. Each cat has unique preferences, and understanding them can help you craft a scratching post that fits seamlessly into your home and lifestyle.
Imagine creating a beautiful, functional piece of furniture that resonates well with your décor while giving your cat a perfect place to scratch. Rather than purchasing a standard post from a store, crafting your own offers unique designs tailored to both your cat’s preferences and your interior’s style. In this article, we will explore creative ideas, materials, and step-by-step instructions to make your own scratching post that your kitty will adore. Let’s dive into the world of DIY cat furniture and see how you can enhance your home while keeping your feline happy.
Benefits of Creating a DIY Cat Scratching Post
Before diving into the crafting process, it is essential to understand the advantages of creating a DIY cat scratching post. Here are some compelling reasons to consider making one for your feline companion:
- Customization: Crafting a scratching post allows you to customize the height, design, and size to suit your cat’s needs and preferences. Whether your cat likes to stretch high or scratch low, building your own ensures it perfectly fits its habits.
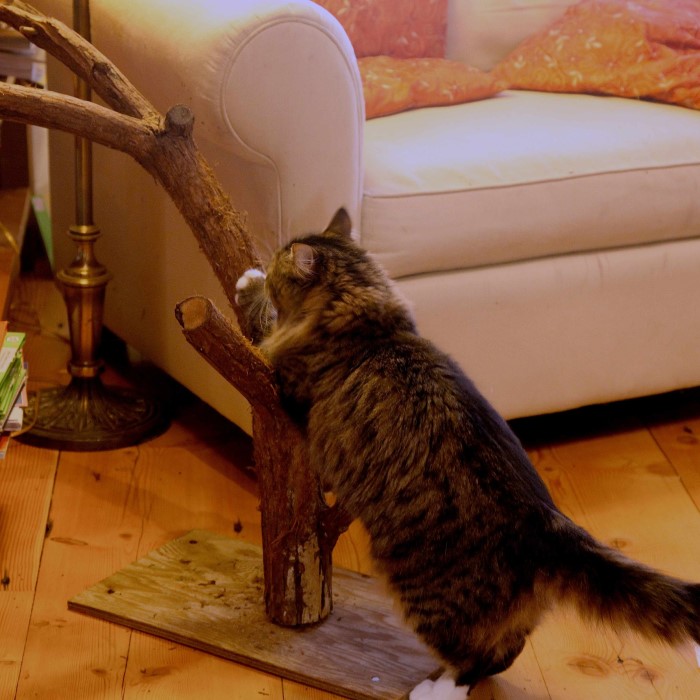
- Materials Choice: You have full control over the materials used when making your scratching post. You can choose from natural products like sisal rope, carpet remnants, or even cardboard. This bubble of creativity allows you to design something that aligns with both your cat’s preferences and your home aesthetics.
- Cost-Effective: Building your own scratching post can be budget-friendly compared to purchasing one from a store, especially since many people have leftover materials from previous projects. Accessing repurposed materials helps reduce costs while still creating a functional product.
- Engagement and Fun: Crafting a scratching post can be an enjoyable project for both you and your family. You can create quality time with your children in the process, teaching them about taking care of pets while bonding through a creative activity.
- Durability: A well-constructed DIY scratching post can last longer than many flimsy store-bought models. You decide the quality of the materials; thus, you can create something that withstands prolonged use and abuse from your favorite feline.
- Aesthetic Appeal: Unlike many mass-produced scratching posts that clash with home decor, you can create a scratching post that blends seamlessly into your design scheme. Choose colors and styles that match your home, and you have a stylish addition visually.
- Environmental Benefits: By making your own scraping post with recycled or sustainable materials, you contribute to reducing environmental waste. This eco-friendly approach aligns with many modern consumers’ values, making your cat’s furniture more meaningful.
With all these benefits in mind, let’s explore the steps required to make your very own DIY cat scratching post.
Materials You Will Need
When crafting a DIY cat scratching post, having the right materials is crucial to ensure stability and functionality. Here’s a list of items you might need:
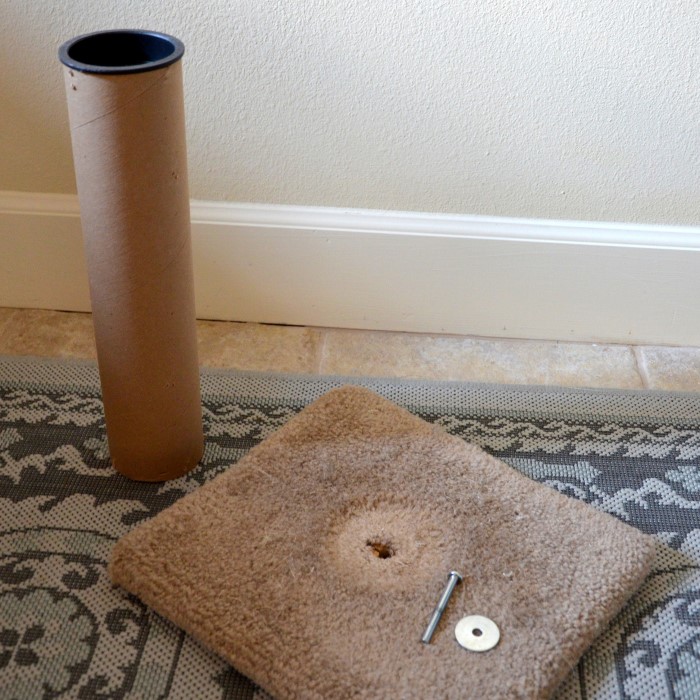
- Base: A solid, sturdy base is essential for stability. You can use plywood boards, a thick piece of wood, or even a heavy cardboard sheet. The base should be large and heavy enough to prevent tipping during use. Typically, a size of about 18”x18” is a good starting point.
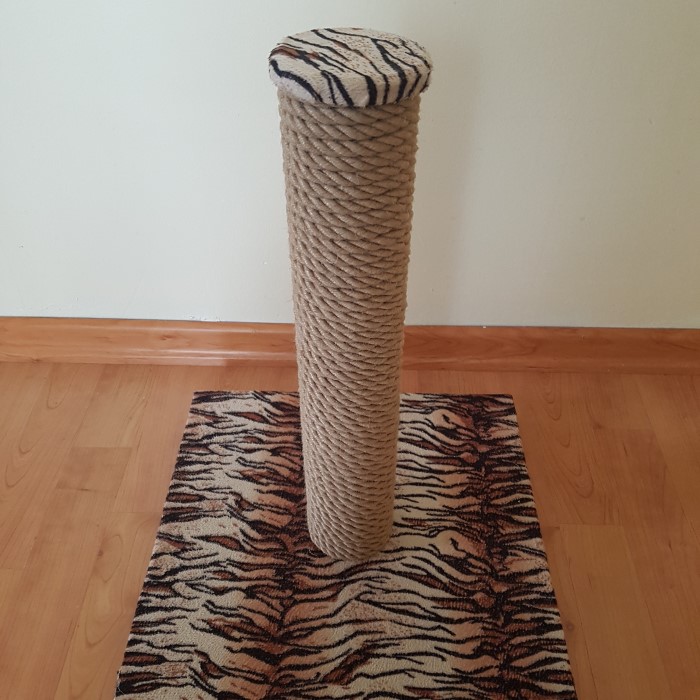
- Vertical Post: For the main scratching section, you can use a wooden dowel, a PVC pipe, or a sturdy cardboard tube. The height should accommodate your cat’s scratch-and-stretch habits, generally between 24” to 36”.
- Sisal Rope or Carpet: Sisal rope is a popular choice for covering the pole since it is durable and perfect for scratching. Alternatively, heavy-duty carpet remnants, natural fibers, or more environmentally friendly materials like jute can be used as alternatives.
- Adhesives: Strong adhesive glue is necessary for securing materials together. Hot glue, wood glue, or a strong bonding adhesive suitable for fabric can work effectively.
- Optional: Decor Items: Depending on your design, you may want to personalize the scratching post. This could involve paint, fabric, or other decorative elements to align the post with your home décor.
Step-by-Step Guide to Making a DIY Cat Scratching Post
Now that you have your materials ready, it’s time to craft your own DIY cat scratching post. Here’s a straightforward step-by-step guide:
- Create the Base: Start by cutting your plywood or heavy board into a square or rectangular shape. The size should be proportionate to the height of your scratching post. Sand the edges to avoid splinters and ensure safety for your cat.
- Prepare the Staking Post: Take your vertical post and measure the desired height based on your cat’s preferences. The common height ranges between 24 to 36 inches. Cut the post accordingly, and if you are using a cardboard tube, reinforce its strength with additional layers of sturdy cardboard.
- Wrap the Post: Beginning at the base, secure one end of the sisal rope, carpet, or chosen material. Use adhesive to stick it firmly in place. Start wrapping it tightly around the post. Ensure there are no gaps between the wraps, creating a solid scratching surface.
- Secure the Top: Once you reach near the top of the post, secure the end of the rope or material using glue. If using carpet, cut it to size and fold it over the top for a polished finish.
- Attach the Post to the Base: Once your post is prepared, it’s time to attach it to the base. Use wood glue or screws to secure the bottom end of the post to the center of the base. Ensure it is firmly attached to prevent any movement while your cat is using it.
- Add Decorative Elements: If desired, paint or decorate the base to match your home decor. This can include adding fabric coverings, embellishments, or toys to enhance the scratching post’s appeal.
- Final Check and Drying: Allow the glue to dry thoroughly before allowing your cat to use the scratching post. Check to ensure all parts are secure and stable, ensuring your cat’s safety during use.
- Introduce Your Cat: Once everything is dry, encourage your cat to use the new scratching post. You can entice them with catnip or toys to help them familiarize themselves with the new addition to their environment.
Creating your own DIY cat scratching post can be a rewarding experience for both you and your furry friend.
Frequently Asked Questions
What Can I Use for a Cat Scratching Post?
You can use materials like sisal rope, carpet remnants, cardboard, wood, or even fabric. Choose materials that are sturdy and able to withstand scratching to ensure durability.
What is an Alternative to Sisal Rope?
Alternatives to sisal rope include jute, carpet remnants, and fabrics that are suitable for scratching. Each material offers various textures for your cat, allowing them to satisfy their natural scratching instinct.
What Glue to Use for Cat Scratching Post DIY?
Use strong adhesive like wood glue or hot glue for assembling components. Ensure the glue is safe and non-toxic for pets. A good-quality adhesive guarantees that the materials stay secure, maintaining the post’s durability.
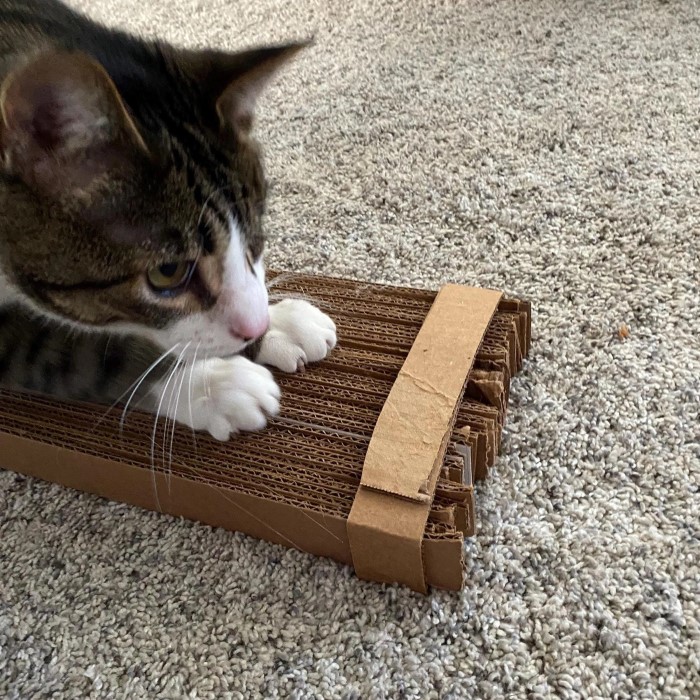
Is Cardboard a Good Scratching Post for Cats?
Yes, cardboard can be an excellent scratching option. Cats enjoy the texture. Cardboard can be easily shaped and crafted to create affordable and custom scratching surfaces. However, it may wear out faster than other materials.
Conclusion: Crafting a Unique Scratching Post for Your Cat
Creating a DIY cat scratching post is not just a cost-effective solution; it also allows for a unique design that resonates with your cat’s preferences and your home’s aesthetic. Providing a designated scratching area is vital for your cat’s well-being, and the benefits of doing so are numerous.
Not only does it protect your furniture, but it also contributes to your cat’s physical and mental health. So, why not take the plunge and craft a scratching post? After all, it can result in a delightful project that enhances both your home and your cat’s happiness. Embrace your creativity, and take the time to make a bespoke scratching post that your furry friend will enjoy. The joy of watching your cat scratch and stretch on a post you’ve crafted yourself is immensely rewarding. Enjoy your crafting experience, and cherish the moments of joy your cat will experience with their new scratching post!