


Introduction: Embrace the Serenity of Watercolors
In the hustle and bustle of daily life, finding moments of tranquility can feel like a rare luxury. Yet, nestled within the realm of art lies an inviting escape – the gentle art of watercolor painting. This beginner-friendly tutorial invites you to embark on a journey where strokes of color merge with the fluidity of water, creating a harmonious dance that breathes life into delicate flowers on paper. Whether you’re seeking a creative outlet or yearning to unwind, this easy flower watercolor painting guide is your ticket to a world of artistic bliss.
Materials: Gathering Your Tools
To begin our artistic voyage, it’s essential to gather the right tools. For this tutorial, you’ll need:
- Watercolor paper: Look for a pad with at least 140lb weight to prevent warping.
- Watercolor paints: A basic set with primary colors (red, blue, yellow) plus green is sufficient for beginners.
- Paintbrushes: A round brush of size 6 and a smaller one (size 2 or 3) for details.
- Water containers: One for clean water, another for rinsing.
- Pencil and eraser: For sketching out your design lightly.
- Paper towel or cloth: To blot excess moisture.
Sketching Simplified: Drawing Your Floral Outline
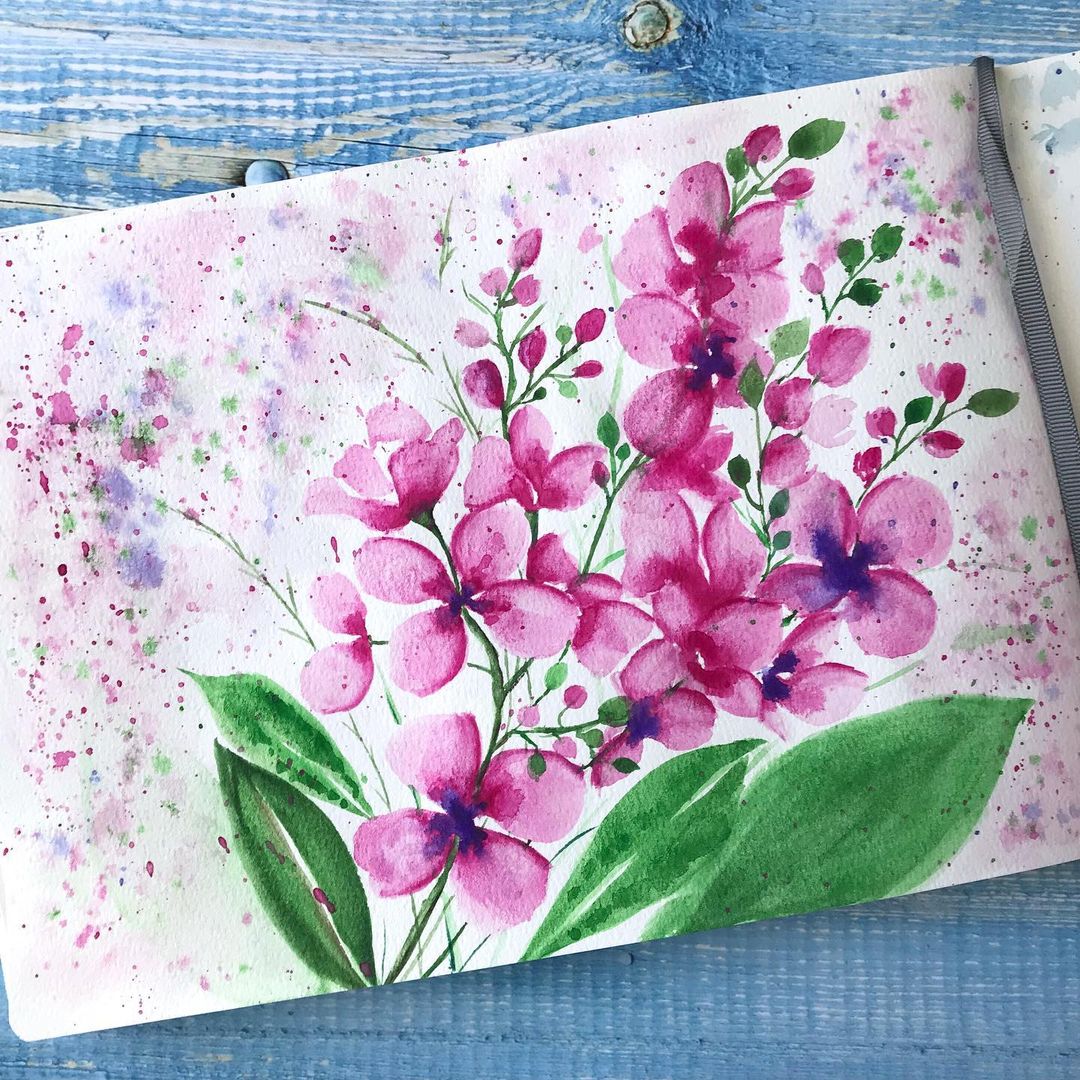
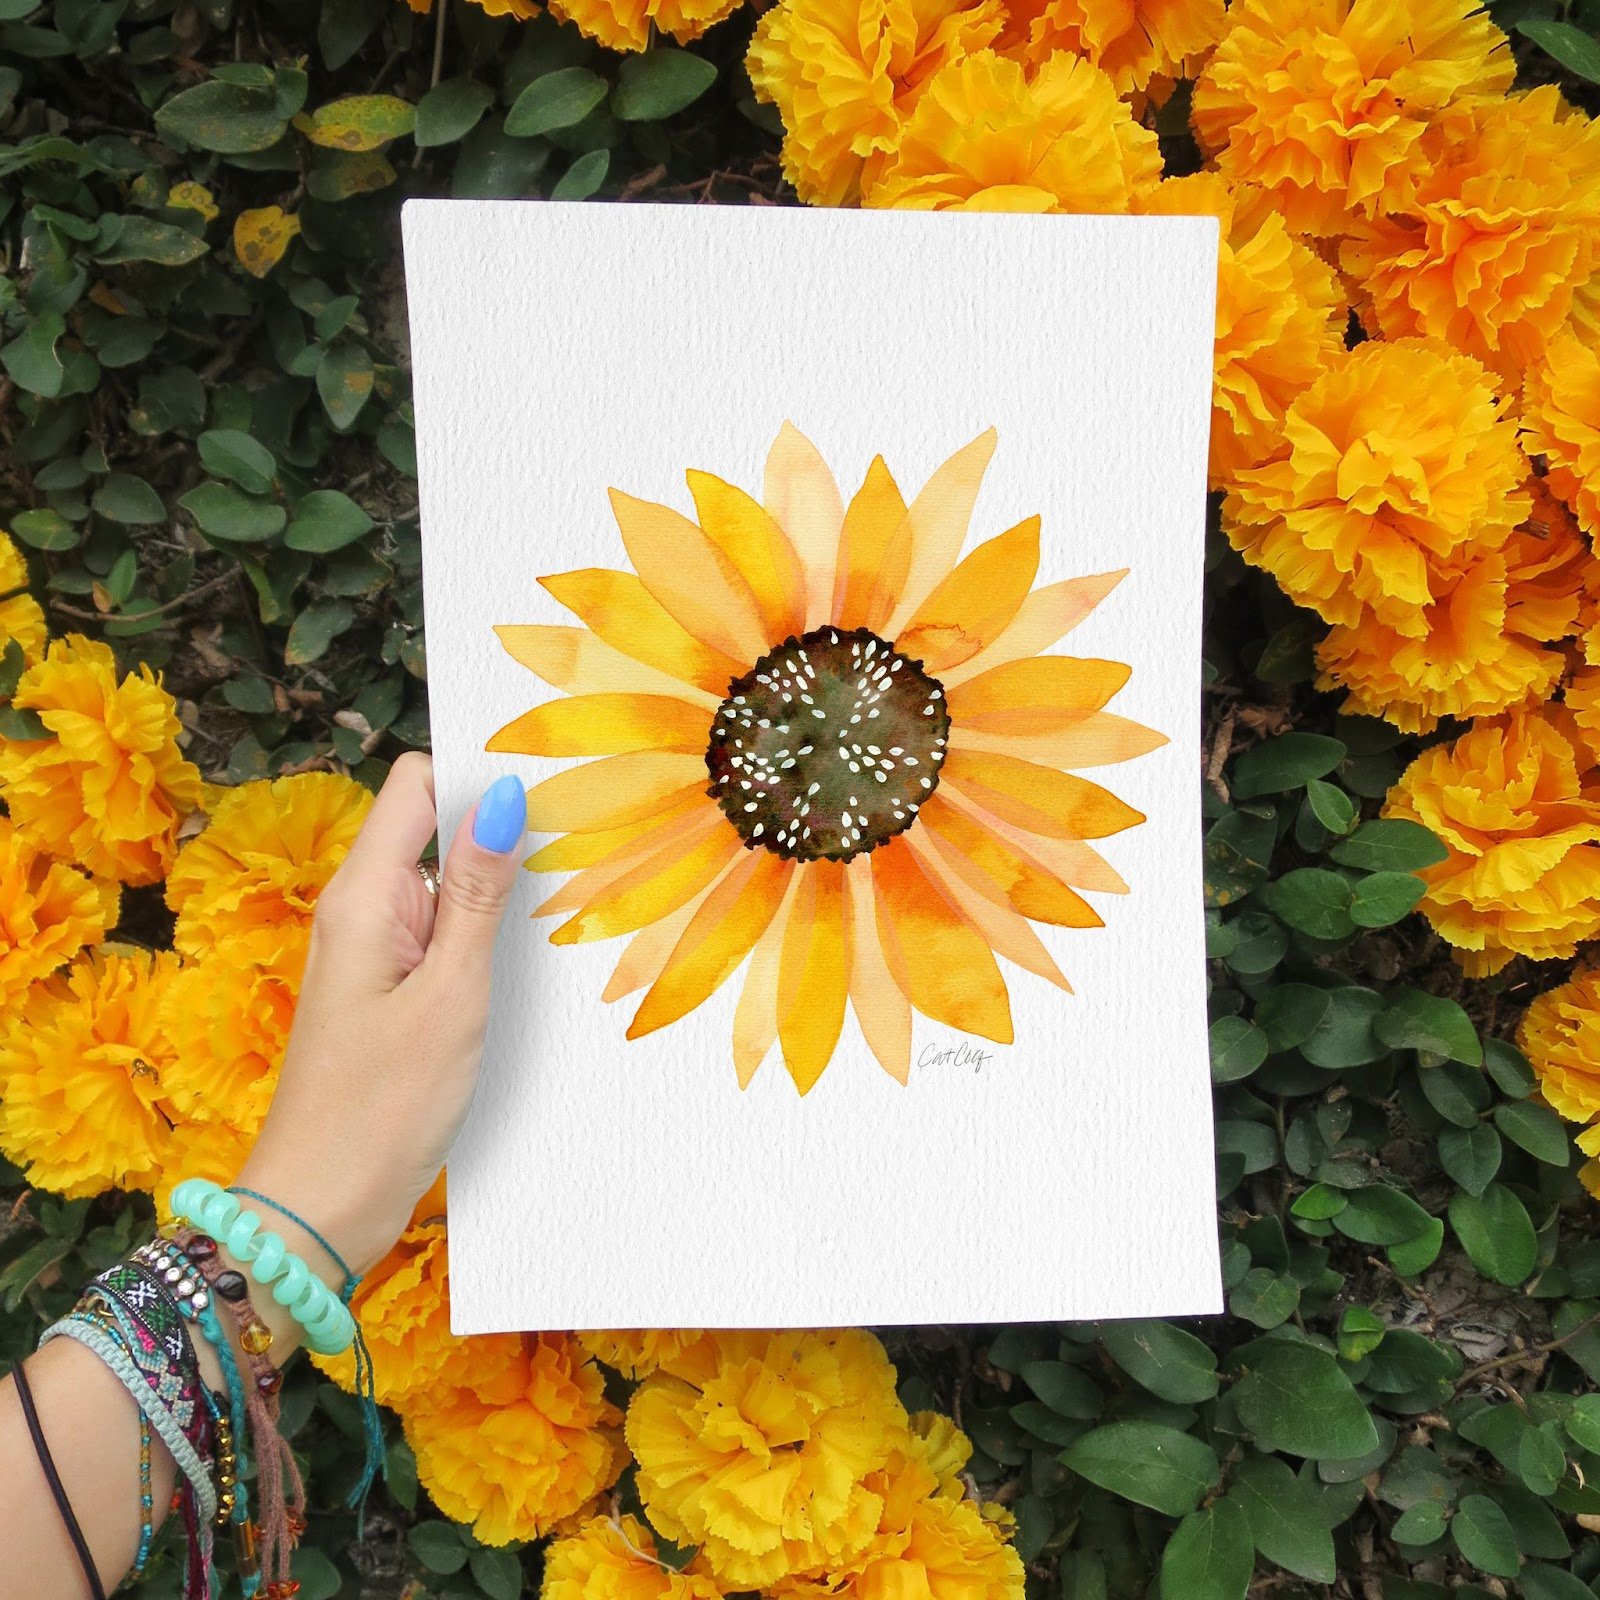
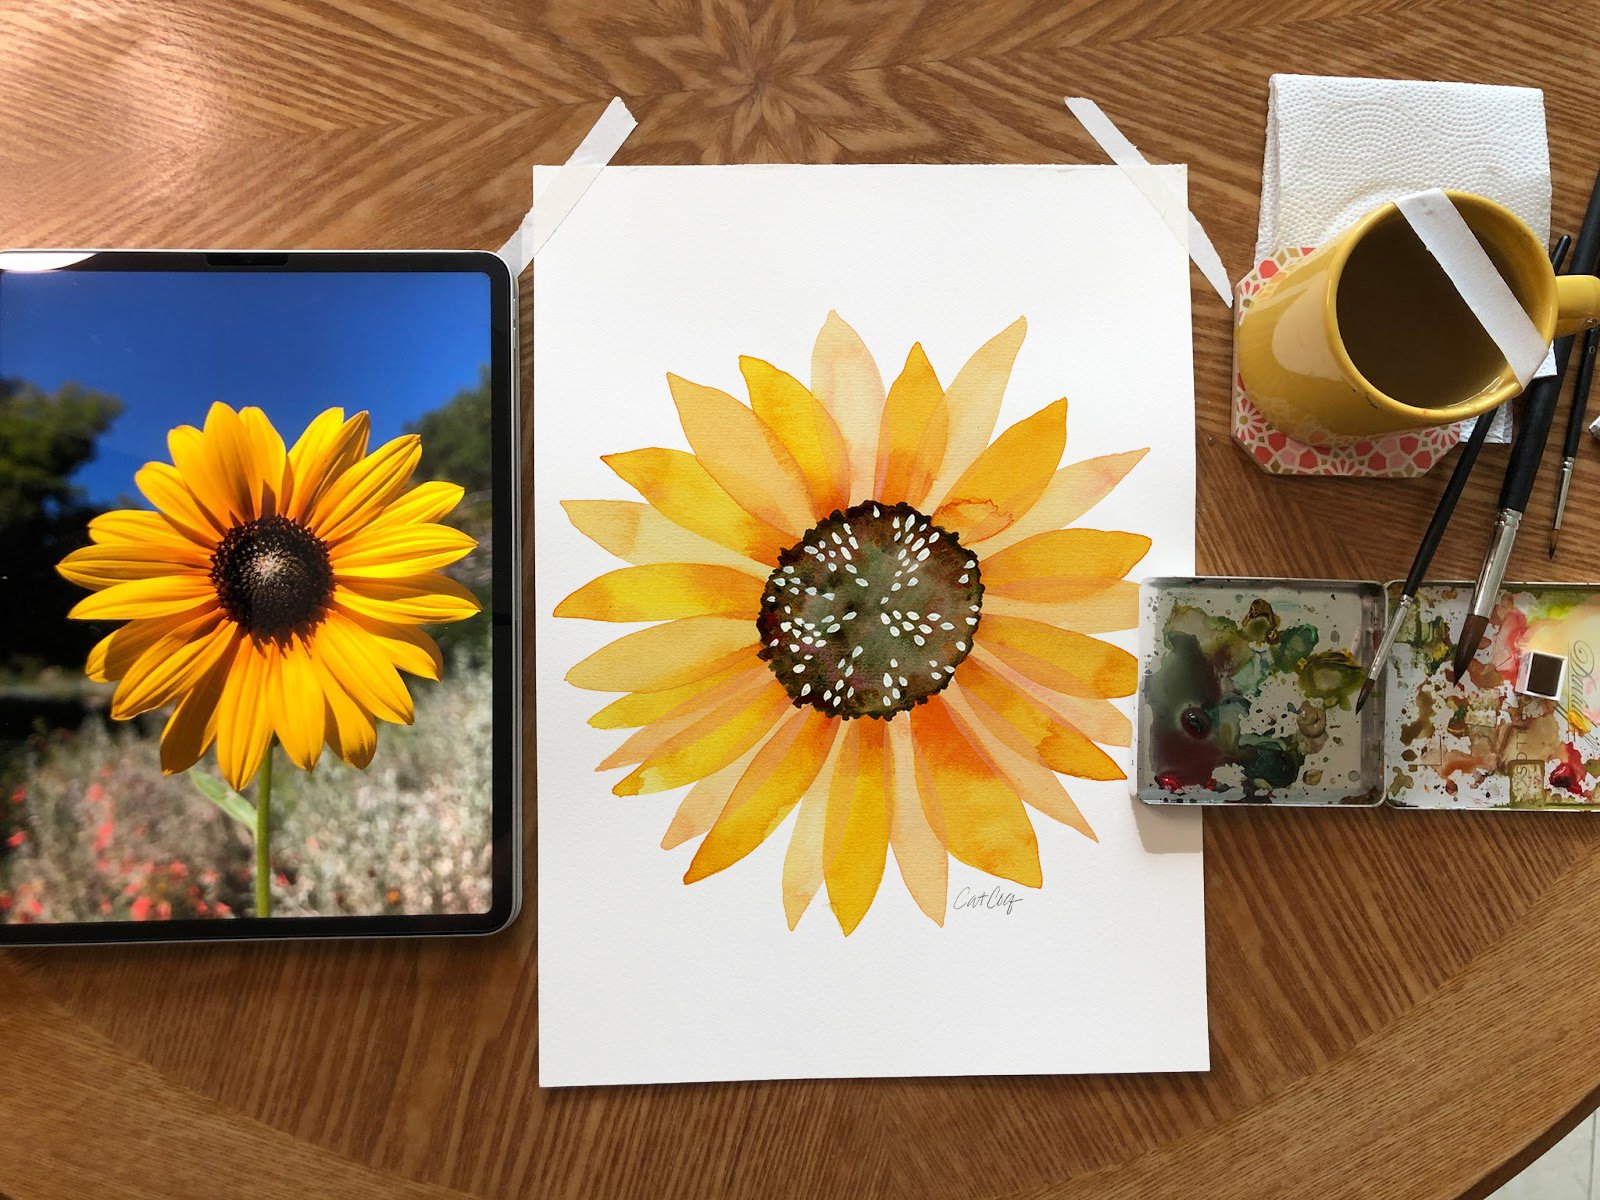
Before dipping your brush into paint, lightly sketch your floral design onto the paper. Choose a simple flower like a daisy or a cherry blossom – their forms are forgiving and perfect for beginners. Focus on capturing the basic shapes: circles for petals, a small center for the daisy, or a cluster for the cherry blossom. Remember, this is just a guide; don’t worry about perfection. The beauty of watercolors often lies in their organic, slightly imperfect nature.
Color Theory Basics: Understanding Your Palette
Watercolors have a unique transparency that allows light to pass through the pigment, creating a luminous effect. Start by mixing your primary colors to create secondary ones. For instance, mix red and yellow to get orange, blue and yellow for green, and blue and red for purple. Familiarize yourself with color blending; it will be crucial for achieving natural-looking shades in your flowers.
Techniques to Master: Wet-on-Dry vs. Wet-on-Wet
Two fundamental techniques in watercolor painting are wet-on-dry and wet-on-wet.
Wet-on-Dry
This technique involves applying paint onto dry paper, allowing for more control over the pigment. It’s great for outlines and adding details. Begin by loading your brush with a small amount of paint and practicing strokes on a scrap piece of paper.
Wet-on-Wet
For a softer, more fluid effect, wet the area of your paper where you want to paint with a clean brush, then apply the color. The paint will spread and blend naturally, ideal for creating soft petal edges or backgrounds.
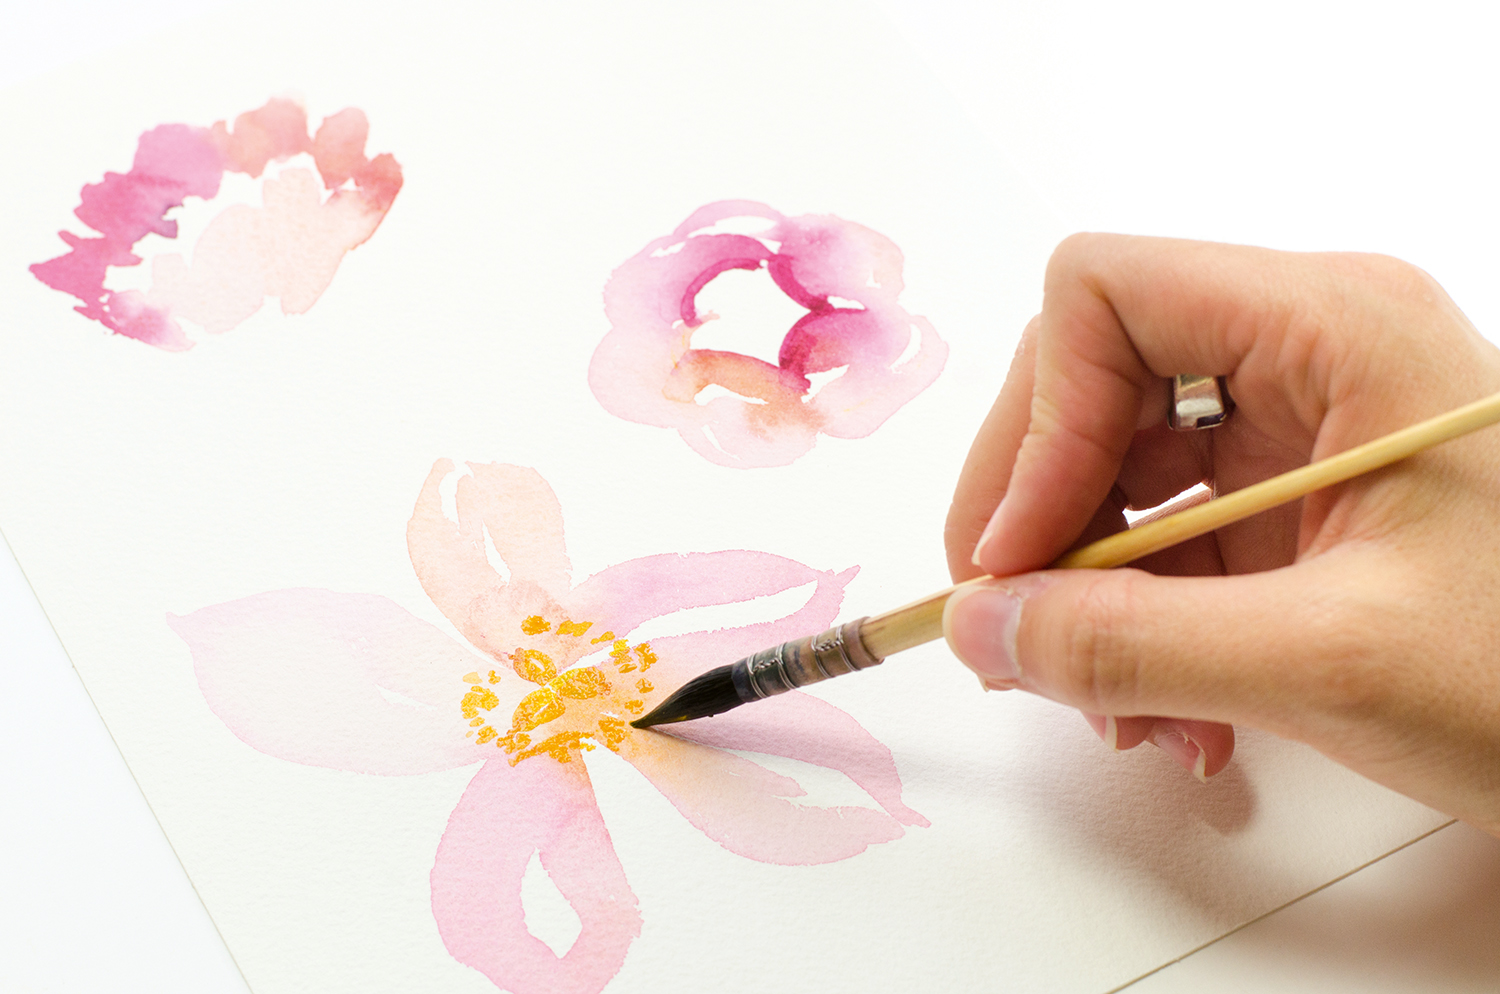
Let’s Paint: Daisy Delight
Step 1: Base Layers
Using the wet-on-dry technique, paint the petals with a light yellow. For the center, apply a warm brown or ochre. Allow each layer to dry before adding more color to build depth.
Step 2: Shading & Depth
With a slightly damp brush, add shadows to the petals using a pale orange or pink. For the center, deepen the color with more brown, leaving some white spaces for highlights. Remember, watercolor is about layering – patience yields beautiful results.
Step 3: Details & Finishing Touches
Using your smaller brush and a darker shade, outline the petals lightly to give them definition. You can also add a few speckles of green for leaves, using the wet-on-wet technique for a blended effect. Lastly, review your painting and make any final touch-ups.
Cherry Blossom Bliss
Step 1: Blooming Branch
Sketch a slender branch with pencil. Wet the branch area and paint it with a mix of brown and Payne’s gray. While the branch is still damp, add some pink for the blossoms using the wet-on-wet technique.
Step 2: Petal Prettiness
Once the base layer is dry, use a lighter pink to add highlights to the petals. Create depth by adding a touch of purple or red to the shadow areas.
Step 3: Ethereal Effects
Spritz a bit of water over the painted blossoms with a spray bottle, then blot gently with a tissue to create a soft, dreamy effect. Finish by outlining the petals lightly with a darker shade for definition.
Embracing Imperfections: The Beauty of Watercolors
Remember, every stroke, every accidental blend, contributes to the unique character of your painting. Watercolors often have a mind of their own, but that’s part of their allure. Don’t fret over mistakes; instead, see them as opportunities for creative exploration.
Landscape Serenity: A Mountain Sunset
Materials Addition
For this project, you’ll need additional colors in your palette such as Payne’s Gray, Ultramarine Blue, Burnt Sienna, and Alizarin Crimson.
Step 1: Sky and Horizon
Begin with a wet-on-wet technique for the sky. Wet the top two-thirds of your paper, then blend Ultramarine Blue at the top, fading into Alizarin Crimson towards the horizon. Let the colors naturally mix and create a gradient. While the paper is still damp, add a touch of Payne’s Gray at the horizon line to suggest mountains.
Step 2: Mountain Silhouettes
Once the sky is dry, paint the mountain range using a mix of Ultramarine Blue and Burnt Sienna, working wet-on-dry for more control. Vary the tone to suggest depth and distance. Remember, mountains in the distance should appear lighter and less defined.
Step 3: Foreground and Reflections
Use a darker mixture of your mountain colors to paint the foreground, indicating trees or rocks. Add a strip of water at the bottom, reflecting the sky’s colors using wet-on-wet. With a dry brush, suggest ripples or texture in the water.

Vibrant Still Life: Fruits in a Bowl
Additional Tools
For this project, ensure you have colors like Cadmium Red, Lemon Yellow, Sap Green, and Burnt Umber in your palette.
Step 1: Sketch and Base Colors
Lightly sketch the outline of the bowl and fruits with a pencil. Apply a base layer of colors to each fruit: red for apples, yellow for lemons, and green for grapes, using wet-on-dry for clarity.
Step 2: Shadows and Highlights
Mix your colors with a touch of Burnt Umber to create shadow tones. Paint these under and around the fruits, considering the light source. Use a clean, damp brush to lift out highlights where light directly hits the fruits, creating a sense of volume.
Step 3: Bowl and Background
Paint the bowl with a mix of Burnt Umber and Ultramarine Blue, adding shadows and highlights to suggest its shape and form. For the background, apply a light wash of a complementary color to the fruits, enhancing their vibrancy.
Conclusion: Your Artistic Journey Continues
Congratulations! You’ve taken the first steps in your watercolor adventure. As you continue to practice, experiment with different flowers, techniques, and color combinations. With each painting, you’ll not only refine your skills but also discover a deeper connection with this calming, meditative art form. Remember, the true joy of watercolor lies in the process – the journey of transforming simple brushstrokes into a blossoming masterpiece. So, keep painting, keep exploring, and let your creativity bloom.


