Introduction to Custom Picture Frames
Creating your own picture frames can be a fun, rewarding experience, especially when done with kids. How to make your own picture frame is not only a creative project but also a fantastic way to spend quality time together. In this blog post, we will explore various materials, step-by-step instructions, and innovative design ideas that are perfect for crafting with children.
Benefits of Making Your Own Frame
- Cost Efficiency: DIY frames are less expensive than store-bought ones. Crafting your own saves money.
- Creative Freedom: You design the frame style, color, and decorations to suit your preferences.
- Perfect Fit: Custom frames provide the perfect dimensions for your artwork or photo.
- Unique Results: Every frame you build is one-of-a-kind and reflects your creativity.
- Enhancing Skills: Building your own frame improves crafting abilities and woodworking skills.
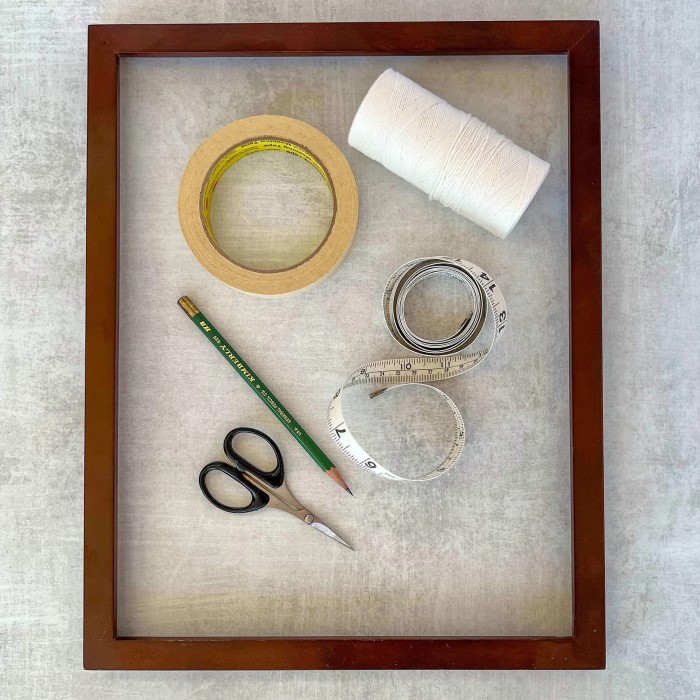
Materials Needed for Picture Frame Crafting
- Wood or Metal: Choose sturdy materials for durability and aesthetic appeal.
- Measuring Tools: Use a ruler and tape measure for precise dimensions.
- Saw and Cutting Tools: Ensure clean cuts for frame pieces.
- Glue and Fasteners: Securely join the frame pieces together.
- Sandpaper: Smooth rough edges for a polished finish.
- Paint, Stain, or Varnish: Customize the frame’s appearance as desired.
- Glass or Acrylic Sheet: Protect and cover the artwork.
- Backing Board: Support the artwork and hold it in place.
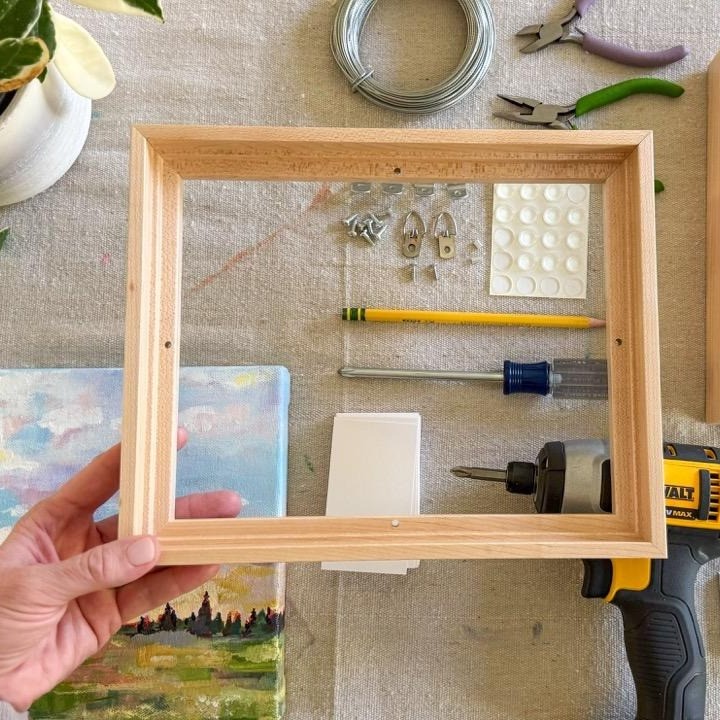
- Hardware: Install nails or clips to secure materials and hang the frame.
- Optional Decorations: Include beads, fabric, or other embellishments for an extra flair.
Making your own picture frame is a fulfilling craft project. With the right materials and planning, you can create a functional and attractive frame that meets your style and needs.
Planning Your Picture Frame Design
Careful planning makes crafting your picture frame easier and ensures the best design.
Choosing the Right Dimensions and Style
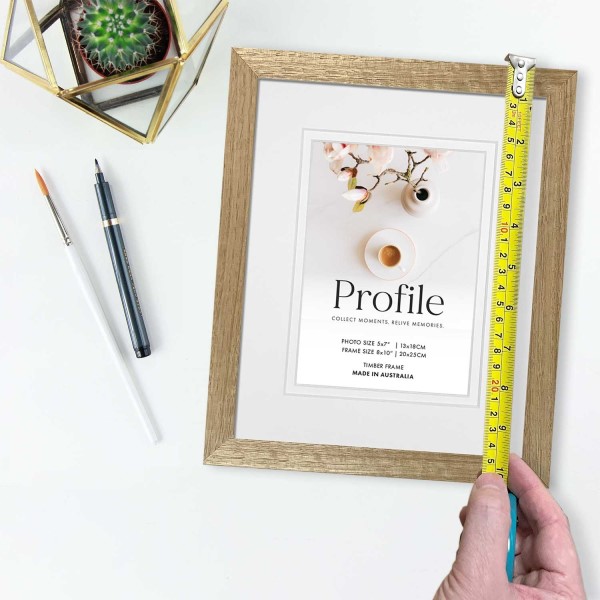
- Measure Your Artwork or Photo: Use accurate dimensions for a precise fit.
- Decide on Style: Match the frame style to your décor or artwork theme.
- Consider Thickness: Choose a width that complements your artwork’s proportions.
- Design Simplicity or Complexity: Select a clean look or intricate details based on preference.
- Choose Orientation: Determine if the frame will be landscape or portrait.
- Plan Additional Features: Include extra elements like a mat board or shadow box.
Selecting Materials for Durability and Aesthetics
- Wood Options: Choose hardwoods for strength or softwoods for easier crafting.
- Metal Choices: Opt for aluminum or steel for a modern finish.
- Backing Material: Pick sturdy plywood or MDF for support and stability.
- Glass or Acrylic: Decide between clear or non-reflective sheets for protection.
- Paint and Stain Preferences: Pick neutral or vibrant colors that highlight your artwork.
- Decorative Elements: Select beads, fabrics, or carvings for added elegance.
Plan your design carefully. Use quality materials to ensure a durable and beautiful frame.
Step-by-Step Guide to Building a Picture Frame
Creating your own picture frame is a straightforward process when broken into simple steps. Follow this guide to craft a frame that complements your artwork perfectly.
Measuring and Cutting Your Frame Pieces
- Measure the dimensions of your artwork or photo carefully.
- Add the desired size for the border if using a mat.
- Mark the measurements on the wood or metal you’ve chosen.
- Use a saw to cut the material into four precise pieces.
- Remember to cut the ends of the pieces at a 45-degree angle for proper joining.
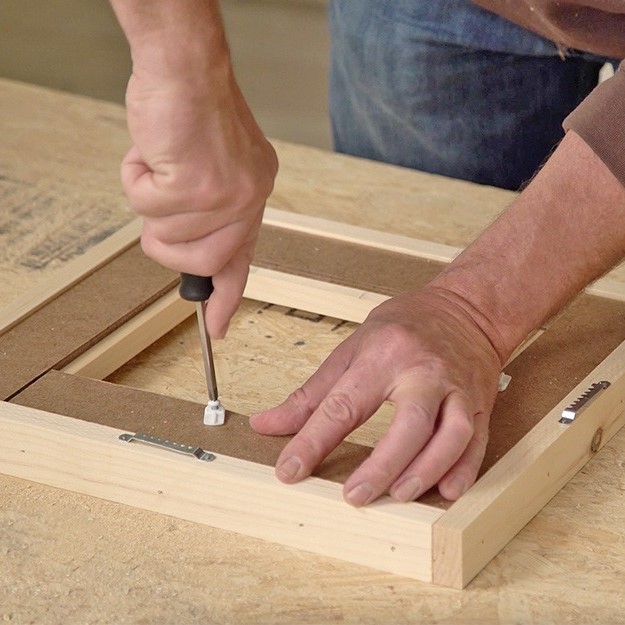
Assembling the Frame Structure
- Arrange the four frame pieces on a flat surface.
- Apply wood glue or metal adhesive to the angled joints.
- Securely clamp the corners together to allow the adhesive to set.
- Reinforce the joints with small nails, screws, or corner brackets for added stability.
Sanding and Smoothing Edges
- Sand the edges of the frame to remove splinters or rough areas.
- Focus on the corners to ensure they fit seamlessly.
- Wipe the frame with a clean cloth to remove dust from sanding.
Adding Finishing Touches and Decorations
- Paint or stain the frame to match your design preferences.
- Allow the paint or stain to dry completely before adding decorations.
- Attach embellishments like beads, fabric, or carvings for a unique look.
- Seal the frame with varnish or a protective finish to ensure durability.
By following these steps, you’ll learn how to make your own picture frame with ease. With proper measuring, cutting, and finishing techniques, you can create a stylish and sturdy frame for your cherished artwork or photos.
Techniques for Glass and Backing Installation
Installing glass and backing is a crucial step in building your own picture frame. These components safeguard your artwork, ensuring its longevity and presentation. Here’s a quick guide to help you get it right.
Preparing Glass for the Frame
- Measure the Glass Dimensions: Use the interior frame size to determine the glass dimensions.
- Cut the Glass: Carefully use a glass cutter to trim the glass to size. Safety goggles are essential.
- Smooth the Edges: Sand the edges of the glass gently to prevent any sharp points or splinters.
- Clean the Glass: Remove dust and fingerprints using a microfiber cloth and glass cleaner.
- Optional Non-Reflective Glass: For optimal viewing, consider using non-reflective or UV-protective glass.
Securing the Backing and Artwork
- Place Artwork First: Position your art or photo carefully on the backing material.
- Align Backing with the Frame: Ensure the backing board fits snugly within the frame dimensions.
- Fit the Glass Over Artwork: Position the cleaned glass on top of the photo or artwork.
- Secure the Backing: Use frame clips, tabs, or nails to fix the backing securely in place.
- Install Hanging Hardware: Attach sturdy hooks or a wire on the back for wall mounting.
Properly installing the glass and backing ensures that your artwork stays protected. Taking these steps enhances the overall appearance of your custom picture frame while adding years to its durability.
Creative Ideas for Decorating Your Picture Frame
Decorating your picture frame is a fun and creative way to make it unique. After building the basic frame structure, you have numerous options to enhance its appearance. Let your imagination run wild and customize your frame to match your style or home décor.
Painting and Staining Techniques
- Choose the Right Paint or Stain: Pick colors or stains that complement your artwork and home decor.
- Prepare the Frame: Sand the surface thoroughly for smooth paint or stain application.
- Prime the Surface: Use a primer, especially for bold colors or glossy finishes, to ensure adherence.
- Paint Evenly: Apply paint with smooth, even strokes using acrylic or chalk paint.
- Utilize a Stain: Enhance the wood grain’s natural look with a clear or colored wood stain.
- Layer Colors: For a unique effect, apply multiple colors or finishes, such as distressed or ombre designs.
- Dry and Seal: Let the paint or stain dry completely before adding a clear topcoat to protect it.
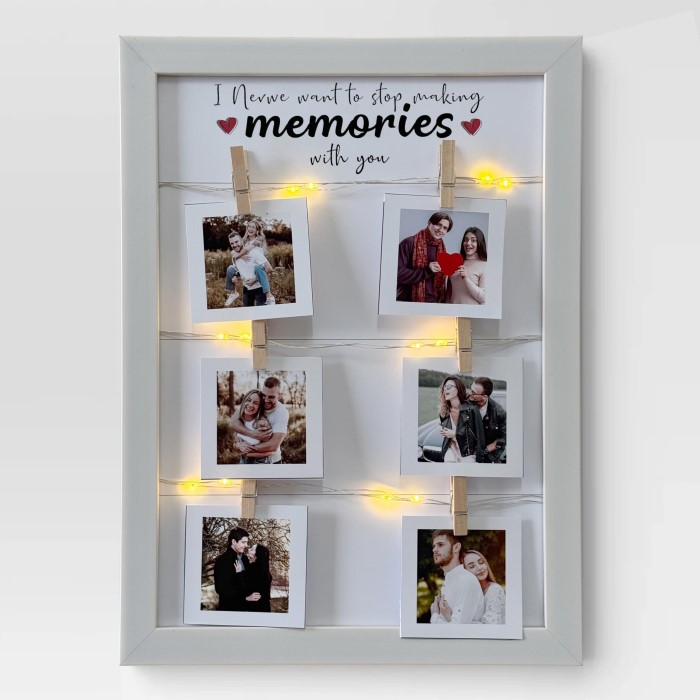
Adding Embellishments: Beads, Fabric, and Other Materials
Beads and Gems
- Add Sparkle: Glue beads or rhinestones along the edges of the frame to create dazzling highlights. This step enhances the frame’s overall appearance and attracts attention.
- Choose Various Sizes: Mix and match different sizes of beads and gems for visual interest. Larger stones can serve as focal points, while smaller beads can fill in spaces for a cohesive look.
Fabric Accents
- Wrap Colorful Fabric: Select vibrant or textured fabric and wrap it around the frame. This technique can offer a warm, inviting feel and create a unique aesthetic.
- Experiment with Patterns: Use different fabric patterns, such as floral, plaid, or polka dots, to match the photo’s theme or enhance the frame’s character.
Natural Embellishments
- Incorporate Natural Materials: Gather materials from nature, such as shells, pebbles, or dried flowers, to embellish the frame.
- Create a Rustic Touch: These natural elements can provide a rustic charm, making the frame suitable for beach or nature-themed photos.
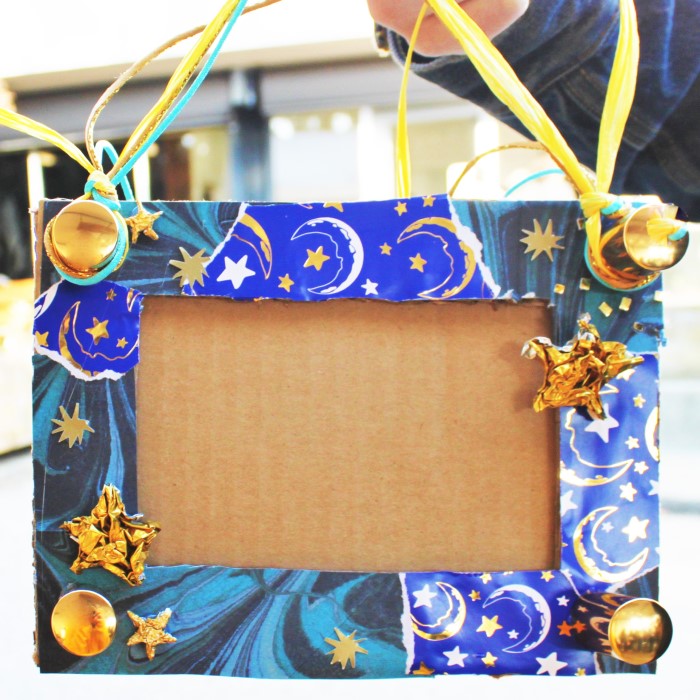
Stickers or Decals
- Use Adhesive Patterns: Decorate the frame with stickers or decals that reflect your chosen theme. This can include fun shapes, inspirational quotes, or seasonal designs.
- Easy Application: Stickers are easy to apply and change, making them a flexible option for personalizing your frame without much effort.
Ribbons or Twine
- Attach Decorative Elements: Use ribbons, lace, or natural twine to wrap around the frame or tie into bows. This addition can enhance the frame’s charm and give it a vintage appearance.
- Choose Appropriate Colors: Select colors and materials that complement the photo or other embellishments on the frame to create a cohesive design.
Personalized Engravings
- Add Meaningful Touches: Utilize a wood-burning tool to engrave unique designs, initials, or meaningful quotes onto the frame. This personalization can make the frame a cherished keepsake.
- Select a Design: Consider the message or decoration you want to include and practice on a scrap piece of wood before applying it to the actual frame.
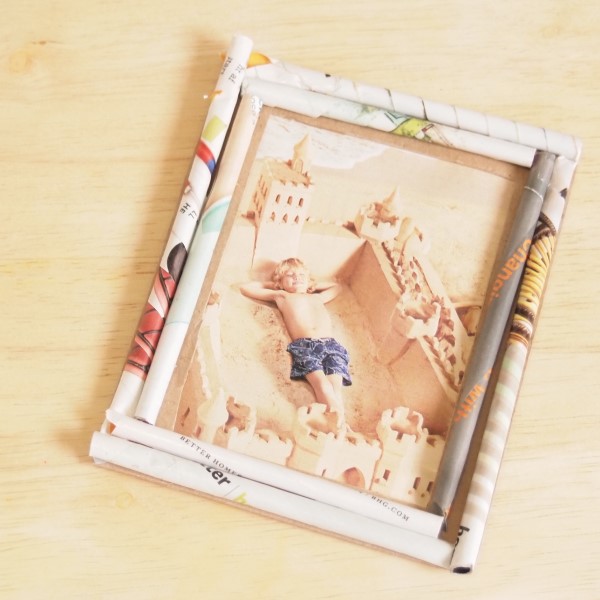
Decorative Paper or Washi Tape
- Cover with Patterns: Use decorative paper or washi tape to cover the entire frame or create borders. This approach allows for endless customization options.
- Layer for Depth: Experiment with layering different types of paper or tape to achieve a textural finish that enhances the visual appeal of the frame.
Mixed Media Art
- Combine Various Materials: Get creative by mixing multiple materials, such as buttons, pins, and charms, to form an eclectic and layered design on the frame.
- Explore Different Themes: This technique allows for a playful approach where each material can represent a different aspect of the person or memory you are framing, making it a truly unique piece.
Take your time decorating your frame to achieve eye-catching results. Experiment with different techniques and materials to create a frame that stands out. This process will make your picture frame a true reflection of your style and artistry.
Troubleshooting Common Issues
Creating your own picture frame can sometimes lead to challenges. Addressing these issues ensures a polished and sturdy frame. Below are solutions to common problems you might encounter.
Fixing Uneven Frame Edges
Uneven edges can result in poor alignment and gaps in your frame. Here’s how to fix this issue:
- Inspect Edges for Misalignment: Look for gaps or uneven corners in the frame.
- Sand Down Excess Material: Use fine-grit sandpaper to even out uneven edges.
- Check Angles with a Square Tool: Ensure all corners are at perfect 90-degree angles.
- Reassemble and Adjust: Disassemble and reattach parts if issues persist.
- Use Wood Filler for Gaps: Fill small gaps with wood filler, then sand for a smooth finish.
- Double-Check Measurements: Confirm all frame dimensions match before final assembly.
Properly aligning the edges improves your frame’s appearance and durability.
Addressing Loose Joints
Loose joints can weaken your frame and affect its functionality. Follow these steps to fix them:
- Identify the Loose Joints: Check each corner for movement or instability.
- Disassemble Joints: Carefully separate the frame pieces where the joint is loose.
- Reapply Adhesive: Use strong wood glue or metal epoxy on the affected joint.
- Clamp the Joint Firmly: Secure the joint with clamps to ensure a tight bond.
- Reinforce with Brackets: Add corner brackets or small nails for extra support.
- Test the Stability: Once dry, gently test the joint for sturdiness.
Taking time to reinforce loose joints extends your frame’s lifespan. Regular checks prevent future problems.
Addressing these common issues ensures your handmade frame is sturdy, functional, and visually appealing. Proper preparation and handling lead to professional-quality results.
Tips for Maintenance and Longevity
To ensure your custom picture frame lasts for years, proper maintenance is essential. Follow these practical tips to keep your frame and the artwork it holds in excellent condition.
Regular Cleaning Practices
- Dust the Frame Often: Use a soft, dry cloth to remove dust and debris regularly.
- Avoid Excessive Moisture: Do not use water or wet cleaners, as they can damage the frame’s finish.
- Use Proper Cleaners: For glass, use a mild, non-abrasive glass cleaner and wipe with a microfiber cloth.
- Inspect for Damage: Routinely check the frame for cracks or loose joints and fix them immediately.
- Protect from Sunlight: Keep frames away from direct sunlight to prevent fading or warping.
- Avoid Harsh Chemicals: Do not use strong cleaning agents that may erode the frame’s surface.
- Polish Wooden Frames: Apply furniture polish to wooden frames to maintain their shine and protect them.
Preserving the Artwork Within the Frame
- Use UV-Protective Glass: Choose UV-protective glass to shield your artwork from harmful light damage.
- Check Humidity Levels: Keep the frame in a room with consistent humidity to prevent warping or mold.
- Secure Artwork Firmly: Ensure the artwork and backing are held tightly within the frame.
- Avoid Touching the Artwork: Handle artwork using clean hands or gloves to prevent smudges or creases.
- Add Acid-Free Backing: Use acid-free materials to prevent yellowing and damage over time.
- Store in a Dry Place: Keep framed artwork in a dry and clean area when not displayed.
- Inspect Regularly: Check for pests, moisture, or any signs of damage to act quickly.
By implementing proper cleaning and preservation methods, your custom picture frame and cherished artwork will stay in excellent condition for years to come.
Conclusion: Enjoy Crafting Together
In conclusion, understanding how to make your own picture frame is a wonderful way to bond with your children while nurturing their creativity. Crafting encourages critical thinking and fine motor skills, making it educational as well as enjoyable.
With step-by-step instructions and a variety of materials available, creating picture frames can be an engaging home project. Explore different design ideas and make this activity a regular family tradition. So, gather your materials, unleash your creativity, and start crafting together. You’ll be amazed at the memories you’ll create along the way! Happy crafting!