Introduction
Creating a DIY picture frame offers a wonderful opportunity to add a personal touch to your home decor. Picture frames not only protect your favorite images but also serve as beautiful decorative elements. Whether you want to display memories from a family vacation or display art that resonates with you, a DIY picture frame can be customizable to fit any style. In this guide, we will explore some unique ideas for making stunning diy picture frames that will enhance your living space and showcase your personal taste.
Tools and Materials Needed
Having the right tools and materials is key to creating a quality DIY picture frame. This section will guide you through the essentials.
Common tools for making a picture frame
- Measuring tape or ruler: For accurate measurements of the photo or artwork.
- Handsaw or miter saw: To cut frame pieces to the correct size and at precise angles.
- Clamps: These hold the frame pieces firmly while joining them.
- Miter box: Helps achieve accurate 45-degree cuts for corners.
- Wood glue: For securing frame joints.
- Sandpaper: Smoothens edges and surfaces before finishing.
- Hammer and nails: For assembling the frame securely.
- Paintbrush or foam brush: Used for applying paint or stain evenly.
- Screwdriver or drill: To attach hanging hardware to the finished frame.
- Protective gear: Includes safety goggles and gloves to ensure your safety.
Selecting the best materials for frame construction
- Wood: A classic and versatile choice. Options include pine, oak, or cedar.
- MDF (Medium Density Fiberboard): Economical and suitable for painted designs.
- Plastic frames: Lightweight and available in various colors.
- Metal: Durable and modern, ideal for industrial-themed interiors.
- Glass or plexiglass: Protects your photos from dust and damage. Plexiglass is lightweight and shatter-resistant.
- Backing material: Usually cardboard or foam board to support the photo.
- Picture hanging hardware: D-rings, sawtooth hangers, or a wire for wall mounting.
Choose tools and materials that suit the design and size of your DIY picture frame. Having quality materials ensures a frame that is durable and visually appealing.
Measuring and Planning Your Frame
Creating a well-designed DIY picture frame starts with careful measuring and planning. Proper measurements ensure your artwork or photo fits perfectly within the frame, while thoughtful planning shapes the design and overall dimensions of the frame.
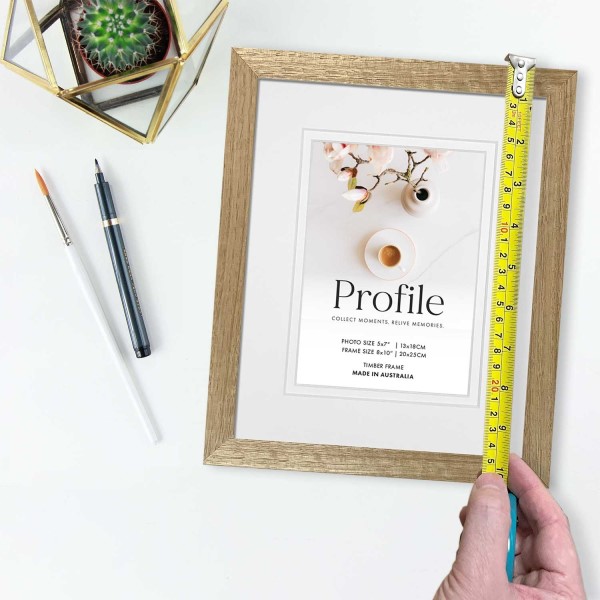
Measuring your artwork or photo
Accurate measurements are essential for building a good-quality frame. First, measure the height and width of your artwork or photo using a ruler or measuring tape. For irregular shapes, trace the outline onto paper for reference. Add an extra inch to the measurements for allowance, ensuring that the frame securely holds the photo or artwork. Double-check the dimensions to avoid mistakes.
Planning the dimensions of the frame
Once you have the artwork’s size, plan the frame dimensions. Decide how thick and wide you want the frame edges to be. Consider the overall look of the frame, whether thin for minimalistic design or wide for a robust appearance. Sketch the design on paper to visualize the final product. If using mats or borders, include their dimensions in the plan. Planning ensures the frame complements your photo or artwork perfectly, creating a pleasing aesthetic for your DIY picture frame.
Cutting the Frame Pieces
After planning the dimensions of your DIY picture frame, the next step is cutting the frame pieces. This process requires careful precision to ensure all parts fit together seamlessly.
Choosing the right saw for cutting
Selecting the correct saw is crucial for smoothly and accurately cutting the frame pieces. Here are some common options:
- Miter saw: Ideal for precise 45-degree angle cuts, ensuring clean corners for your frame. This is often the best choice for professional-quality results.
- Hand saw with a miter box: A more affordable and simple option, this ensures accurate angled cuts with manual control.
- Circular saw: Useful for straight cuts, but requires a steady hand for accurate results.
Choose a saw that suits your skill level and the material you selected for your frame. Always prioritize safety and wear protective gear while cutting.
Tips for accurate and safe cuts
To achieve precision and maintain safety, follow these cutting tips:
- Measure and mark carefully: Use a ruler or measuring tape to mark the wood with a pencil before cutting.
- Always double-check measurements: Ensuring measurements are correct avoids multiple attempts and material waste.
- Set up a sturdy workspace: Use a workbench or a flat surface to keep the material steady.
- Secure the material: Use clamps to hold the material in place while cutting.
- Cut slowly and steadily: Avoid rushing to ensure clean cuts and reduce the risk of injury.
- Practice first: Test cuts on scrap material to become comfortable with the tools.
- Follow safety guidelines: Wear safety goggles and gloves to protect yourself from sharp edges and sawdust.
By choosing the right tools and methodically cutting the frame pieces, you’ll lay the foundation for a well-made, sturdy DIY picture frame.

Assembling the Frame
Once you’ve cut your frame pieces, the next step is to assemble them. Properly assembling the frame ensures that it is sturdy and holds your artwork securely.
How to join the frame corners securely
Joining the corners of your DIY picture frame correctly is key to its durability. Here’s how to do it:
- Align the pieces: Place the frame pieces on a flat surface. Ensure the edges meet perfectly to form a 90-degree angle.
- Apply wood glue: Apply a thin layer of high-quality wood glue on the ends of the frame pieces.
- Hold corners in position: Press the edges firmly together. Wipe off any excess glue with a damp cloth.
- Reinforce with nails or staples: Use a hammer and small nails or a staple gun. Secure the corners for added stability.
- Let the glue dry: Leave the frame undisturbed for at least 24 hours to let the glue set properly.
Using precise alignment ensures that your frame looks professional and lasts for a long time.
Using clamps and adhesives for stability
Clamps and adhesives play a major role in stabilizing your DIY picture frame during assembly:
- Choose the right clamps: Use corner clamps to hold pieces firmly while gluing and nailing.
- Apply even pressure: Clamp each corner after applying glue to maintain an even hold.
- Check alignment: Double-check that the corners form perfect 90-degree angles before tightening the clamps.
- Allow time to cure: Follow the glue manufacturer’s instructions and let it dry completely before removing the clamps.
For extra stability, you can consider using “L-shaped” corner braces. These can be screwed into the back of the frame for added strength.
By taking your time and carefully securing the corners, you will create a DIY picture frame that is both sturdy and attractive.
Decorating and Painting the Frame
Decorating and painting your DIY picture frame adds character and enhances its overall appearance. Thoughtful decoration can make your frame truly unique and complement your artwork or photo perfectly.
Choosing paint or stain for your frame
Picking the right paint or stain is crucial for achieving your desired look. Consider these points:
- Paint options: Choose acrylic or latex-based paints for vibrant and rich colors.
- Stain options: Wood stains enhance natural grains and give a classic, rustic finish.
- Color scheme: Match or contrast the colors with your room and artwork.
- Surface preparation: Sand the frame to smooth surfaces before applying paint or stain.
- Sealant: Use a clear varnish or polyurethane for durability and protection.
- Application tool: Use brushes or foam for even application and precision.
Allow the paint or stain to dry completely before moving to decoration. Test on scrap pieces first to avoid mistakes.
Adding decorative elements to personalize the frame
Personalizing your DIY picture frame makes it special and one-of-a-kind. Try incorporating these ideas:
- Use stencils: Create patterns or designs using stencils for a professional touch.
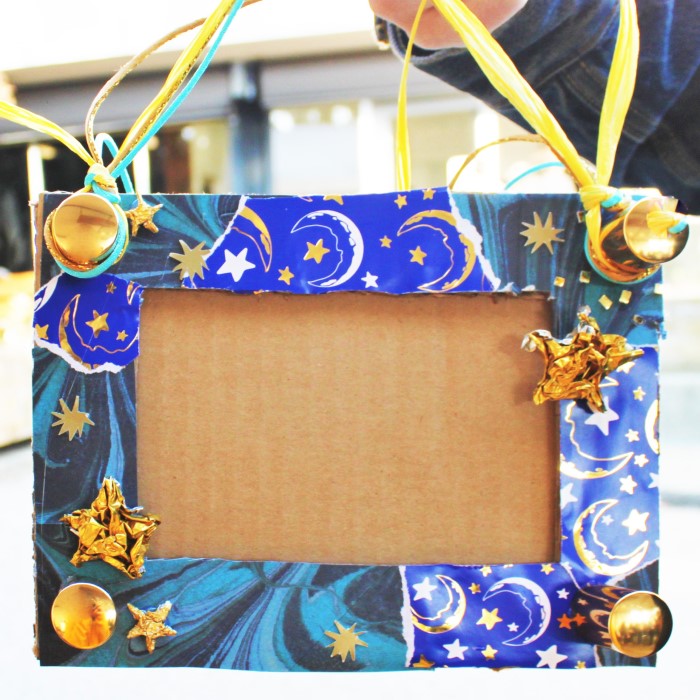
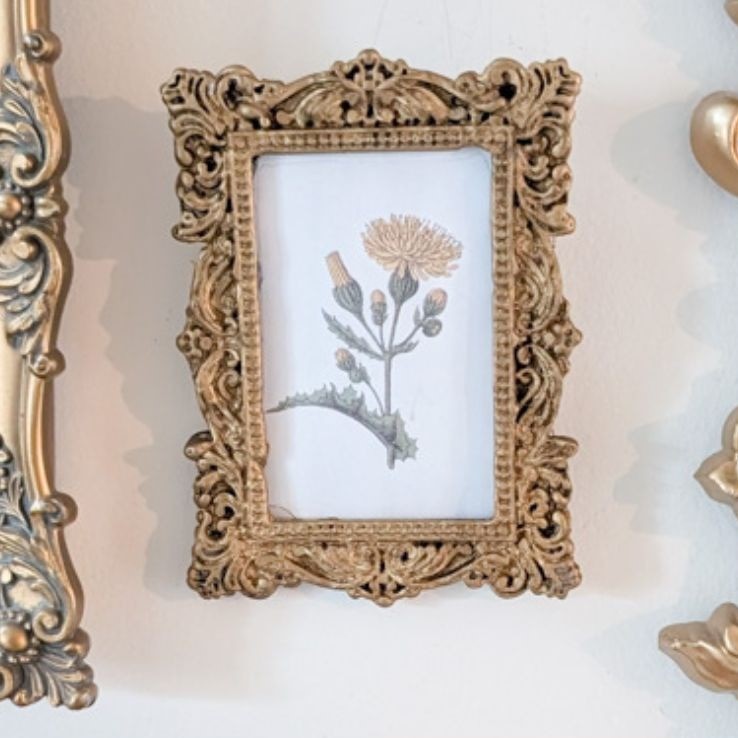
- Attach embellishments: Add beads, buttons, or gems for a playful or elegant look.
- Paint details: Add fine details using small brushes for intricate designs.
- Decoupage: Apply decorative paper, fabric, or images with adhesive for unique textures.
- Add distressed effects: Sand edges slightly for a vintage, aged finish.
- Contrast materials: Mix wood, metal, or fabric elements for dynamic visual appeal.
Keep your workspace clean and organized to avoid damaging the frame. With thoughtful decoration, your DIY project will stand out and reflect your personality.
Attaching the Backing and Glass
Once your DIY picture frame is assembled and decorated, it’s time to complete it by attaching the backing and glass. This step protects your artwork or photo and ensures a polished look.
Installing the glass for protection
Adding glass to your DIY picture frame will help protect your photo or artwork from dust and damage. Here’s how to do it:
- Clean the glass: Use a lint-free cloth and glass cleaner to remove smudges and dust.
- Place the glass in the frame: Gently position the glass inside the frame, ensuring it fits snugly.
- Check for alignment: Ensure the glass sits evenly without any gaps or loose edges.
- Use spacers if needed: For deeper frames, add spacers to keep the glass in place.
- Recheck the frame: Make sure the glass is free of fingerprints or dust before securing.
Securing the photo and backing panel
Now, secure your artwork or photo along with the backing material to complete your frame:
- Insert the artwork or photo: Place your photo or artwork on top of the clean glass.
- Add a mat (optional): Position a mat around your photo for a more professional look.
- Place the backing panel: Lay the foam board or cardboard backing over the photo.
- Secure the back panel: Use small nails, glazier points, or frame clips to hold the backing in place.
- Fix the edges: Check for even pressure on all edges to ensure a tight fit.
- Inspect your work: Look for any gaps or misalignments and adjust if necessary.
By properly installing the glass and securing the backing panel, your DIY picture frame will safely and stylishly showcase your most treasured memories.
Mounting and Displaying Your Picture Frame
Once your DIY picture frame is complete, it’s time to prepare it for display. Proper mounting and showcasing ensure your hard work is admired and appreciated.
Adding hardware for wall hanging
To display your DIY picture frame on a wall, you need to attach appropriate hanging hardware:
- Choose your hardware: Select D-rings, sawtooth hangers, or picture wire, depending on the frame’s size and weight.
- Mark the positions: Use a ruler to measure equal distances on the back of the frame. Mark where you’ll place the hardware.
- Attach the hardware:
- For D-rings or sawtooth hangers, screw them into the frame’s back securely.
- For a picture wire, attach D-rings on both sides and loop the wire tightly between them.
- Check the strength: Ensure all hardware is sturdy and can hold the frame’s weight.
Properly attached hardware guarantees safe and secure wall hanging for your DIY picture frame.
Display ideas for your finished picture frame
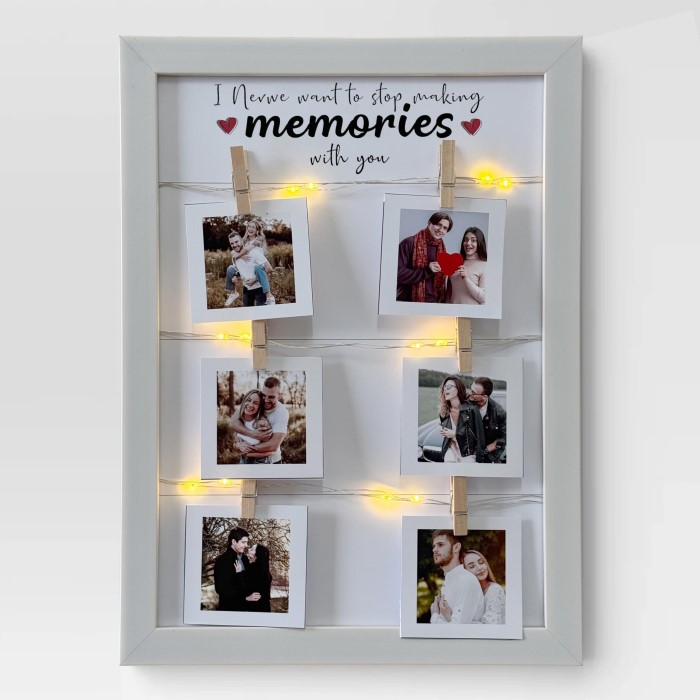
Once your DIY picture frame is ready to hang, consider these creative display ideas:
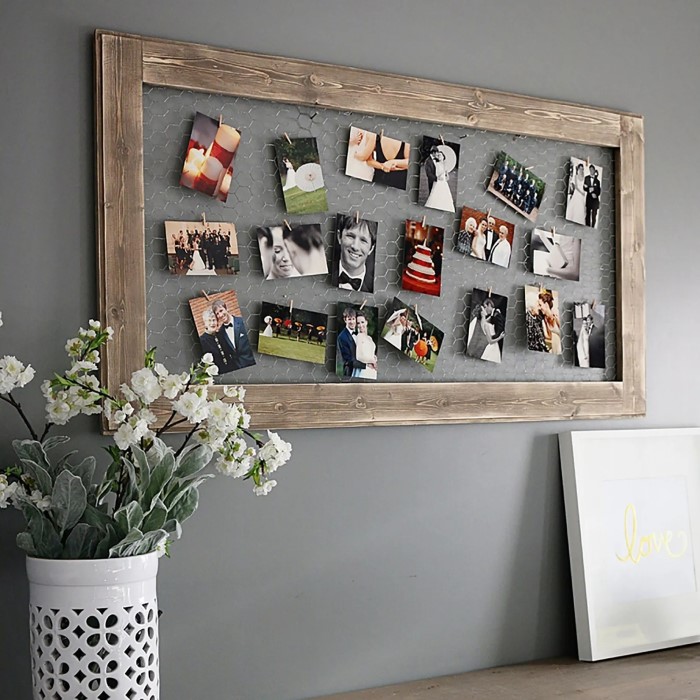
- Gallery wall: Arrange multiple frames of different sizes in a cohesive layout.
- Mantelpiece: Place your framed photo alongside candles or small decor for a warm touch.
- Floating shelves: Lean your frame against the wall on a shelf for a casual look.
- Picture ledges: Group your frame with others on a picture ledge for an art gallery effect.
- Desk or tabletop display: Rest your frame on a small easel for a creative, freestanding display.
- Themed areas: Showcase your frame in spaces that match its design, like a rustic kitchen or modern living room.
Experiment with these ideas to find the perfect spot for your frame. A well-placed DIY picture frame can elevate any space and highlight your artistic effort.
Tips and Tricks for Perfect DIY Frames
Creating a DIY picture frame involves challenges that can be resolved with helpful tips. These tricks will help ensure your project is both beautiful and durable.
Troubleshooting common issues
Even with careful planning, issues can arise during your DIY picture frame project. Here’s how to tackle them:
- Misaligned corners: Use a miter box or clamps for precise 45-degree cuts and alignment.
- Weak joints: Apply high-quality wood glue and reinforce with nails or staples.
- Cracked wood: Sand rough edges before assembly and handle gently to avoid damage.
- Uneven paint application: Use foam brushes for smooth and even coverage, avoiding brush streaks.
- Glass doesn’t fit: Measure the inner dimensions of the frame carefully before cutting or placing the glass.
- Hanging hardware issues: For heavy frames, use robust D-rings or wire to ensure stability.
By paying attention to these common problems, you can achieve a polished and professional DIY picture frame.
Enhancing durability and longevity of your frame
A durable DIY picture frame withstands time and protects your artwork effectively. Use these techniques to enhance its longevity:
- Seal and protect the wood: Apply a clear varnish or polyurethane for added protection against wear and moisture.
- Use quality materials: Select sturdy wood, MDF, or metal that won’t warp over time.
- Reinforce joints: Add corner braces or extra nails to strengthen weak areas.
- Avoid sunlight exposure: Display frames away from direct sunlight to prevent fading or discoloration.
- Dust regularly: Use a soft cloth to clean the frame and glass to maintain its appeal.
- Rotate display locations: Change the frame’s position occasionally to avoid stress in one area.
By applying these tips, your DIY picture frame will remain a cherished addition to your decor for years to come.
Conclusion
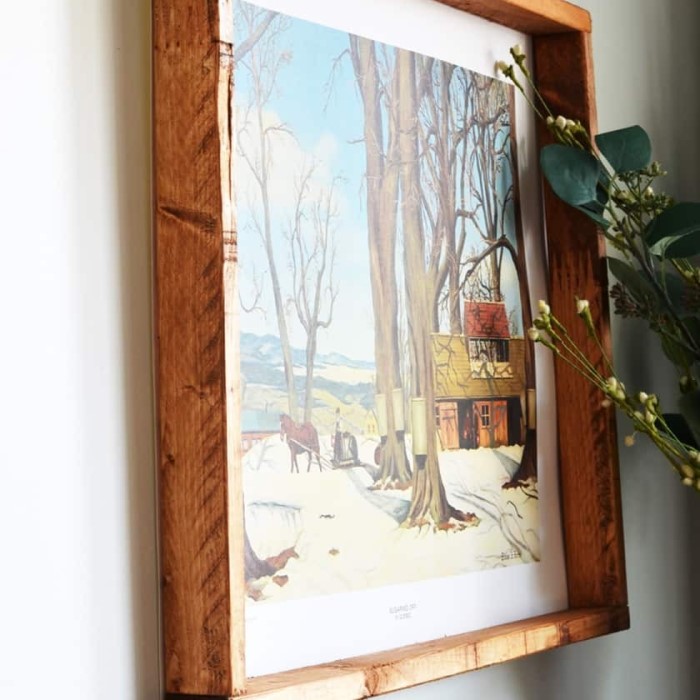
In conclusion, creating diy picture frames is a rewarding and enjoyable project that enhances your home decor while allowing you to express your creativity. From rustic wooden frames to fabric-covered designs, the possibilities are endless.
The process involves gathering simple materials, exploring various creative ideas, and following specific steps to create beautiful frames customized to your style. By displaying your finished projects in creative ways, you can turn your cherished memories into art.
So, gather your supplies today and let your imagination run wild as you embark on your DIY picture frame journey! Whether for yourself or as thoughtful gifts, these frames will undoubtedly capture attention and elevate your decorative aesthetic. Enjoy the process and the satisfaction of crafting something uniquely yours!