


Introduction to Picture Framing a Deck
Mastering how to picture frame a deck is an essential skill for DIY enthusiasts looking to elevate their outdoor spaces. A well-framed deck not only enhances the overall aesthetic appeal but also provides structural integrity. Picture framing involves surrounding the deck surface with a border of decking material, creating a clean and polished look. This guide offers you detailed steps, tips, and insights into the picture framing technique, ensuring you can create a stunning deck that will impress guests and family alike.
Understanding the various aspects of deck framing will help you appreciate the practical benefits and visual enhancements it brings to your outdoor area. By following this comprehensive guide, you will be better equipped to tackle your own project and achieve professional-quality results.
What is Picture Framing a Deck?
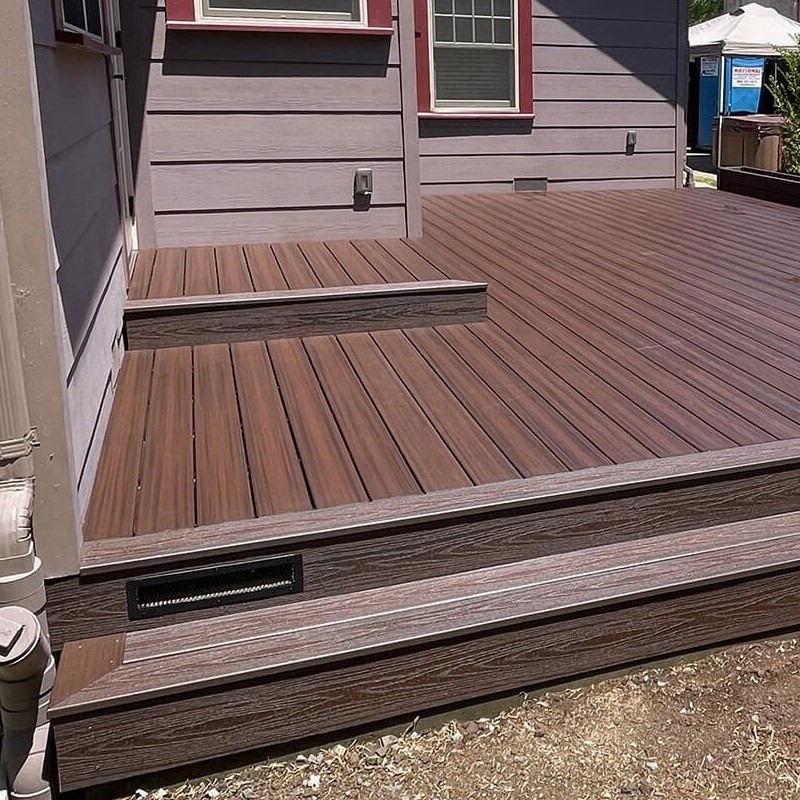
- Definition of Picture Framing: Picture framing refers to creating a border around the deck surface using decking boards. This technique provides a finished look and can define the space visually.
- Aesthetic Enhancements: A picture-framed deck can make the space appear more polished. The border draws attention to the decking material and enhances the beauty of the overall design.
- Functional Benefits: In addition to aesthetic appeal, picture framing can help protect the edges of the deck boards. The framed border reduces wear and tear on the ends of the boards, leading to greater longevity.
- Design Versatility: Picture framing can be adapted to various deck shapes and sizes. Whether you have a square, rectangular, or irregularly-shaped deck, this technique can enhance its appearance and functionality.
Tools and Materials Needed
How to picture frame a deck? Before you begin your project, gathering the necessary tools and materials is crucial. Below is a list to help you prepare effectively:
Decking Boards
- Quality Selection: When selecting decking boards, it is essential to choose high-quality materials that not only match your existing deck aesthetically but also offer durability and longevity.
- Material Options:
- Composite Boards: These are engineered from recycled materials and provide resistance to fading, staining, and mold, making them a low-maintenance choice.
- Cedar Wood: Known for its natural beauty and resistance to decay, cedar offers an appealing look with a pleasant scent but may require periodic maintenance.
- Pressure-Treated Wood: This type of wood is treated with preservatives to resist rot and insect damage, making it a cost-effective option for outdoor projects but may require painting or staining for added protection.
Screws
- Outdoor Deck Screws: It’s important to use deck screws specifically designed for outdoor applications. These screws are coated or treated to resist rust and corrosion.
- Durability Factor: Rust-resistant screws ensure that your deck remains sturdy and safe over time, preventing potential structural issues that can arise from the deteriorating fasteners.
Saw
- Circular Saw Functionality: While a circular saw is ideal for making straight cuts across large planks, it may require a steady hand and careful measurement to ensure accuracy.
Drill
- Electric Drill Requirement: An electric drill is a crucial tool for driving screws into your decking boards efficiently. It saves time and effort compared to manual screwdrivers.
- Speed and Power: Opting for a drill with adjustable speed settings can help you control the depth and speed of the screws being driven, ensuring a secure fit without splitting the wood.
Square and Level
- Framing Square Importance: Using a framing square helps in checking and maintaining right angles, ensuring your boards are cut and placed accurately.
- Level Tool Necessity: A level is essential for checking that your deck boards are even and aligned properly, preventing any water pooling or structural issues.
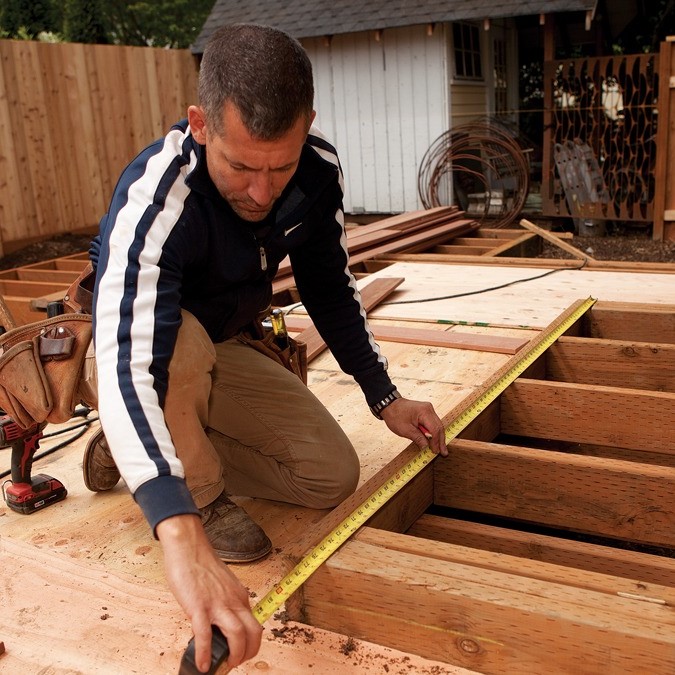
Measuring Tape
- Importance of Measurement: Accurate measurements are crucial for ensuring that your decking boards fit correctly within the designated space.
- Precision is Key: Taking multiple measurements before cutting can prevent costly mistakes and ensure a professional-looking finish.
Chalk Line
- Marking Straight Lines: A chalk line is an excellent tool for drawing straight lines across your work area, which is essential for making accurate cuts.
- Alignment Assistance: By snapping a chalk line, you can easily align your boards with visual guides, enhancing the overall precision of your project.
Step-by-Step Guide on How to Picture Frame a Deck
Planning Your Design
- Take Measurements: How to picture frame a deck? Begin by measuring the perimeter of your deck area. Accurate measurements will help you determine how much material you need.
- Draw a Sketch: Create a simple sketch or diagram detailing the layout of the picture frame. This visual guide will act as your roadmap throughout the installation process.
- Choose Your Border Design: Decide if you want a simple border or a more intricate design. Consider whether you want to use the same material or contrast it with different decking boards.
Preparing the Deck Surface
Clean the Deck
- Remove Loose Debris: Start by clearing the deck of any loose items such as furniture, planters, or decorative pieces. This will provide a clearer workspace and help you inspect the surface effectively.
- Sweep Thoroughly: Use a broom or a leaf blower to sweep away dirt, leaves, and other debris. Take the time to ensure that you reach into corners and along the edges where dust tends to accumulate.
- Wash the Surface: If your deck has stubborn stains or built-up grime, consider using a deck cleaner or a mixture of soap and water. Apply this solution with a brush or power washer to ensure a thorough clean.
- Rinse Off Cleaning Solutions: After washing, use clean water to rinse away any soap or cleaning residue. It’s crucial to leave the surface free of chemicals that could interfere with installation.
- Allow to Dry: Once cleaned, allow sufficient drying time. This will prevent moisture from getting trapped under the boards during installation, which could lead to mold or rot down the line.
Inspect for Damage
- Visual Examination: Carefully inspect each decking board for signs of rot, mold, or damage. Look for any discoloration, soft spots, or splits that could compromise the structural integrity of the boards.
- Check for Warping: Assess whether any of the boards are warped or uneven. Warping can lead to issues with the stability and appearance of your picture frame installation.
- Feel for Soft Spots: Run your hand along each board to detect any areas that feel soft or sponge-like. These areas might indicate that the wood has decayed and is no longer sound for support.
- Document Damaged Areas: Make a list of any boards that require repair or replacement. This will help you track what materials you need before proceeding with the project.
Dry Fit Boards
- Temporary Laying Out: Begin the process of dry fitting by laying the rattan picture frame boards on the deck’s surface without securing them. This will help you visualize how they will fit and look once installed.
- Check Alignment: As you lay out the boards, ensure they aligne correctly with respect to corners and edges. Proper alignment will contribute to a clean, professional appearance.
- Evaluate Board Placement: Consider the spacing between each board during the dry fit. This is an opportunity to adjust for any gaps that might not look appealing once installed.
- Make Necessary Adjustments: If you find that certain boards are not fitting as expected, make the necessary adjustments. This might involve trimming the boards to fit or repositioning them for better alignment.
- Confirm Fit Before Securing: Once you are satisfied with the layout and fit, you can proceed to secure the boards. But first, double-check the entire setup to ensure it meets your design vision before permanently fixing the boards in place.
Cutting the Boards
- Measure and Mark: Begin measuring sections of your picture frame boards. Use a pencil to mark where you will make cuts.
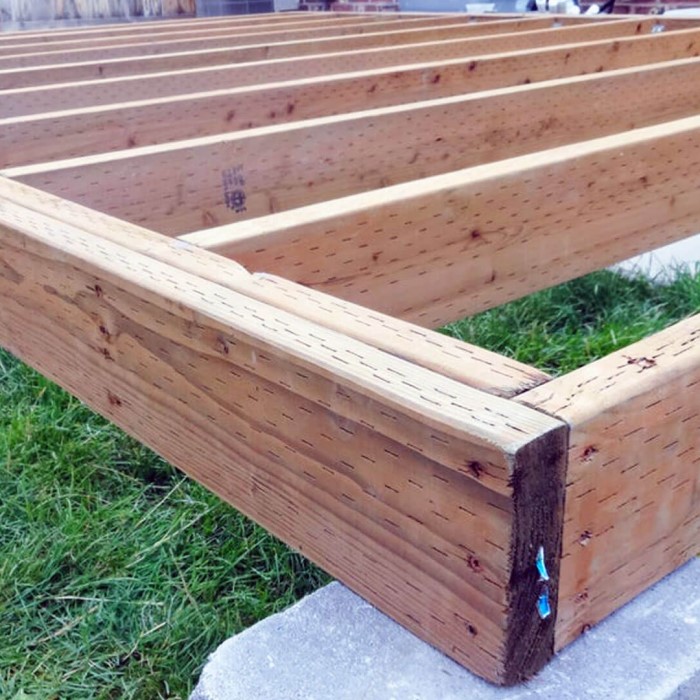
- Cut with Precision: Use a miter saw or circular saw to cut the boards to the correct lengths. For corners, ensure that you cut at a 45-degree angle for a clean joint.
- Check for Fit: After cutting the boards, position them again to check their fit. Adjust as necessary to ensure a snug fit against your deck boards.
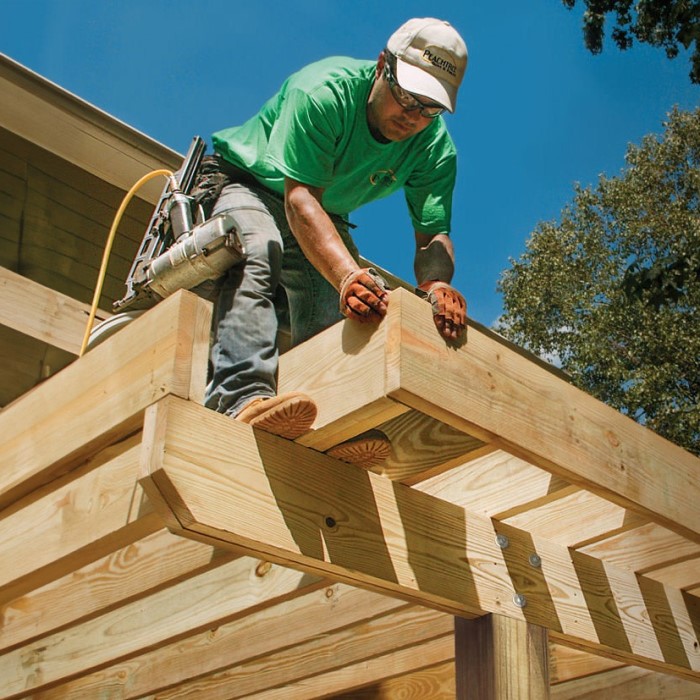
Securing the Picture Frame Boards
- Position the Boards: Once satisfied with the fit, begin attaching the picture frame boards to your deck.
- Use Screws: Secure each board using deck screws, placing them approximately every 16 inches along the length of the boards. Use a drill for easy fastening.
- Ensure Stability: As you work, continually check that each piece remains level.
Final Touches and Finishing
- Fill Any Gaps: After securing the boards, check for any gaps or imperfections along the seams. Use wood filler or caulk to fill cracks for a seamless appearance.
- Sand Edges: If needed, sand any rough edges to ensure a smooth finish. This step is essential for safety and aesthetics.
- Seal and Protect: If you used untreated wood, apply a sealant or stain to protect the decking material from moisture and UV damage. Be sure to follow the manufacturer’s instructions for full effectiveness.
Frequently Asked Questions About Picture Framing a Deck
- How to frame a deck for picture framing?
- Frame the deck by outlining the perimeter with additional decking boards. Secure them with screws, making sure to create clean mitered corners for a polished look.
- Can you picture frame an existing deck?
- Yes, you can picture frame an existing deck. Ensure the existing boards are in good condition before attaching your framing boards for the best results.
- What is the 3-4-5 rule for decks?
- The 3-4-5 rule is a method used to create a right angle. Measure 3 feet along one side, 4 feet along the other, and the distance between these points should be 5 feet to confirm a perfect right angle.
- Is picture framing a deck worth it?
- Picture framing a deck is worth it for aesthetics and durability. It enhances the visual appeal, adds structural integrity, and can increase property value.

Conclusion: Mastering Deck Framing for DIY Enthusiasts
In conclusion, understanding how to picture frame a deck can notably improve both the look and durability of your outdoor space. With the tips provided in this guide, you are well-equipped to take on this rewarding DIY project. The combination of aesthetic enhancements and practical benefits ensures your deck will stand out and be a pleasure for years to come.
Whether you are a seasoned DIY enthusiast or trying this for the first time, picture framing a deck is an attainable goal. By following these steps and considering the outlined tips, you can achieve professional results. Embrace the creativity and express your personal style as you build your perfect outdoor oasis! Happy framing!


