


Introduction to Measuring for Mini Blinds
Measuring for mini blinds may seem straightforward, but accuracy is key to achieving the perfect fit. In this guide, we’ll explore how to measure for mini blinds effectively to enhance your home’s aesthetic and functionality. Whether you’re updating your décor or need light control, proper measurements will ensure that your new mini blinds serve you well. This article will cover various aspects of measuring, including tips, tools, and the necessary steps to guarantee precision.

Tools Needed for Measuring Mini Blinds
How to measure for mini blinds? Accurate measurements depend on having the right tools ready before you start. Gather the following items:
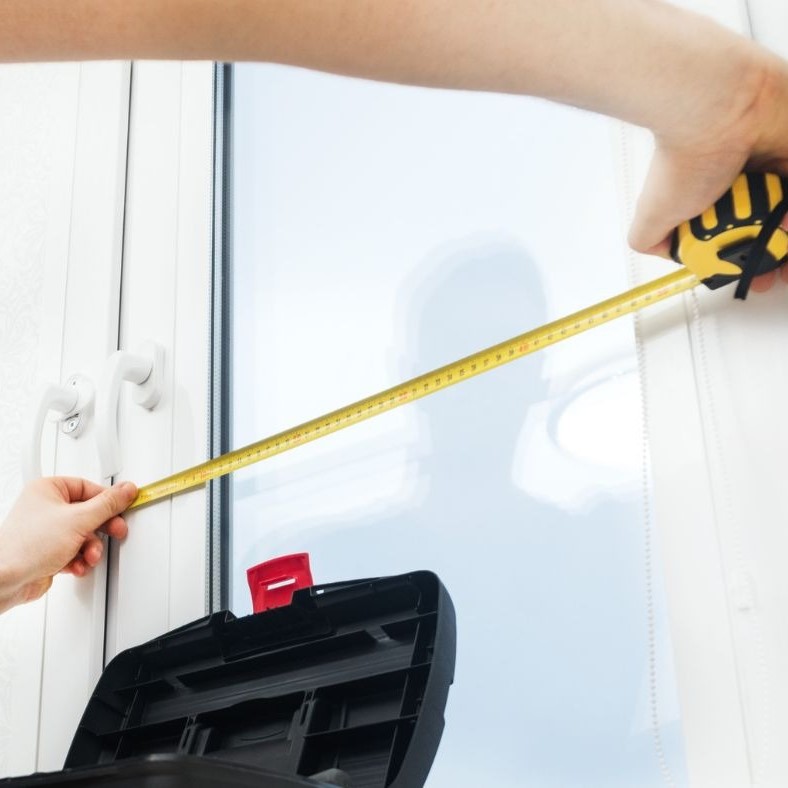
Metal Measuring Tape:
Opt for a sturdy metal tape rather than a fabric tape, as it offers greater durability and less flexibility when measuring.
A metal measuring tape provides reliable results, minimizing the risk of measurements being affected by bends or kinks.
Choose a tape with clear markings and a locking mechanism to hold it in place while you take measurements, ensuring accuracy throughout the process.
Pencil:
Use a sharp pencil to mark dimensions clearly on the window frame or nearby surface for easy reference.
Avoid using pens or permanent markers, as these can be difficult to erase or may smudge, leading to confusion when recording measurements.
It is also helpful to make small, precise marks rather than large lines, allowing you to pinpoint specific measurement points more easily.
Notepad or Paper:
Keep a notepad or a sheet of paper handy to write down all measurements as you take them. This helps to prevent any potential mix-ups that could arise from memory lapses.
Organize your notes by labeling each measurement according to its location (for example, “Width Top,” “Width Bottom,” “Height Left,” etc.). This structure fosters clarity.
Consider using a digital device, such as a smartphone or tablet, to note your measurements if you prefer a more accessible format.
Step Ladder:
If you are measuring tall windows, a sturdy step ladder is essential. It allows you to reach high areas safely and comfortably without straining.
Make sure to choose a stable ladder that is the right height for your needs and always follow safety guidelines while using it.
Use the ladder to inspect the entire window frame, including corners that can be difficult to access from the ground.

Level:
A level is crucial for ensuring that your measurements are even and align correctly, particularly if you are planning to install blinds that require precision.
Use the level to check that your measurements are consistent from top to bottom, ensuring uniformity across the entire window frame.
If you are mounting the blinds outside of the window frame, it’s especially important to check levels, as uneven installation can lead to a skewed appearance.
Calculator:
A calculator can be a handy tool for quick computations, particularly when you need to adjust measurements, account for overlaps, or calculate the final size of the blinds you need.
It helps avoid mental math errors, especially when dealing with fractions and inches, making the measuring process more efficient.
Choose a basic calculator or download a calculator app on your smartphone to ensure it’s readily available during measurement and adjustment sessions.
Each tool plays a unique role in ensuring your measurements are accurate. Improper tools can lead to errors, affecting the fit of the mini blinds. Prepare this list before starting any measurement process for seamless installation.
Choosing Mounting Style: Inside vs Outside Mount
How to measure for mini blinds? When measuring for mini blinds, selecting the mounting style is crucial. The choice between inside and outside mount impacts both aesthetics and functionality. Here’s a breakdown to help you decide:
Inside Mount
- Looks Sleek and Clean: Inside mounts create a streamlined look as blinds fit inside the window frame.
- Requires Precise Measurements: Exact dimensions are vital for fitting blinds snugly within the frame.
- Maximizes Wall Space: The design doesn’t extend beyond the window frame, leaving wall space untouched.
- Limited Light Control: Small gaps may allow slight light seepage.
Outside Mount
- Hides Imperfections: Outside mounts cover window frames and walls, hiding any damage or flaws.
- Ideal for Shallow Frames: Suitable for windows with minimal depth where inside mounts won’t fit.
- Better Light Coverage: Blinds extend past the frame, blocking more light.
- Customizable Size: Offers flexibility to adjust width and height beyond window dimensions.
Factors to Consider
- Frame Depth: Deep frames work well for inside mounts while shallow frames suit outside mounts.
- Desired Appearance: Choose sleek aesthetics (inside) or bold coverage (outside).
- Privacy Needs: Outside mounts prevent visibility gaps for enhanced privacy.
- Ease of Installation: Inside mounts require precise cuts; outside mounts are often simpler to install.
Understanding these mounting styles ensures you pick the ideal option for your windows. Consider aesthetics, functionality, and window structure before making a decision.

Preparing Your Windows for Measurements
Before measuring for mini blinds, it’s essential to prepare your windows. Proper preparation ensures accurate measurements. Follow these simple steps to get started:
- Clean the Window Area: Remove any dust, dirt, or debris from the window frame and surrounding surfaces. Clean corners and edges thoroughly for accurate dimensions.
- Remove Existing Coverings: Take down any old curtains, blinds, or window treatments. This prevents interference during measurements and yields a clear view of the window frame.
- Inspect the Window Frame: Check the frame for damage, warping, or irregularities. Repair or note these conditions to avoid fitting issues later.
- Check the Frame Depth: Assess the frame’s depth if planning an inside mount. Ensure it’s deep enough to hold the blinds securely.
- Measure Obstructions in the Wall: For outside mounts, check for protrusions, such as handles or molding. Note these to adjust blind dimensions accordingly.
Preparation is key to taking reliable measurements. With a clean and inspected space, you can avoid errors and ensure a hassle-free fitting process for your mini blinds.
How to Measure for Inside Mount Mini Blinds
Measuring for inside mount mini blinds requires precision. Follow these steps for accurate results. Inside mounts fit within the window frame, enhancing your room’s streamlined look.
Width Measurement Process
- Use a Metal Measuring Tape: Ensure accurate and reliable measurements.
- Measure at Three Points: Measure across the top, middle, and bottom of the frame.
- Record the Smallest Measurement: Write down the narrowest width for a snug fit.
- Avoid Rounded Numbers: Use exact numbers to avoid fitting issues.
- Check for Obstructions: Note handles or locks that could interfere with the blinds.
Height Measurement Process
- Start Measuring From the Inside Edge: Measure inside the frame, from top to bottom.
- Measure at Three Points: Check the left side, center, and right side heights.
- Record the Largest Measurement: Take note of the tallest height for proper coverage.
- Inspect the Window Frame: Confirm its levelness to avoid slanted blinds.
- Add Depth Measurement: Verify the frame depth is adequate for mounting brackets.
By following these steps, you ensure a perfect fit for inside mount mini blinds. Always double-check measurements before purchasing or installing blinds.
How to Measure for Outside Mount Mini Blinds
Outside mount mini blinds cover the window frame and extend beyond it. This style is ideal for shallow frames, better light coverage, and enhanced privacy. Accurate measurements are essential for a seamless fit.
Determining Width and Height
Width Measurement Process
- Measure the Total Width: Start by measuring the width of the window, including the frame.
- Add Extra Inches: Add 3-4 inches to both sides for proper light coverage and privacy.
- Account for Obstructions: Adjust the width if handles or protrusions are near the window.
- Use a Level Tool: Ensure your measurement is straight for even coverage.
- Write Down Exact Numbers: Record the total width without rounding.
Height Measurement Process
- Measure From Top to Bottom: Start from the top edge of the frame to the desired blind length.
- Include Extra Length: Add 3 inches to the height for full coverage below the frame.
- Adjust for Obstacles Below: If molding or handles exist, adjust to ensure the blinds don’t interfere.
- Check Vertical Level: Ensure the measurements are straight and even.
- Record Tallest Measurement: Write down the maximum length.
By applying these steps, you ensure your outside mount mini blinds fit perfectly. Double-check all measurements before ordering or cutting your blinds for accuracy.
Common Mistakes to Avoid When Measuring
Accurate measurements are crucial for perfectly fitting mini blinds. Avoid these common errors:
Using the Wrong Tools:
It is essential to always use a metal measuring tape for accurate and reliable measurements when preparing to install window treatments.
Metal measuring tapes provide stiff, straight lines that help you avoid inaccuracies common with more flexible tools like fabric tapes or rulers.
Avoid using fabric tapes, as they can stretch and lead to incorrect measurements over time. Rulers may be too short for larger windows, making them impractical for this task.
Rounding Measurements:
When taking measurements, always record the exact dimensions without rounding off to the nearest whole number. Rounding can lead to significant fitting issues during installation.
Small errors in measurements may seem insignificant initially, but they can result in blinds that do not fit properly, requiring adjustments or compromises in their functionality.
Keeping exact measurements helps ensure that you have a perfect fit that enhances both the appearance and efficiency of your window treatments.
Skipping Depth Check:
For those opting for inside mounts, it is crucial to check the depth of the window frame to ensure it can adequately support the mounting brackets of the blinds.
Insufficient depth may cause mounting issues, compromising the stability and effectiveness of the blinds once installed.
Always measure the depth at multiple points to accommodate any potential inconsistencies in the window frame.
Overlooking Obstructions:
Be vigilant for any obstructions that may interfere with the installation of mini blinds. Items such as handles, locks, or decorative molding can impact the measuring process.
Identify these obstructions early on to adjust your measurements accordingly, ensuring that the blinds can operate smoothly without interference.
Consider how these elements will affect both the installation and functionality of the mini blinds when planning your measurements.
Measuring Only Once:
Never rely on a single measurement for width and height. Always measure multiple times at various points. This practice ensures accuracy and identifies any discrepancies early.
Confirm all results at least twice, as this step is essential for preventing potential fitting issues when it comes time to install your blinds.
Taking the time to double-check your measurements can ultimately save you from costly mistakes and wasted materials.
Ignoring Light Coverage Needs:
For outside mounts, always remember to add a few extra inches to both the width and height measurements for proper coverage and light blockage.
Adding additional inches allows for the blinds to extend beyond the window frame, effectively minimizing light leakage around the edges after installation.
This additional coverage can improve both the aesthetic appeal and functional performance of the blinds.
Missing Documentation:
Always document your measurements clearly and neatly as you take them. This step is crucial, as misremembering numbers can lead to installation mistakes and frustrations later on.
Organize your notes systematically, labeling each measurement’s corresponding window location to avoid confusion during the installation process.
Consider taking photos of the measurements as a backup reference to further ensure accuracy.
Measuring Without Cleaning:
Before beginning your measurements, make sure to clean the window area. Dirt, dust, or existing window coverings can distort your measurements significantly.
Preparing the window surface ensures that you have a clear view of how to position the blinds and helps eliminate any sources of error during the measuring process.
A clean work area lays the foundation for accurate measurements and a smoother installation process.
By avoiding these errors, your mini blinds will fit perfectly and function as intended.

Tips for Accurate Measurements
Taking precise measurements for mini blinds ensures a perfect fit. Follow these helpful tips:
- Double-Check All Measurements: Measure each dimension twice to confirm accuracy and avoid potential errors.
- Use the Right Tools: Prefer metal measuring tapes for stable and precise readings over flexible tapes.
- Measure in Multiple Locations: For both width and height, take measurements at three different points.
- Record Exact Numbers: Avoid rounding off dimensions; use exact numbers for the best fit.
- Ensure Level Measurements: Use a level tool to maintain even and straight measurement lines.
- Include Additional Inches (For Outside Mount): Add extra width and height to enhance light coverage and privacy.
- Be Aware of Obstructions: Note handles, locks, or moldings to adjust measurements as needed.
- Mind Depth Requirements (For Inside Mount): Ensure your window frame depth can support the mounting brackets adequately.
- Keep Workspace Ready: Remove any covers, clean the space, and ensure unobstructed access to the frame.
- Stay Consistent in Units: Stick to one measuring unit type (inches or centimeters) for all dimensions.
By applying these tips, you’ll get accurate dimensions, ensuring your mini blinds fit perfectly.
Next Steps After Taking Measurements
Once you have recorded your window measurements, it’s time to proceed with the next steps. Proper follow-through ensures that your mini blinds fit perfectly and function as intended. Follow these steps to move forward:
- Double-Check Your Measurements: Reconfirm all dimensions to ensure accuracy. Measure again if necessary.
- Decide on the Mounting Style: Review your measurements to finalize either an inside or outside mount.
- For inside mounts, verify frame depth again to confirm compatibility.
- For outside mounts, check for obstacles and finalize added width and height adjustments.
- Research Blind Options: Browse mini blind styles, colors, and materials that match your room’s theme.
- Consult the Manufacturer’s Guidelines: Check the manufacturer’s measurement instructions. Ensure your dimensions align with their product recommendations.
- Place Your Order: Provide your measurements accurately when ordering custom mini blinds online or in-store.
- Prepare for Installation: Gather tools such as a screwdriver, level, and step ladder. Review installation instructions if available.
- Test the Blinds Fit: Before final installation, test the blinds to ensure they align with your window size.
- Make Any Adjustments: If minor discrepancies arise, use adjustments like trimming or spacer brackets to achieve the perfect fit.
Completing these steps sets you up for a smooth installation process and flawlessly fitted mini blinds.
Conclusion
In conclusion, accurately measuring for mini blinds is vital for achieving an optimal fit and ensuring functionality. By following our step-by-step guide, you can confidently take measurements, avoid common mistakes, and enjoy the benefits of well-fitted mini blinds. Whether you choose an inside or outside mount, remember that precise measurements lead to a cleaner look and improved performance. Now that you know how to measure for mini blinds, you’re ready to enhance your living space with stylish and functional window coverings.


