


Introduction
Mini blinds are a popular window treatment choice for many homes and offices due to their versatility and style. However, like all household items, they require regular cleaning to maintain their appearance and ensure a healthy environment. Dust and allergens can accumulate on mini blinds, making proper cleaning essential. In this article, we will explore how to clean mini blinds effectively, offering a range of techniques suitable for different materials and situations. With straightforward tips, anyone can achieve sparkling results while ensuring their mini blinds look their best.

Types of Mini Blinds and Their Cleaning Needs
Keeping your mini blinds clean starts with understanding their type and material. Each material has distinct features that affect the cleaning method.
Materials Commonly Used in Mini Blinds
Mini blinds are made from various materials. Common options include aluminum, wood, vinyl, and fabric.
- Aluminum: Lightweight and rust-resistant, aluminum blinds are easy to wipe and dust.
- Wood: Wooden blinds look elegant but demand careful cleaning to avoid damage from water.
- Vinyl: Durable and affordable, vinyl blinds tolerate most cleaning methods well.
- Fabric: Fabric blinds require gentle handling and specialized cleaning techniques.
How Cleaning Needs Differ by Material
Each type of mini blind material requires unique cleaning approaches. Here’s how:
- Aluminum Blinds: Use a soft cloth or duster. Avoid abrasive cleaners to prevent scratches.
- Wooden Blinds: Dust regularly and clean with a slightly damp cloth. Avoid soaking or water-based solutions.
- Vinyl Blinds: Wash with mild soap and water. They handle moisture better than wood.
- Fabric Blinds: Vacuum with a brush attachment or spot clean stains with a gentle solution.
Choosing the right cleaning method based on material keeps your blinds in great condition.
Preparing for Cleaning Mini Blinds
How to clean mini blinds? Before cleaning your mini blinds, it’s important to prepare properly. Having the right tools and following safety measures ensures a smooth process.
Tools and Supplies Required
Gather the necessary supplies to make cleaning efficient and effective. Here’s what you need:
Duster or Soft Cloth
- Functionality:
- Excellent for removing dust particles that accumulate on the surface of mini blinds.
- The soft texture prevents scratching or damaging the blinds, ensuring they stay in good condition.
- Usage Tips:
- Regularly dusting with a duster or soft cloth can help maintain cleanliness and prolong the life of the blinds.
- Choose microfiber dusters or cloths as they effectively trap dust without leaving lint behind.
Vacuum Cleaner with Brush Attachment
- Efficiency:
- A quick and convenient method to clean blinds, allowing for effective dusting without excessive manual labor.
- The brush attachment gently agitates the dust and dirt, lifting it away from the blinds.
- Usage Tips:
- Use the vacuum on a low setting to avoid damaging delicate materials while still achieving thorough cleaning.
- Ideal for fine dust and allergens, making it a great choice for households with allergy sufferers.
Bucket of Warm Water
- Utility:
- Useful for washing and soaking blinds when they require deeper cleaning beyond surface dusting.
- Warm water helps to dissolve dirt and grime more effectively than cold water, making the cleaning process easier.
- Usage Tips:
- Fill the bucket with warm, not boiling, water to avoid warping or damaging the blinds’ materials.
- Consider using this method for fabric or wooden blinds that can tolerate gentle soaking.
Mild Detergent or Soap
- Effectiveness:
- Removes dirt, grime, and stubborn stains without harming the materials of the blinds.
- A mild formula ensures that the integrity and color of the blinds are preserved during the cleaning process.
- Usage Tips:
- Dilute the detergent in warm water before application to create a gentle cleaning solution.
- Always test the detergent on a small, inconspicuous area first to ensure compatibility with the blind’s material.
Sponge or Non-Abrasive Pad
- Suitability:
- Perfect for scrubbing delicate surfaces without causing scratches or damage.
- A non-abrasive pad ensures that you can apply some pressure without compromising the blind’s finish.
- Usage Tips:
- Use a sponge or pad dampened with the detergent solution to gently scrub away dirt.
- Rinse the sponge or pad frequently to avoid reapplying dirt back onto the blinds.
Old Towel or Drop Cloth
- Purpose:
- Protects surfaces beneath the blinds and catches any drips or debris during the cleaning process.
- Prevents water spots or cleaning solution marks on floors or other furniture.
- Usage Tips:
- Lay the towel or drop cloth on the floor before starting to clean to keep the area tidy.
- Use an old towel that you don’t mind getting wet or dirty, as it will soak up any excess liquid during the cleaning procedure.
Having these tools on hand ensures you’re ready to tackle any cleaning challenges.
Safety Tips Before Starting
Safety is crucial when cleaning blinds, especially if they are installed at height. Follow these tips:
- Secure the Area: Clear your workspace to avoid accidents.
- Wear Protective Gloves: Protect your hands from harsh cleaners or dirt.
- Use a Stable Step Stool: Safely reach high-mounted blinds without risks.
- Avoid Over-Soaking: Excess water can cause damage to some materials.
- Test Cleaners First: Check solutions on a small area to prevent discoloration.
- Handle Blinds Gently: Avoid bending or twisting delicate parts.
These safety measures help prevent damage and ensure a safe cleaning process.
Methods to Clean Mini Blinds
Cleaning your mini blinds regularly keeps them looking fresh and functional. Depending on their condition, you can choose between a light dusting, vacuuming, washing, or deep cleaning.
Dusting Mini Blinds with a Duster or Cloth
Dusting is a simple way to maintain mini blinds. Follow these steps:
- Close the Blinds: Tilt the slats fully in one direction.
- Use a Duster or Soft Cloth: Gently wipe across the slats from top to bottom.
- Reverse and Repeat: Tilt the slats in the opposite direction and clean again.
- Focus on Edges: Pay attention to corners where dust often collects.
Dusting regularly prevents stubborn grime buildup and keeps blinds looking clean.
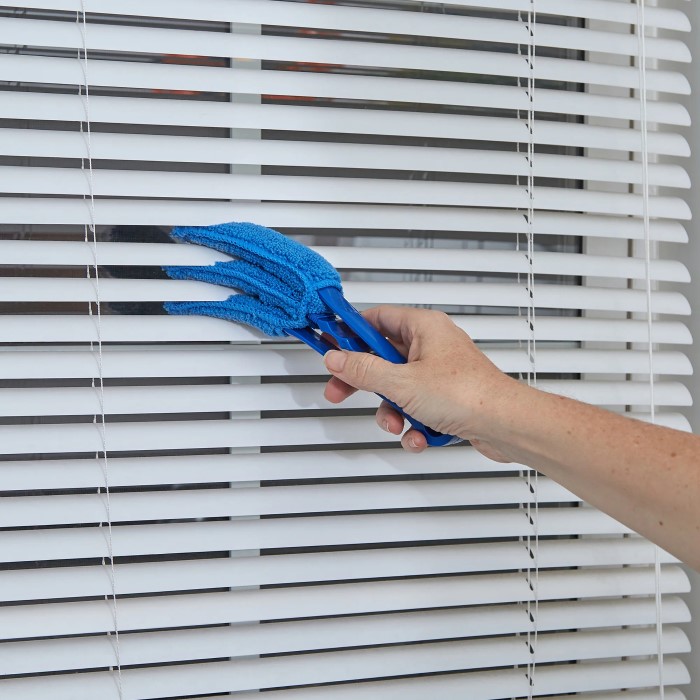
Vacuuming Mini Blinds for Quick Maintenance
Vacuuming is effective for removing light dust and dirt. Here’s how to do it:
- Attach the Brush Tool: Use a vacuum brush attachment to avoid damaging the slats.
- Set to Low Suction: High suction may bend or harm delicate materials.
- Vacuum Each Slat: Go across the slats horizontally, top to bottom.
- Optional Backup: Use a microfiber cloth to ensure no dust remains.
Vacuuming works best for blinds exposed to frequent dust.
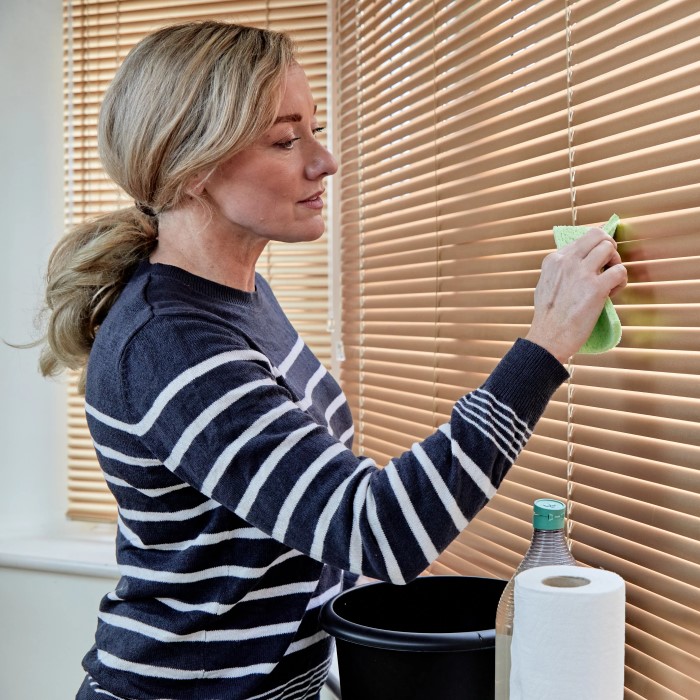
Washing Mini Blinds with Soap and Water
For blinds that need more cleaning, washing with water helps. Follow these steps:
- Remove Dust First: Lightly dust or vacuum the blinds.
- Prepare Cleaning Solution: Mix warm water with mild detergent.
- Use a Sponge: Dip the sponge and wipe each slat gently.
- Rinse with Clean Water: Use a damp cloth to remove soap residue.
- Dry Thoroughly: Pat each slat dry with a towel to prevent water spots.
Avoid over-soaking wooden blinds as it can cause damage.
Deep Cleaning for Stubborn Stains
Deep cleaning is necessary for blinds with heavy grime or stains. Follow these steps:
- Remove the Blinds: If possible, take them down for easier cleaning.
- Soak in a Tub: Fill a bathtub with warm water and mild soap.
- Scrub Gently: Use a soft brush to remove stains from each slat.
- Rinse Thoroughly: Drain the soapy water and rinse the blinds with clean water.
- Dry Completely: Hang them to air dry or wipe with a dry towel.
Deep cleaning restores the original look of heavily soiled blinds. Always check material care guidelines first.
Cleaning Mini Blinds Without Removing Them
Cleaning mini blinds without removing them saves time and effort. This approach works well for routine cleaning.
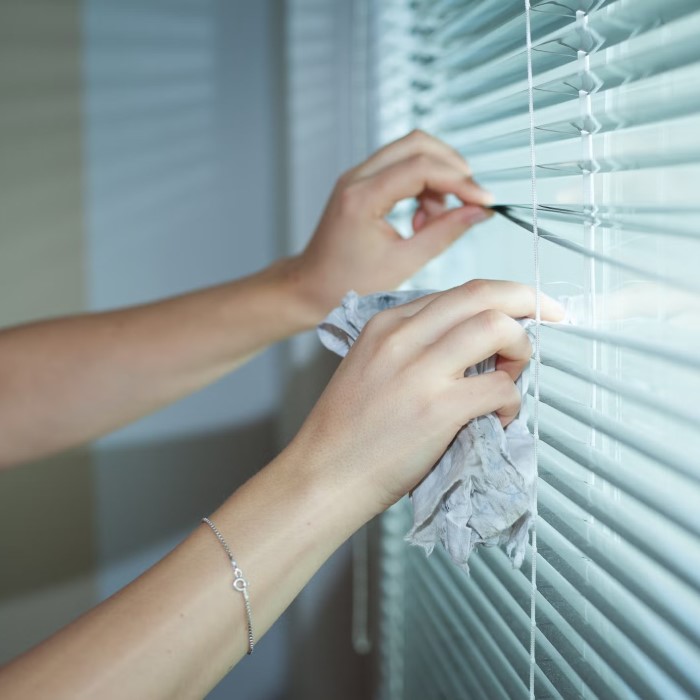
Techniques for Spot Cleaning
Spot cleaning is ideal for removing localized stains and dirt. Here’s how to do it:
- Identify Stains: Locate areas with visible dirt or smudges.
- Prepare a Cleaning Solution: Mix warm water with mild soap or vinegar.
- Use a Soft Cloth or Sponge: Dip it in the solution and wring out excess liquid.
- Wipe Gently: Rub the stained area in a circular motion.
- Dry Thoroughly: Use a dry cloth to remove moisture and prevent watermarks.
- Protect Delicate Materials: Avoid excessive rubbing to prevent damage to wood or fabric blinds.
Spot cleaning is quick and effective for handling minor messes.
Using Homemade Cleaning Solutions
Homemade solutions are a budget-friendly way to clean mini blinds. They are also eco-friendly. Follow these steps:
- Vinegar Solution: Mix equal parts white vinegar and water for removing grime.
- Lemon Juice Mix: Combine lemon juice and water. Ideal for grease and sticky dirt.
- Baking Soda Paste: Mix baking soda with water for tough stains on vinyl or aluminum blinds.
- Apply Solution: Dip a cloth or sponge and gently clean each slat.
- Rinse with Water: Use a damp cloth to wipe off residue.
- Dry Completely: Pat the blinds dry with a clean towel to avoid streaks.
Homemade solutions are versatile and safe for most blind materials.
Removing Mini Blinds for Deep Cleaning
Taking mini blinds down for deep cleaning can help remove stubborn grime effectively. Follow the steps carefully to avoid damage.
Step-by-Step Instructions for Safe Removal
Follow these steps to safely remove your mini blinds without harming them:
- Inspect the Mounting Brackets: Check how blinds are attached to the wall or window frame.
- Open the Brackets: Locate the release tabs on the brackets and open them gently.
- Lift the Blinds: Hold both ends of the blinds and lift them out of the brackets.
- Handle with Care: Move the blinds carefully to prevent bending or twisting slats.
- Clean the Frame: Wipe down the mounting area before reinstalling blinds to remove dust and dirt.
- Place the Blinds in a Safe Area: Lay them flat in a clean spot for deep cleaning preparation.
Removing blinds properly makes cleaning more effective and prevents accidental damage.
Tips for Reinstalling Blinds After Cleaning
Reinstalling blinds correctly ensures they work as intended. Follow these helpful tips:
- Dry the Blinds Fully: Ensure blinds are completely dry to prevent mold or water stains.
- Check for Damage: Inspect blinds for bends, missing parts, or wear before reinstalling.
- Align the Brackets: Position brackets properly to fit blinds back in place without hassle.
- Reinsert the Blinds: Gently slide blinds back into brackets and secure them by closing tabs.
- Test the Mechanism: Adjust slats and tilt controls to check proper function after installation.
- Tighten Screws if Loose: Ensure the brackets are firmly secured to avoid any movement.
Properly reinstalling blinds keeps them functional and safe while ensuring your deep cleaning effort is worthwhile.
Preventing Dirt Build-Up on Mini Blinds
Keeping mini blinds clean requires regular maintenance and protective measures. Preventing dirt and grime early saves time and effort in the long run.
Routine Maintenance Tips
Routine care ensures your mini blinds stay in great condition. Follow these practical tips:
- Dust Weekly: Wipe blinds with a duster or soft cloth to remove surface particles.
- Vacuum Regularly: Use a brush attachment to clean lightly and reach between slats.
- Spot Clean Immediately: Deal with small stains as soon as they appear to prevent stubborn buildup.
- Inspect for Damage: Check slats monthly for warping or wear to address problems quickly.
- Rotate the Slats: Tilt blinds in alternate directions to avoid long-term dirt accumulation.
- Keep Nearby Areas Clean: Reduce dust near your blinds by maintaining clean window sills and curtains.
A consistent cleaning routine helps extend the life of your mini blinds.
Protective Measures to Extend Their Longevity
Protective measures safeguard blinds from damage and reduce dirt accumulation. Here’s how you can ensure durability:
- Limit Exposure to Moisture: Avoid steam or water near wooden blinds to prevent warping.
- Use Window Treatments: Install sheer curtains to reduce direct sunlight and dust entry.
- Control Indoor Air Quality: Use air purifiers or humidifiers to minimize airborne particles.
- Handle Gently: Open and close blinds with care to avoid bending or breaking slats.
- Apply Protective Coating: For aluminum or vinyl blinds, consider anti-dust sprays periodically.
- Adjust Cleaning Frequency: Clean more often in high-dust zones or homes with pets.
Taking protective steps ensures your mini blinds stay functional and maintain their appearance longer.
Troubleshooting Common Cleaning Challenges
Cleaning mini blinds can sometimes present unique challenges. Addressing these issues ensures effective maintenance and prolongs their lifespan.
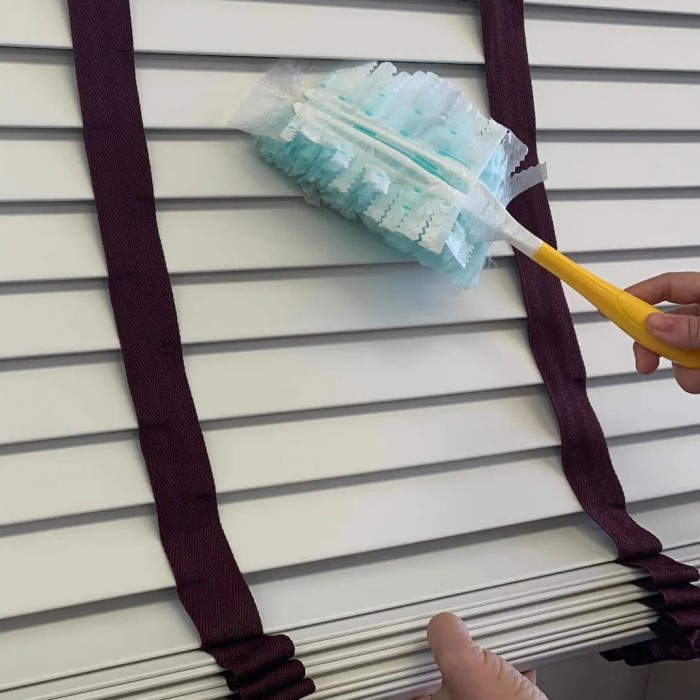
Dealing with Hard-to-Reach Areas
Hard-to-reach areas often trap dirt and dust. Follow these tips to clean them efficiently:
- Use an Extendable Duster: Reach high spots without straining or risking safety.
- Vacuum with a Slim Attachment: Narrow brush tools remove dirt from tight spaces effectively.
- Wrap a Cloth Around a Stick: Use it to access gaps and corners between slats.
- Tilt Blinds Regularly: Adjust the angle of slats to expose hidden dusty sections.
- Clean Both Sides: Wipe both front and back surfaces for thorough cleaning.
Addressing these areas helps avoid long-term grime buildup.
Addressing Warped or Damaged Blinds
Warped or damaged blinds require extra care to restore functionality. Here’s how to approach the issue:
- Inspect Individual Slats: Check which slats are bent, cracked, or unaligned.
- Gently Straighten Aluminum Slats: Bend them back into shape using light pressure.
- Repair Loose Strings: Tie or replace broken cords to fix tension problems.
- Avoid Excess Moisture: Prevent water damage, especially on wooden blinds.
- Replace Broken Parts: For extensive damage, consider replacing slats or brackets.
- Seek Professional Help: Call a repair expert for severe warping or unfixable issues.
Proactively addressing damage ensures blinds look and function their best.
Conclusion
In conclusion, learning how to clean mini blinds effectively is essential for maintaining a clean and healthy home environment. With various techniques tailored to different materials, it is possible to achieve sparkling results while preserving the quality of the blinds. Regular maintenance, such as dusting and using gentle cleaning methods, significantly extends the lifespan of mini blinds. By following the tips and methods outlined in this guide, you will find yourself equipped to keep your mini blinds looking fresh and new. Remember, consistent care is the key to delightful results!


