


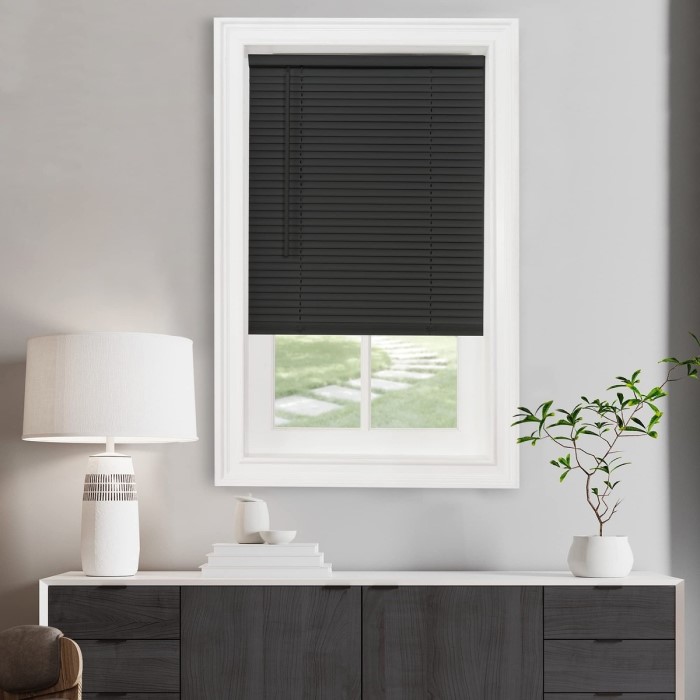
Benefits of 1 Inch Mini Blinds
Space-Saving Design for Compact Rooms
1 inch mini blinds are perfect for small spaces. Their slim build saves valuable room. Unlike bulky window coverings, they fit snugly inside window frames. This creates a clean and clutter-free look. Apartments, offices, and narrow spaces work best with these blinds. Their sleek design enhances modern or minimalist decor.
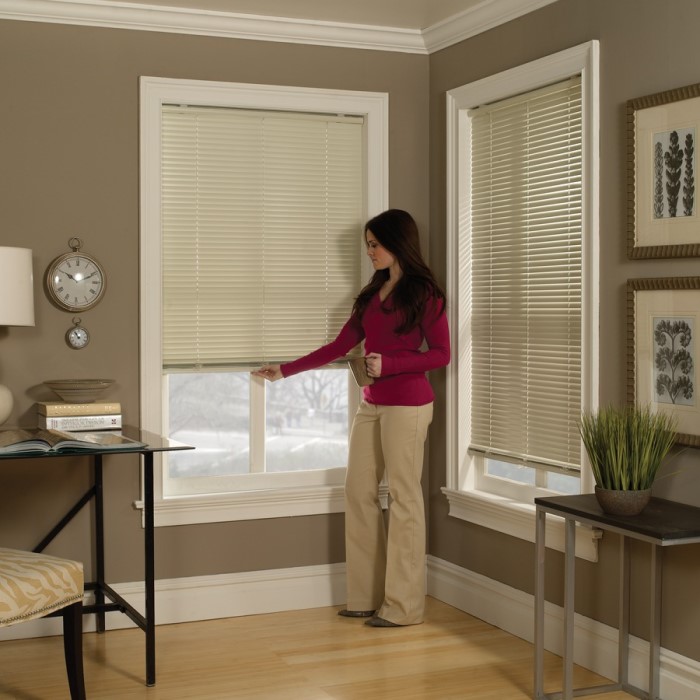
Enhanced Light Control and Privacy
1 inch mini blinds give excellent control over light and privacy. You can tilt the slats to adjust lighting. Close them fully for complete privacy. These blinds prevent unwanted sunlight glare. They’re ideal for bedrooms, living rooms, or home offices. With just a twist, you can enjoy the right balance of natural light.
Durable and Easy-to-Maintain Materials
Mini blinds are designed to last. Materials like aluminum, vinyl, or faux-wood resist wear and tear. Their durability handles frequent use with ease. Cleaning them is simple and quick. Dust them weekly or wipe with a damp cloth to maintain their look. Their sturdy materials make them a long-lasting, hassle-free option for any home.
Popular Materials for 1 Inch Mini Blinds
Aluminum Mini Blinds: Lightweight and Affordable
Aluminum mini blinds are a great option for affordability and durability. They are lightweight, making them easy to install and handle. These blinds resist moisture and rust, which makes them ideal for kitchens and bathrooms. Aluminum blinds are also budget-friendly, offering a sleek look at a reasonable cost. Additionally, their reflective surfaces help reduce heat, keeping rooms cooler.
Wood and Faux-Wood Mini Blinds: Elegant and Versatile
Wood and faux-wood mini blinds offer a classic and stylish appearance. Genuine wood blinds add warmth to any room and are great for traditional decor. Faux-wood blinds, made from PVC or composite materials, mimic the look of wood while being more resistant to moisture. This makes faux-wood ideal for areas like bathrooms or humid spaces. Both options are durable and work well with various interior styles, including rustic and modern designs.

Vinyl Mini Blinds: Cost-Effective and Practical
Vinyl mini blinds are one of the most practical options for window coverings. Their low cost makes them ideal for households on a budget. Vinyl blinds resist humidity, dents, and bends, offering excellent durability. Cleaning vinyl is simple—just wipe with a damp cloth. These blinds excel in high-traffic areas due to their resilient nature. Available in various colors, vinyl blinds fit seamlessly into many decor styles.
Choosing the Perfect Color and Style
Finding the right color and style for your 1 inch mini blinds enhances your home decor. A thoughtful selection can bring harmony to your space and emphasize its theme.
Matching Blinds to Room Decor
Match the color of your blinds to the room’s overall design. For modern styles, consider sleek finishes like metallic or crisp whites. In traditional rooms, wood or faux-wood blinds blend seamlessly with warm tones. For bold or eclectic spaces, experiment with patterned or brightly colored blinds.
Think about the furniture and wall colors. Coordinated shades create a cohesive look. Dark blinds paired with light walls create contrast, while neutral blinds complement almost anything. Consider your room’s function too—child-safe designs or moisture-resistant blinds may be best for practical purposes.
Trendy Neutral Shades and Bold Colors
Neutral shades remain highly popular for mini blinds. Colors like beige, gray, or white pair beautifully with minimalist spaces. They give a clean and timeless look while adapting to varying design changes.
Bold colors are perfect for making a statement. Bright reds, blues, or greens can turn your blinds into eye-catching features. For creative spaces, opt for vibrant hues that reflect your personal taste. Whether you prefer neutrals or daring shades, blinds can effortlessly transform your room’s atmosphere.
Installation Tips for Mini Blinds
Proper installation of 1 inch mini blinds ensures functionality and aesthetic appeal. Follow these tips to make the process straightforward and effective.
Measuring Windows for Precise Fit
Accurate measurements are key when installing mini blinds. Here’s how to measure your windows:
- Measure the Width: Use a steel tape to measure the window width at the top, middle, and bottom. Record the smallest measurement to ensure the blinds fit snugly.
- Measure the Height: Measure from the top to the bottom edge of the window frame. Do it for both sides and the center. Again, use the smallest dimension for your calculation.
- Account for Inside or Outside Mounts: Decide whether you want an inside or outside mount. Inside mounts sit within the frame, while outside mounts cover the full frame. For inside mounts, subtract ? inch from width and height to ensure proper clearance.

Step-by-Step Installation Guide
Once you’ve measured correctly, proceed with the installation:
Gather Tools
- Preparing for Installation: Before starting the installation of your mini blinds, it’s crucial to gather all necessary tools and equipment to ensure a smooth process. Preparing in advance can help you avoid distractions and interruptions later on.
- Essential Tools: The tools you’ll need include:
- Drill: A power drill or a manual hand drill will allow you to create holes in the wall or frame where the brackets will be mounted.
- Screws: Make sure to have screws that correspond to the mounting brackets provided with your mini blinds. Different materials may require different types of screws.
- Brackets: These are essential for holding the headrail of the mini blinds securely in place. Ensure that they are compatible with your blinds.
- Level: A level is a critical tool for ensuring that the blinds are installed evenly. This helps prevent any crooked or misaligned installations.
- Screwdriver: A screwdriver is necessary for tightening screws into the brackets. It’s important to have the right type, whether Phillips or flat-head, that fits your screws.
Attach Mounting Brackets
- Marking Positions: Start by determining where you’ll install the mounting brackets. Use a pencil to mark the desired positions either inside or outside the window frame. This step is essential for achieving the right placement of your blinds.
- Drill Starter Holes: Once you have marked the positions, use the drill to create starter holes. Be sure to drill carefully to avoid damaging the wall or frame. Pilot holes should be made if drilling into wood or drywall.
- Securing Brackets: After drilling the starter holes, position the brackets over the holes. Use the provided screws to attach the mounting brackets securely. Make sure they are firmly anchored to support the weight of the blinds.
Insert the Headrail
- Placing the Headrail: With the brackets securely attached, it’s time to insert the headrail of the mini blinds. Align the headrail so that it sits correctly in the mounting brackets.
- Checking Alignment: As you place the headrail into the brackets, check to ensure it aligns properly. This alignment is crucial for the blinds to operate effectively when opened or closed. Take your time to make adjustments as needed.
Secure the Blinds
- Fixing Blinds in Place: After aligning the headrail, you’ll need to secure the blinds using the hardware provided. This might include additional screws or clips designed to keep the blinds stable.
- Ensuring Stability: It’s important to ensure that the blinds are properly fixed in place to prevent them from falling or shifting during operation. This added layer of security will help maintain the longevity of the installation.

Test Functionality
- Checking Operation: With the blinds secured, it’s essential to test their functionality. Pull the cords or twist the wand, depending on the operating mechanism of your mini blinds.
- Light Control: Make sure that you can easily adjust the blinds to control the amount of light entering the room. This is one of the primary purposes of blinds, so testing this feature is crucial.
- Privacy Functionality: Additionally, ensure that the blinds provide the desired level of privacy. Checking this functionality will ensure that the installation meets your needs.
Double-Check Alignment
- Using a Level: After testing the functionality, it’s important to double-check the alignment of the blinds. Use a level to confirm that the blinds are even.
- Making Adjustments: If the level indicates that the blinds are not properly aligned, make necessary adjustments. This may involve loosening the brackets slightly and repositioning the headrail for correct leveling.
- Final Checks: Once everything is confirmed to be level and secure, take a step back to visually inspect the installation. Ensuring that the blinds are both functional and aesthetically pleasing is the final step towards a successful installation.
Following these steps will help you install 1 inch mini blinds effortlessly, transforming your windows while ensuring durability and style.
Cost Considerations
Choosing 1 inch mini blinds means balancing affordability and quality. Costs vary based on materials and features.
Budget-Friendly Options
If you’re on a budget, look for vinyl or aluminum mini blinds. Vinyl blinds are cost-effective and practical. They’re resistant to dents and moisture, lasting well over time. Aluminum blinds are lightweight and affordable. They offer durability and a sleek, modern vibe. Both options offer great value without compromising on functionality.
Basic colors and standard sizes also reduce costs. Avoid custom-made blinds or special finishes if affordability is key. Budget-friendly blinds often come pre-sized and ready to install, saving you time and money.
Investment in High-Quality Features
Investing more can bring long-term benefits. Faux-wood blinds offer durability and a premium appearance. They resist moisture and mimic real wood at a more affordable price. Genuine wood blinds provide elegance but cost more.
Consider additional features like cordless designs or motorized options. These enhance safety and convenience but may raise the price. Energy-efficient blinds with reflective coatings can save money over time by reducing energy bills.
High-quality blinds often use better materials and offer extended warranties. While the initial cost is higher, they provide better durability and performance. Investing in quality ensures longer-lasting beauty and reliability for your blinds.
Maintenance and Cleaning Tips
Proper upkeep of your 1 inch mini blinds ensures they look great and last long. Regular maintenance minimizes dust buildup and keeps them functioning smoothly.
Regular Dusting and Spot Cleaning
- Dust Weekly: Use a microfiber cloth or duster to remove surface dirt from your blinds.
- Wipe with a Damp Cloth: For stubborn grime, lightly dampen a cloth and wipe each slat gently.
- Avoid Harsh Chemicals: Stick to mild detergents, as harsh cleaners can damage the finish.
- Focus on High-Use Areas: Clean areas like kitchens or bathrooms more often, as dust and moisture accumulate quicker.
Deep Cleaning Techniques for Long-Term Use
For deeper cleaning, follow these steps:
- Remove the Blinds: Gently detach the blinds from their mounting brackets.
- Submerge in Soapy Water: Use a bathtub or container filled with warm water and mild soap.
- Scrub with a Sponge: Wipe each slat individually to remove stubborn dirt or stains.
- Rinse and Dry: Rinse thoroughly with clean water and let the blinds air dry completely.
- Reinstall Carefully: Once dry, reattach the blinds, ensuring proper alignment.
Deep cleaning keeps your blinds fresh and extends their lifespan. Commit to seasonal cleaning for best results.
Customization Options for Mini Blinds
Personalizing your 1 inch mini blinds can improve functionality and aesthetics. Custom options allow for safer, more convenient use while complementing your home decor.
Cordless Designs for Safety
Cordless mini blinds prioritize safety, especially for homes with kids or pets. Traditional cords can pose strangulation risks, which cordless designs eliminate completely. Instead of cords, these blinds use mechanisms like wand controls or spring systems for easy operation.
Cordless blinds also offer a cleaner look, making them ideal for minimalist decor. They reduce clutter while ensuring smooth and practical usability. These designs are perfect for bedrooms, playrooms, or family living spaces.
Easy to use, durable, and hazard-free, cordless blinds are a top choice for safe and modern window coverings.
Motorized Options for Convenience
Motorized mini blinds provide cutting-edge convenience. Controlled by remote, smartphone apps, or voice commands, they are highly user-friendly. You can adjust them effortlessly from anywhere, making them ideal for hard-to-reach windows or tech-savvy households.
Their smooth, precise operation ensures excellent light and privacy control. They integrate well with smart home systems for automated schedules, like closing blinds at bedtime. Motorized options are perfect for luxury homes, offices, or spaces requiring high functionality.
While motorized blinds cost more, they offer long-term benefits in efficiency and ease of use. Upgrade your 1 inch mini blinds for modern convenience and stylish performance.


